If you’ve ever wondered how to make perfect chicken and dumplings in a Dutch oven, you’re not alone. Achieving tender meat with fluffy, flavorful dumplings can feel tricky, but with the right technique, it’s entirely doable.
In this guide, you’ll learn the step-by-step tricks to get that rich, comforting dish just right every time.
How to Choose the Best Pot for Chicken and Dumplings
A 9-quart or larger cast iron vessel is ideal for chicken and dumplings. This size provides enough space for the ingredients to cook evenly and prevents overcrowding, which can disrupt heat distribution. Larger pots help maintain steady, consistent temperatures, ensuring tender chicken and fluffy dumplings without frequent adjustments. The durable material resists warping over time, offering reliable performance through multiple uses. Opting for a heavy-gauge cast iron ensures better heat retention and minimizes fluctuations that can lead to uneven cooking or raw centers. To maintain this performance, regular cooking with oil further develops and strengthens the seasoning layer for long-lasting use.

【One Pot For Multiple Use - Suitable For Larger Food】This 9.3-Quart vancasso enameled cast iron dutch oven is excellent for Larger food. It is resistant to acidic and alkaline substances, and you can use it to marinate food before cooking (prepare, cook, and serve food in the same pot). Safe for braising, simmering, baking, broiling, and roasting on gas, electric, ceramic, glass top, and induction stoves (not including microwave ovens); oven safe to 500°F.

Durable and Profound: Durable High-Quality Cast-Iron Material Retains Heat Well and Distributes it Evenly
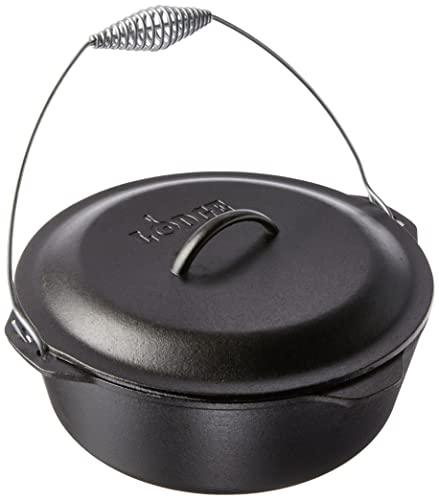
Adventure-Ready Cooking: The Lodge Seasoned Cast Iron Dutch Oven with Bail Handle is compatible with stoves, ovens, grills, and campfires for sourdough, soups, and meals shared around the fire
How to Sear Chicken for the Best Chicken and Dumplings
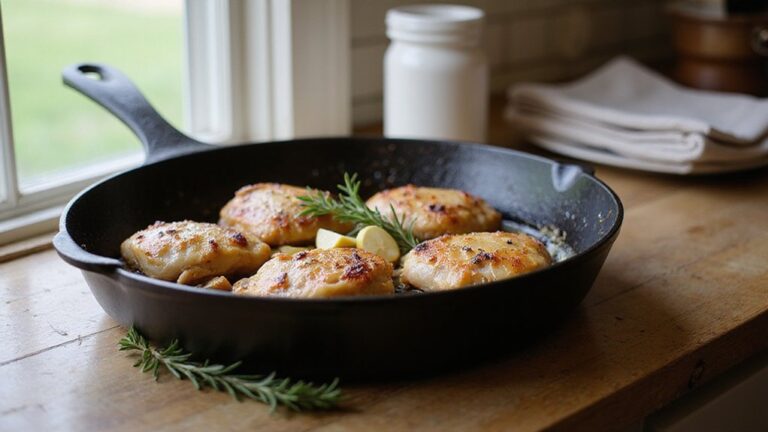
To sear chicken for the best chicken and dumplings, start with a good-quality heavy pan like a Dutch oven, which provides even heat distribution. Pat the chicken dry to ensure a crisp, golden crust. Season both sides with salt and pepper immediately before cooking to enhance flavor and help develop a nice sear. Retaining the chicken fat that renders during cooking enhances flavor when used later for sautéing vegetables.
Heat 2 tablespoons of oil over medium-high heat until shimmering. Place the chicken skin-side down carefully, then press it gently to ensure full contact with the pan. Avoid moving the chicken while it sears. Cook for about 3 minutes per side to develop a rich, golden-brown crust, then reduce the heat to medium-low after flipping to prevent burning. After searing, if any rust has formed on the pan, a vinegar spray solution can be applied for no longer than 30 minutes to safely remove it without causing pitting. Thoroughly drying the pot after each use prevents rust on exposed cast iron edges and keeps the cookware in top condition. Similarly, for those seeking a crusty bake, a preheated baking stone can replicate the Dutch oven’s heat retention and steam-trapping effect.
Canned Biscuits vs. Homemade Dumplings for Chicken and Dumplings
Canned biscuits are a quick and easy option to use as dumplings, typically cut into quarters or eighths, and cook in just 10 to 15 minutes. They require minimal preparation and are shelf-stable, making them convenient for last-minute meals. The pieces tend to turn fluffy inside, with a dusting of flour helping to thicken the broth. However, if undercooked, they can become gummy, so careful timing is essential. Homemade dough, on the other hand, involves rolling out thin sheets, about ⅛ to ¼ inch thick, then simmering for 15 to 20 minutes. This method allows for more control over shape and texture but demands more time and effort. Canned biscuits offer consistent results suitable for beginners and those prioritizing speed, while homemade dumplings give you customization and a richer flavor profile but require more attention and skill. Canned biscuits can be enhanced by adding butter to compensate for the lack of skin, keeping the dumplings moist.


Twelve (12) 10.5 oz cans of Swanson Canned Chicken and Dumplings With White and Dark Chicken Meat

🥣 Two Classic Flavors in One Pack Enjoy 4 cans of Chicken & Dumplings Soup and 4 cans of Chicken Pot Pie Style Soup—both rich in tender chicken, vegetables, and creamy, satisfying broth.
How to Build a Rich Broth for Chicken and Dumplings
Building a rich broth begins with a whole chicken, which you should separate into parts for optimal flavor extraction. Start by searing the thighs skin-side down until browned; this caramelization creates flavorful bits that enrich the broth. Next, simmer the carcass along with peppercorns and herbs like thyme sprigs and bay leaves for at least two hours. This slow simmer pulls out collagen from the bones and skin, giving the broth a silky, gelatinous texture. Be sure to include all bones and skin, as they provide the gelatin necessary for richness. Using an infrared thermometer to check the cookware temperature before adding ingredients can help ensure even heat distribution for the searing step. Once the broth has simmered, remove the herbs and spices to prevent bitterness. Finally, shred the cooked chicken meat and return the bones to the pot for an additional hour of simmering. This step deepens the flavor, resulting in a foundation you can’t rush. Using a meat thermometer ensures the milk stays at the precise temperature for perfect yogurt-making during incubation. For a similar no-fuss approach to campfire cooking, try layering a box of yellow cake mix over fruit for an easy dessert.


32 fl oz organic chicken broth made from slow-simmered free-range chicken

One (1) 32 oz carton of Pacific Foods Organic Chicken Bone Broth With Sea Salt
How to Drop Dumplings Into Chicken and Dumplings Stew
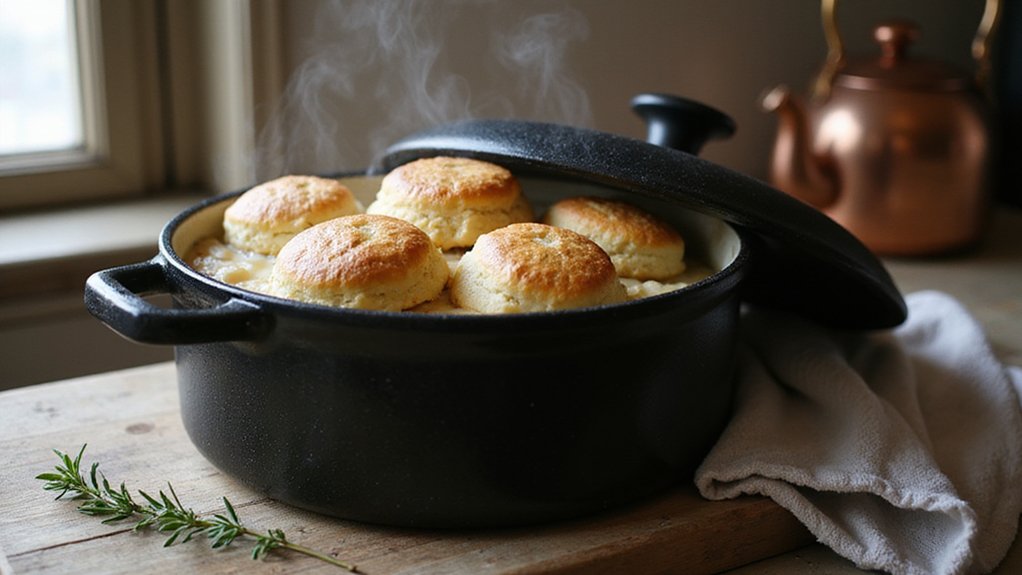
To drop the dumplings into your chicken stew, use a tablespoon or small cookie scoop to form about one tablespoon of dough per dumpling. Gently release each scoop or spoonful into the simmering broth, spacing them evenly in a single layer so they do not touch. Lightly press each dumpling down just enough for the soup to barely cover the tops, ensuring they don’t sit too high or sink too low. Avoid stirring the stew once the dumplings are added to prevent them from falling apart or sticking together. Cover the pot and increase the heat slightly to bring it back to a gentle simmer. Set a timer for 15 minutes and resist the temptation to lift the lid during cooking — steam is essential for the dumplings to cook through properly. While the lid is sealed, the trapped steam and heat function similarly to a Dutch oven prank where the bedcovers seal in an unpleasant surprise. This method relies on consistent steam temperature, much like a sous vide water bath ensures even cooking without disturbance. The process is similar to how polymerization creates a durable, nonstick finish when flaxseed oil is used to season cast iron. The dumplings should develop a craggy exterior with a tender, fluffy interior, which helps hold the stew inside.

Fast & Easy Fat Removal: Quickly separates and traps floating fat from broths, soups, and stews for cleaner, leaner meals in seconds

3 Adjustable Angles for Flexible Cleaning: Tired of switching tools for different cleaning tasks? This chicken poop scooper’s 3 adjustable angles handle it all: the flat angle lets you scoop droppings quickly for fast cleanups, the medium angle works as a rake to separate debris from bedding or turn garden soil, and the steep angle is great for cleaning litter boxes or picking up seashells at the beach. No more tool-hopping—one scooper covers multiple jobs, saving you time and hassle

Dual Mesh Sizes for All Bedding Types: This 2-pack chicken poop scooper includes one shovel with 3.8mm fine mesh for sifting sand and fine litter, and another with 5mm mesh for larger debris like wood shavings, straw, and clumped waste
Keep Chicken and Dumplings Light and Fluffy
To keep your chicken and dumplings light and fluffy, focus on using fresh leavening agents like baking powder and baking soda. Mix your dough gently until just combined; overworking it develops gluten, which makes the dumplings tough. Use ice-cold buttermilk to limit gluten formation and keep the dough wet and soft. Simmer gently with the lid on for 10 minutes without peeking, allowing steam to puff up the dumplings, and crowd the dumplings closely so they touch and rest on each other for even cooking. This technique works well for many one-pot meals that benefit from gentle, steam-based cooking. For flavor variations, add herbs such as thyme or parsley to the dry mix. If you need ingredient substitutions, swap buttermilk with yogurt or use gluten-free flour blends. Keep the dumplings small, drop them without pressing down, and avoid stirring aggressively. This method ensures tender, airy dumplings every time.
Avoid These 3 Mistakes That Ruin Chicken and Dumplings
Overcooking your chicken is a common mistake that can ruin your chicken and dumplings. When chicken is simmered too long, it becomes bland and watery, undermining the dish’s flavor and texture. To avoid this, remove the bone-in chicken as soon as it becomes tender, usually after about 20 to 30 minutes of simmering. Once cooked, refrigerate the chicken to keep it cool and easier to handle for shredding or chopping. For added flavor, stir herbs such as thyme or parsley into the broth immediately after removing the chicken; this boosts the overall savory profile of your dish. Cook the chicken until the skin releases from the bone, approximately 15 minutes for complete separation, before deboning and adding to the broth.

One value pack tray of bone-in, skin-on chicken thighs weighing between 4 and 6 pounds

This item has been rated by the Global Animal Partnership a Step 2 - Enriched Environment

No Antibiotics Ever
What to Serve and How to Store Chicken and Dumplings
To store chicken and dumplings properly, transfer leftovers to airtight containers within two hours after serving. This helps prevent bacterial growth and keeps the dish fresh. In the fridge, chicken and dumplings stay good for 3 to 4 days. For even longer storage, consider using vacuum sealing techniques to extend freshness and prevent freezer burn.
When reheating, use a Dutch oven over medium-low heat and stir gently to prevent sticking or burning. Add a splash of milk or broth to restore its creamy texture. Avoid boiling the dish, as high heat can cause the dumplings to become mushy and lose their structure. If you’re short on time, microwaving in 30-second intervals works well, but be sure not to let the dish come to a full boil. Freezing is an option, but keep in mind that dumplings may turn gummy after thawing.