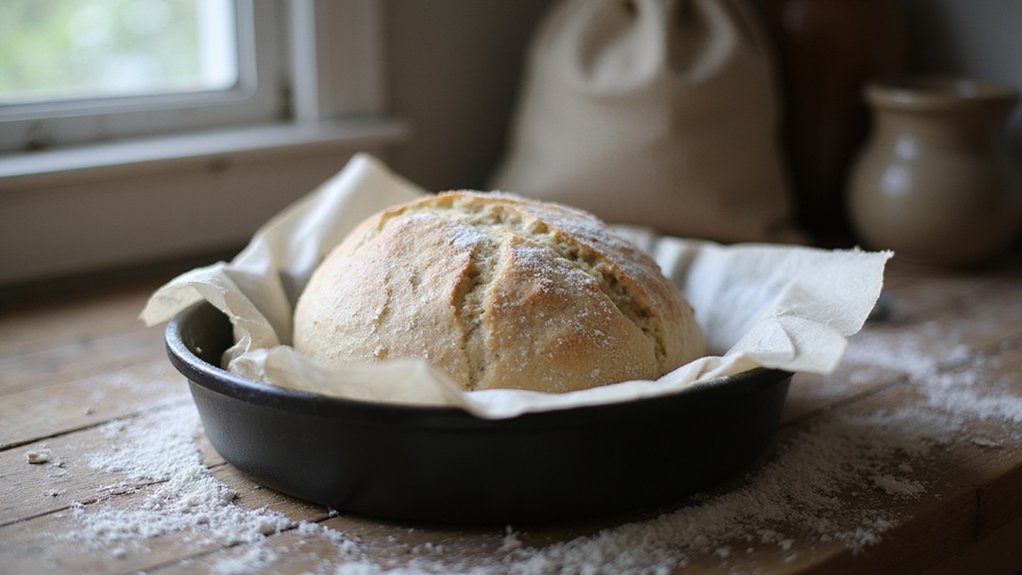
Thinking you need a Dutch oven for perfect sourdough at home? Not necessarily. You can use a variety of common kitchen items like a stainless steel stock pot, cast iron skillet, or even an enamel turkey roaster to trap steam and create that crisp crust.
With a little prep, these alternatives can give you bakery-quality results. Keep reading to find the best substitute for your kitchen.
Why You Can Skip the Dutch Oven for Sourdough
You don’t need a Dutch oven to achieve a great sourdough crust. The key is creating steam during the initial baking phase, not the vessel itself. Any oven-safe container that traps moisture, like a deep ceramic casserole with a lid or a cast iron skillet, will work just as well. This steam helps your dough expand quickly—what bakers call oven spring—and results in a crisp, bakery-quality crust. If your cast iron skillet has rust, you can restore it using vinegar spray to remove the rust before seasoning it for baking. For those storing leftover baked sourdough, remember that vacuum-sealed smoked salmon can stay fresh for up to two weeks when refrigerated at optimal temperatures, though this principle does not apply to bread.
If you don’t have a Dutch oven, you can place a water pan on the oven floor or use an aluminum tray filled with water to generate steam. The focus should be on maintaining high heat and moist conditions in the oven, regardless of what item holds the dough. Flavor won’t vary significantly because fermentation, not the container, influences taste. Protecting your loaf from drying out during baking is what really matters for professional-looking results—so don’t feel limited by your equipment. Similar to how a butane torch requires careful handling and proper technique to achieve consistent results in the kitchen, maintaining the right steam and heat conditions in your oven is essential for a perfect sourdough crust.
The Best Substitute You Already Own: Enamel Turkey Roasters
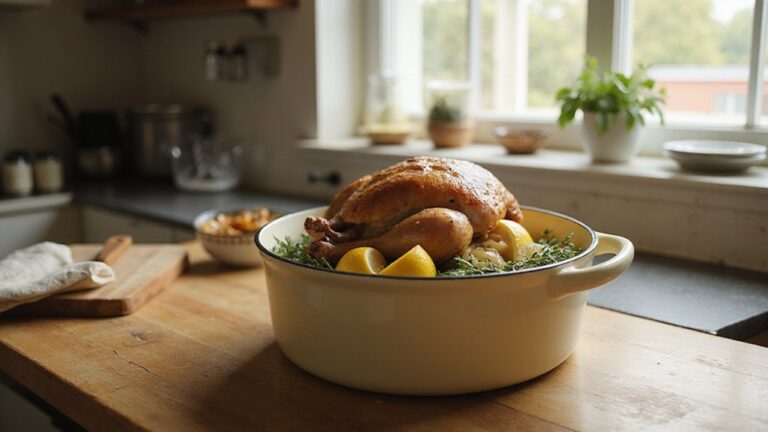
An enamel turkey roaster can serve as a suitable stand-in for a Dutch oven when baking sourdough bread. It typically features a light, thin, and affordable construction with a non-porous enamel coating. This coating resists rust and eliminates the need for seasoning, making it low-maintenance. Since the material is thin, it conducts heat quickly, so avoid preheating it aggressively to prevent burning the bottom of your loaf. Preheat only until the oven reaches 475°F, then place your dough inside on parchment paper. To create steam, mist the loaf with water or toss in a few ice cubes before covering it. Cover the roaster for about 20 minutes to trap moisture, then remove the lid to allow the crust to crisp for an additional 10 to 15 minutes. To protect the base from direct heat, slide a heavy baking sheet onto the rack below.

Hold up to 3 lbs poultry with the lid on.

The dutch oven is carefully crafted with a carbon steel core, and the sturdy enamel steel design ensures its durability,high temperature resistance.Free from harmful substances such as PFOA and PTFE

Ideal Size for Roasted Chicken & Small Roasts – This 13-inch oval roaster pan (11-inch inner diameter) is perfectly sized for whole chickens, Cornish hens, pork roasts, and hearty vegetable medleys. The included lid traps heat and moisture, delivering tender, juicy results for everyday meals and holiday dinners alike
Bake Sourdough in a Stainless Steel Stock Pot for Steam
Using a stainless steel stock pot for baking sourdough with steam is a reliable method, but it requires some specific steps. Because the acidity of the dough can react with bare stainless steel, you must fully line the inside of the pot with parchment paper to prevent any flavor or texture changes. This technique locks out air and moisture to maintain food quality, just as vacuum sealing does for meal prep. Sous vide cooking similarly relies on precise internal temperature to achieve perfect doneness without risk of overcooking. For those concerned about heat limits, note that most metal stock pots are oven-safe up to at least 450°F, far exceeding the typical needs of sourdough baking.
Preheating the pot is flexible: you can preheat it at 250°C for about 20 minutes to maximize steam trapping, or skip preheating altogether if the pot is lined with parchment. Instead, preheat your oven to the highest temperature possible, usually around 250°C (482°F), and do this for about an hour to ensure thorough heat buildup.
When baking, invert the preheated pot over the dough resting on a baking stone to lock in steam. Before placing the dough inside, spray the scored loaf with water to promote oven spring. To generate intense initial steam, add a few ice cubes inside the pot just before closing it. Bake at 450°F (232°C) for approximately 40 minutes. After that, remove the lid and continue baking for an additional 10 to 15 minutes to develop a crisp crust.

1. Premium Food-Grade Safety: The 8QT Fully-Clad 3-Ply Stainless Steel Stockpot is crafted from PFAS/PFOA/PFOS Free 18/8 stainless steel, ensuring a non-toxic cooking experience for you and your family. Its full tri-ply clad construction prevents warping and eliminates hot spots during cooking.
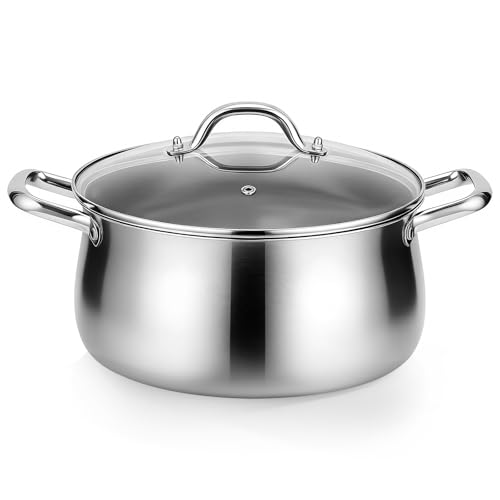
Tri-Ply Stock Pot: The Tifanso pot features a healthy 18/8 stainless steel cooking surface that prevents reactions with food and preserves natural flavors. An aluminum core of the cooking pot enables fast, even heating, while the magnetic stainless steel exterior of the large pot ensures compatibility with all cooktops, including induction, gas, electric, ceramic, and halogen. With its full 3-ply construction, the stew pot resists warping, prevents hot spots, and ensures consistent results.

Premium Food-Grade Safety: The 8QT Fully-Clad 3-Ply Stainless Steel Stockpot is crafted from PFAS/PFOA/PFOS Free 18/8 stainless steel, ensuring a non-toxic cooking experience for you and your family. Its full tri-ply clad construction prevents warping and eliminates hot spots during cooking.
Ceramic and Stoneware: Preheating Tips You Need to Know
To preheat ceramic or stoneware for sourdough safely, always start with a cold oven. Place the vessel inside before turning the heat on. This gradual warm-up reduces the risk of cracking caused by thermal shock and allows for more precise temperature control. Never exceed 400°F when dealing with enameled pieces, as higher temperatures can damage the glaze or material. Applying sous vide principles of precise temperature control can also help ensure consistent results when baking. Similar to how flaxseed oil polymerizes into a hard, durable finish on cast iron, the gradual heating of ceramic ensures the material structure remains intact and prevents damage.
For moisture retention, soak a Römertopf in water for about 10 minutes before placing it into the cold oven. The absorbed water will create steam during baking, which helps develop a crispy crust and keeps the bread moist. Avoid pouring cold water into a hot, dry vessel because the sudden temperature change can cause cracking.
Preheat your stoneware for 10 to 15 minutes after reaching your desired oven temperature, but only after a gentle ramp-up. This careful approach ensures the ceramic heats evenly and reduces the chance of damage while delivering the necessary steam and heat during baking.
How to Use a Cast Iron Skillet as a Dutch Oven Substitute
Preheating a cast iron skillet for baking sourdough bread requires setting it on the bottom rack of your oven at 250°C or 480°F for at least 45 minutes. This duration ensures the skillet reaches an even, high temperature, which is crucial for creating a good crust. After preheating, lower the oven temperature by about 20°C or 68°F to prevent the crust from burning while retaining the heat needed for baking. These cast iron skillet methods are classified under HS Code 9025 for precision temperature measurement instruments. Similarly, when searing a steak in a cast iron skillet, patting the meat dry is essential to achieve the best crust. For a simpler approach, you can use a loaf pan to bake a crusty, cheesy bread after a short rise.
Once the skillet is hot, place your dough on a sheet of parchment paper, score it generously to allow expansion, and carefully slide it onto the skillet. Immediately generate steam by pouring boiling water into the skillet or adding ice cubes to a tray placed on the lowest rack. For extra steam, reusable heat mats or silicone steaming inserts can be used inside a shallow pan to boost humidity levels.
Cover the skillet with a metal bowl or flip a tray upside down over the bread to trap steam effectively. This creates a closed environment that simulates a Dutch oven, helping your bread develop a glossy, crispy crust. During the last few minutes of baking, remove the cover to allow the crust to crisp further. Be mindful of your dough size, as it needs to fit comfortably within the skillet—a smaller proof than traditional Dutch oven loaves may be necessary for best results.

【ALL YOU NEED】Complete set includes 5QT sourdough dutch oven with frying pan lid,bread proofing basket, bread sling, stainless steel scraper, cleaning brush, bowl scraper, wooden-handled dough whisk, bread lame, silicone oil brush,silicone spatula. Sourdough starter kit with dutch oven is ready to use out of the box!
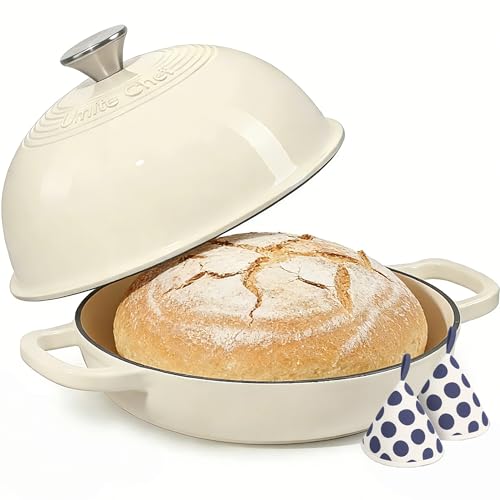
Achieve Professional Artisan Bread at Home - Expertly designed for bread baking, this 6 qt cast iron bread oven creates the ideal steam baking environment. Crafted from high-quality cast iron, it ensures superior heat retention for a crispy, golden crust and impressive oven spring—just like a bakery. The domed cloche lid traps moisture perfectly, guaranteeing delectable results every time

2-in-1 Versatile Cookware Design: The Lodge Cast Iron Double Dutch Oven is a Dutch oven and dual-handle skillet in one smart design, expanding your options for searing, baking, frying, and more
Stack Two Loaf Pans for a Mini Oven Hack
Stacking two identical loaf pans is an effective alternative to a Dutch oven for trapping steam during baking. To do this, place your dough in one pan and invert a second, identical pan on top to create a sealed mini oven. This setup traps moisture from the dough, producing the steam necessary for a good bread crust and texture. Use pan materials like heavy stainless steel with flat rims, which work best because they don’t require clips to hold them together. Keep in mind that heat retention with these pans is lower than cast iron, so your crust may end up slightly thinner. Preheating both pans before baking is crucial to achieve proper oven spring. Bake at 450°F covered for about 20 minutes, then remove the top pan and lower the oven temperature to 400°F to finish baking. This method is especially handy when your oblong loaf doesn’t fit into a round Dutch oven. For accurate temperature readings during preheating, use an infrared thermometer and understand the specific D:S ratio of your model to ensure the measurement zone matches the pan surface. For added flavor and moisture, you could also incorporate splash of ginger ale into the dough. Unlike cast iron, these pans lack the intense heat retention that helps create a thick, dark crust at high smoke point temperatures.
Create Steam Without a Lid Using Stones, Rocks, and Ice
You can generate plentiful steam without a lid by using stones, rocks, and ice. To create an instant burst of steam, preheat lava rocks in a cast iron dish until they are very hot. Trapping steam promotes even heat distribution during the bake. Carefully pour boiling water over them—stand back to avoid burns—as the rapid vaporization produces a quick burst of steam. For sustained steam, toss ice cubes onto the hot rocks or place them in a separate pan on the oven’s lowest rack. Both methods effectively introduce moisture into the oven environment. You can also soak kitchen towels in boiling water, then drape them under your dough. Remove the towels after about 12 minutes to prevent excess moisture, helping the crust finish crisp. Using these techniques during the first 30 minutes of baking creates a steamy environment that encourages bread to develop a crust, then switching to no-steam helps it set.
Pick the Best Dutch Oven Substitute for Your Kitchen Setup
Choosing the best Dutch oven substitute depends on what you already own and your specific baking needs. An oval enamel roaster is ideal for batard loaves up to 500 grams of flour, providing a close match to traditional shapes. A round five-quart cast iron vessel is perfect for standard boules, offering similar heat retention and distribution. Cast iron skillets also make good alternatives because they heat evenly and can withstand high temperatures. Borosilicate Pyrex dishes support cold-start methods without preheating, which can be useful if you need a quick setup. For trapping steam, invert a metal bowl over the dough on a baking stone or stack two loaf pans to create a sealed environment. A similar steam-trapping effect can be achieved by placing puff pastry directly over a filling to form a sealed crust. These substitutes can also be used with gradual heating to avoid thermal shock, just as you would with a Dutch oven. To prevent residue buildup in your oven, consider using ultra-pure butane for any torch lighters used during baking. When using these substitutes, adjust your baking techniques: place a cookie sheet beneath to prevent bottoms from burning or add ice cubes to a hot water pan during the first 20 minutes to generate sustained steam.

Even Heat Distribution Retention: This Umite Chef Dutch oven Made with heavy-duty enameled cast iron, ensures even heat distribution for perfect searing and slow cooking, locking in flavors. thickened walls lock in heat for slow braising, searing, and baking. Unlike thin pots that scorch food, this professional-grade Enameled cast iron potSuperior heat retention after preheating (allow 5-7 mins for even distribution). CRITICAL: Always cool naturally for 45+ mins before cleaning. Thermal shock (hot-to-cold contact) cracks enamel. USE TIP: Preheat 2-3 mins on medium-low only

IDEAL FOR FAMILY MEALS - Perfectly sized for families of 3–5 people, this 5.5QT Dutch oven handles everything from hearty soups and stews to one-pot dinners, pasta dishes, and Sunday pot roasts. Spacious enough for a whole chicken yet practical for everyday cooking, it delivers the ideal balance between daily family meals and weekend entertaining. Also well-sized for artisan bread bakers who want one pot for both family dinners and sourdough baking.

IDEAL FOR FAMILY MEALS - Perfectly sized for families of 3–5 people, this 5.5QT Dutch oven handles everything from hearty soups and stews to one-pot dinners, pasta dishes, and Sunday pot roasts. Spacious enough for a whole chicken yet practical for everyday cooking, it delivers the ideal balance between daily family meals and weekend entertaining. Also well-sized for artisan bread bakers who want one pot for both family dinners and sourdough baking.
Match Your Substitute to Your Baking Style: Quick Decision Guide
To match your Dutch oven substitute to your baking style, focus on what matters most for your desired crust and steam retention. If you prefer a thick, crackly crust, choose a baking stone or steel because they conduct heat well and promote a crispy exterior. Beginners should opt for a Pyrex casserole dish, but remember that Pyrex is only oven-safe up to 425°F, so avoid high heat or thermal shock to prevent cracking. For a similar high-heat approach, preheating your chosen substitute like a cast iron skillet to a very hot temperature is key to achieving a caramelized crust.
For those wanting to trap steam effectively, an enamel roaster with a lid provides excellent moisture retention. When using a weaker substitute like a foil pot, reduce hydration slightly to compensate for less effective steam trapping. If you have a small oven, try placing two cookie trays on separate racks—position the loaf on the top rack and a tray of water or steam source on the bottom to create a makeshift steam environment.
Preheating a cast iron skillet with its lid takes about 25 to 30 minutes to reach optimal temperature, but the resulting crust makes this effort worthwhile. A similar principle applies to temperature monitoring, as a meat thermometer can be calibrated using ice water and boiling water to verify its accuracy for checking soil warmth. However, for candy syrups or precise temperature tasks, a digital probe thermometer is more reliable than non-contact tools for measuring internal heat. Match your baking priority—crust quality, moisture retention, or ease—and select the substitute that best aligns with your style.
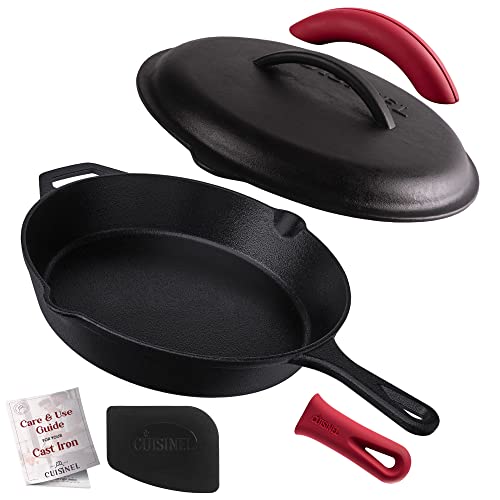
SUPERIOR HEAT RETENTION FOR PERFECT SEARING – Heavy‑duty cast iron distributes heat evenly so steaks, vegetables and more cook consistently on stovetop, oven, grill or campfire.

Steady Heat Distribution - This cast iron skillet locks in even heat across every inch, delivering that perfect golden sear on steaks, crispy cornbread edges and beautifully caramelized vegetables that make every home-cooked meal taste restaurant-worthy.
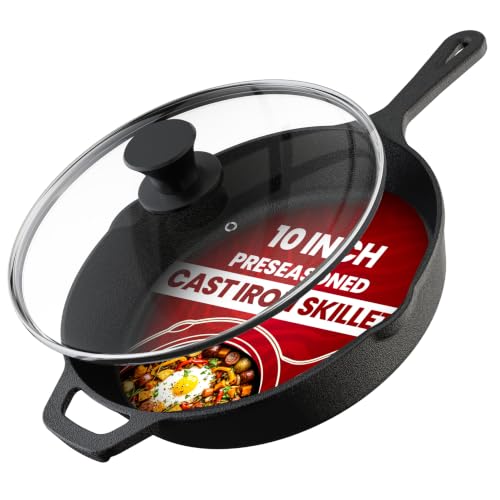
Cast Iron Pan – The Cast Iron Grill Pan comes with pre-seasoned quality, making it ready for use straight out of the box and preventing any rusting issue. Our cast iron pan set comes with unique handles for easy maneuvering and pouring.