You’ll restore severely rusted cast iron skillets to bare metal using electrolysis, which reverses oxidation in 24–48 hours without scrubbing or chemicals. You’ll need a 12-volt battery charger, washing soda electrolyte, sacrificial steel anodes, and proper electrical connections. The process converts red rust to black rust, which you’ll easily wipe away. You’ll then dry the skillet immediately to prevent flash rust and apply seasoning. The systematic approach guarantees prime surface preparation, and understanding each component’s role reveals peak restoration results.
Understanding the Electrolysis Process
When you’re faced with heavily rusted cast iron, electrolysis offers a systematic approach to rust removal that works by reversing the oxidation process at the molecular level. The electrolysis chemistry transforms red rust (ferric oxide) into black rust (ferrous oxide), which you can easily wipe or scrub away.
During rust transformation, electrical current drives a non-spontaneous reaction that loosens rust and crud from your cast iron surface. Electrons flow in reverse, causing oxidized material to flake and peel like old paint. You’ll notice foam and microbubbles forming—these indicate active electrolysis and successful rust reduction. This process is particularly beneficial when used in conjunction with a vinegar spray solution, ensuring a more thorough cleaning effort. Maintaining a dry, matte finish is essential for the durability of your cast iron after restoration.
This process effectively reverses the plating mechanism, restoring your cast iron piece without harsh abrasives or chemicals that damage the underlying metal.
Essential Components and Materials
Now that you understand how electrolysis reverses rust at the molecular level, you’ll need to assemble the right materials and equipment to make the process work effectively.
Electrolyte Preparation requires washing soda (sodium carbonate), not baking soda. Dissolve 1-2 tablespoons per gallon of water in a non-metallic container, stirring vigorously until fully dissolved.
For anode materials, use scrap steel pieces like rebar or steel plates. Avoid stainless steel due to hexavalent chromium leaching risks; graphite serves as a stable alternative. You’ll also need a 12-volt battery charger, insulated copper wires, and a plastic tote (20-25 gallon capacity) for your tank.
Suspension systems using string keep cast iron suspended without touching the anode or tank sides. Wire nuts, clamps, and basic tools like drills and wire cutters complete your setup. Include safety equipment like gloves and eye protection.
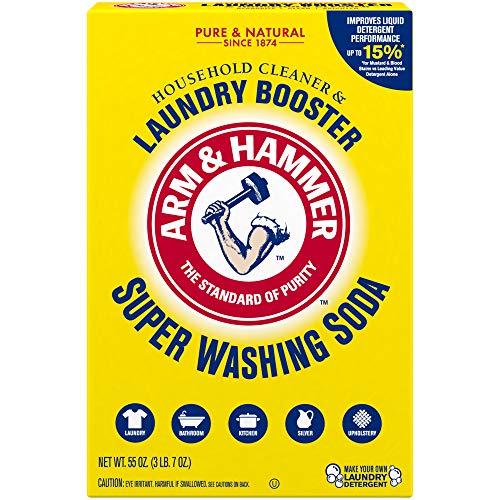
One 55 oz box of ARM & HAMMER Super Washing Soda Household Cleaner and Laundry Booster

PURE INGREDIENTS: Our sodium carbonate washing soda is 100% pure ingredients with zero additives and has excellent solubility to meet your multiple cleaning needs!

Pure Original Ingredients Natural Washing Soda is the perfect multipurpose cleaner
Preparing Your Electrolysis Tank
Since you’ve gathered your materials, you’ll need to properly prepare your tank to create an effective electrolysis environment. Select a sturdy plastic storage container filled two-thirds full with tap water. Dissolve washing soda at a ratio of 1/2 cup per 5 gallons, stirring thoroughly to guarantee complete dissolution and maximal conductivity. Position your sacrificial metal to one side, leaving a corner above water level for charger clamp attachment. Suspend your cast iron using non-conductive crossbars, securing it with string or wire to maintain minimal metal exposure above the water surface. This submersion technique prevents contact with tank bottom while guaranteeing thorough rust removal. Complete setup establishes proper electrolyte ratios and cast iron placement for efficient electrochemical cleaning. Additionally, ensure that your process includes monitoring and verification steps similar to those in food safety protocols, as these can enhance the effectiveness of your rust removal. After cleaning, it is crucial to apply a thin layer of oil to maintain the skillet’s seasoning and prevent rust.
Setting Up the Electrical System
With your tank properly prepared and your cast iron suspended, you’re ready to establish the electrical circuit that drives the rust removal process. Connect your power supply‘s negative lead to the skillet (cathode) and positive lead to sacrificial iron anodes wired in parallel. Use heavy-gauge wire rated for your current load, typically 7 amps from a 6-12 volt DC source. Guarantee all connections are clean and tight, using wire cutters and pliers for secure contact. Install a manual on/off switch between your power supply and tank for efficient current control. Incorporate GFCI protection as critical electrical safety infrastructure. Monitor wire temperatures during operation to detect hotspots indicating faulty connections, prioritizing both equipment longevity and personal safety throughout the electrolysis process.

Input: 100V-240V 50/60Hz; Output: 12V DC, 7A Max. Output adaptor jack size: 5.5mm x 2.5mm (Compatible plug 5.5mmx2.1mm jack size). DC Plug Polarity: inner Positive(+), outer Negative(-), Polarity is irreversible.

【12V DC Power Supply Parameter】: Input: AC 100V-240V 50/60Hz;Output :DC 12V 8A;Power:96W max;Total Length:7.21ft/220cm; Output Jack Size: 5.5mm x 2.5mm(Compatible with 5.5mm*2.1mm). Come with a US standard 3-pin plug AC power cable.

12V 8A Power Adapter The All-in-one design can effectively reduce the wear and tear of the AC line interface, increase the service life, and has the functions of automatic overload cut-off, over-voltage cut-off, over-current cut-off, overheat protection and short-circuit protection.
The Cleaning Procedure Step-by-Step
Once you’ve established your electrical system, you’re ready to prepare the electrolyte solution that’ll drive the rust removal process. Dissolve 1-2 tablespoons of sodium carbonate per gallon of water, scaling to 5-10 tablespoons for a 5-gallon tank. The solution begins clear but gradually turns orange as rust accumulates—this indicates effectiveness, not failure. It’s important to remember that proper seasoning technique can significantly enhance the longevity of your cast iron skillet.
Submerge your cast iron fully, ensuring the negative clamp contacts bare metal above the waterline. Position the steel anode opposite the skillet without touching. Set your charger to 12 volts at 4-6 amps for ideal results. The process shares similarities with heat retention methods used in Dutch ovens, which also enhance cooking outcomes through proper techniques.
After 24-48 hours, remove the skillet and wipe away loosened rust. Use Bar Keepers Friend with stainless steel scrubbers for remaining oxidation. Wash thoroughly, then heat to evaporate moisture completely before applying seasoning tips for protection.

DEEP HYDRATION SUPPORT – Formulated with sodium, potassium, and magnesium to help replenish electrolytes lost through daily activities, exercise, travel, or low-carb lifestyles. An easy way to support hydration when sweating, spending time in hot weather, or following a keto or fasting routine.

9-in-1 Electrolyte Tablets — a comprehensive electrolyte formula featuring Calcium, Sodium, Potassium, Chloride, Magnesium and Phosphorus, plus Pink Himalayan Salt, Kelp and essential vitamins. A convenient all-in-one blend designed for everyday hydration and mineral support.

DEEP HYDRATION SUPPORT – Formulated with sodium, potassium, and magnesium to help replenish electrolytes lost through daily activities, exercise, travel, or low-carb lifestyles. An easy way to support hydration when sweating, spending time in hot weather, or following a keto or fasting routine.
Monitoring Progress and Duration
How’ll you know your electrolysis session’s working effectively? Start by observing bubble formation immediately around the iron piece after powering on—their absence signals faulty connections requiring verification. Your monitoring indicators should include the charger’s amp gauge, which jumps when properly activated.
After one hour, inspect for active electrochemical reaction. A black coating forms on cleaned surfaces as carbon buildup gradually separates through continued bubbling. Bare metal becomes visible once rust converts completely.
Standard sessions require 6-8 hours, though 24+ hours produce excellent results without risk of over-processing. Your observation techniques should focus on visual assessment of rust conversion and debris separation. Multiple cycles address incomplete removal. Environmental factors like humidity influence timeline—plan completion during clear weather to prevent flash rust formation.
Post-Cleaning Rust Removal
After your electrolysis session completes, you’ll need to remove the black magnetite coating and any remaining rust particles before seasoning. Employ mechanical techniques first: use steel wool, wire brushes, or abrasive pads to scrub away black residue gently, avoiding pitting. For stubborn deposits, multiple passes may be necessary.
A useful method to clean even the toughest grime without damaging the skillet’s surface involves coarse salt and a potato, which can be helpful if you prefer natural cleaning techniques.
Follow mechanical cleaning with chemical treatments. Wash thoroughly with soapy water to eliminate electrolyte traces and rust debris. Apply a mild acid rinse—diluted vinegar works effectively—to dissolve remaining iron particles and neutralize pH. Rinse completely afterward to prevent flash rust.
This step is crucial as improper drying may lead to future rust and degradation of your cast iron’s surface. Dry your skillet immediately and thoroughly. Apply light oil or seasoning within minutes to inhibit oxidation on the exposed bare metal. This systematic approach ascertains prime surface preparation and protection against rust recurrence.
Drying and Preventing Flash Rust
Flash rust can develop on cast iron within minutes of water exposure, making immediate drying your most critical defense against oxidation. You’ll want to transfer your skillet directly from the electrolysis tank to a heat source without delay.
Effective drying methods include oven treatment at 200–400°F for 20–30 minutes or stovetop heating until moisture completely evaporates. Position the skillet upside down to facilitate drainage from the cooking surface. Before applying heat, use a lint-free towel to remove excess water.
You should minimize time between rinsing and drying and avoid humid environments during handling. Use warm water for rinsing to reduce condensation risk. After drying, inspect your skillet thoroughly for any flash rust appearance—a thin, reddish layer—before proceeding to seasoning.
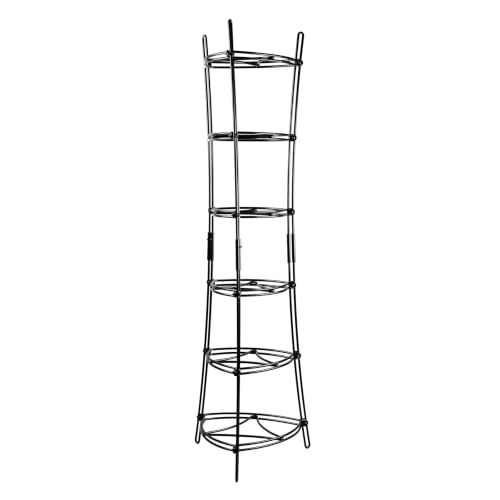
Vertical Cookware Holder: The Lodge Cookware Storage Tower declutters cabinets and countertops with a compact, multi-tier design

HEAVY DUTY CONSTRUCTION -The sturdy steel construction pan rack can hold even your heaviest cast iron pans without bucking or tipping over

Build A True Cookware Tower: 6 roomy tiers and 6 solid hooks—each shelf supports up to 44 lbs, strong enough for your heaviest cast-iron or Dutch oven. No more crouching and rummaging through cabinets—just grab, cook, and enjoy
Safety Precautions and Best Practices
Because electrolysis involves both electrical current and chemical solutions, you’ll need to prioritize safety throughout the restoration process. Wear appropriate personal protective equipment, including insulated gloves and eye protection, when handling washing soda and operating the setup. Ascertain your work area has proper ventilation to prevent fume inhalation and remains dry outside the tank to eliminate electrical hazards.
For electrical safety, use an older manual battery charger set to 6V or lower. Continuously inspect all wires, clamps, and connections to confirm they remain cool and maintain good conductivity. Avoid placing positive clips underwater, as they’ll corrode with the sacrificial electrode. Check terminal connections and attachment points for resistance that could cause overheating. Read all product warning labels before beginning work.