Taking care of your cast iron skillet after cooking can seem tricky, but it’s simple once you know the basics. Proper cleaning and seasoning help your skillet stay non-stick and rust-free for years to come.
With a few easy steps, you’ll keep it in top shape and ready for your next delicious meal. By the end, you’ll know exactly how to clean, dry, and oil your skillet to maintain its best condition.
Keep reading to learn the key tips and tricks for caring for your cast iron.
Rinse Your Skillet Immediately After Cooking
Immediately rinsing your skillet after cooking is essential for easy cleanup. Do this while the pan is still hot or warm to prevent food from sticking and coagulating. Use only hot water—never cold—as rapid temperature changes can cause thermal shock and damage the pan. While it’s still hot, add a little water and bring it to a boil to loosen stubborn bits. Scrape the surface with a flat spatula or a metal utensil, being careful not to scrub too harshly to preserve your seasoning. For extra grip, make a paste from coarse kosher salt and water, then scrub with a towel. However, some sources caution that boiling water in cast iron can open the metal’s pores and trap water, leading to rust. If rust does appear, you can use a vinegar spray solution to safely loosen it without causing further pitting damage. Rinse, discard discolored salt, and repeat if necessary. Fully dry the skillet on low heat, then apply a thin layer of oil to protect its surface. Pour out any accumulated oil and fat to prevent coagulation. Always avoid harsh cleaners and never place the pan in the dishwasher to preserve its seasoning.
Wash Your Cast Iron Skillet Without Ruining the Seasoning
When washing your cast iron skillet, the key is to treat the seasoning like a protective layer, not an enemy. Use hot water with gentle tools such as a wooden scraper or plastic brush to lift food without damaging the seasoned surface. For routine cleaning, mild dish soap can be used sparingly—apply one drop on a stiff brush to safely cut through grease. If stubborn residue remains, try a salt-and-oil paste. Scrub this mixture onto a heated pan, allowing the salt to absorb impurities, then rinse thoroughly. This method helps maintain the skillet’s non-stick qualities. This is similar to the precise temperature control used in sous vide cooking to achieve perfect results without damaging the egg. Stay away from steel wool or harsh detergents, as they can strip away the seasoned layer. This seasoning process involves heating the oil to its smoke point so it bonds chemically with the cast iron. Proper care ensures your skillet stays ready for its next meal without losing its seasoning. Additionally, removing grease or food debris while the skillet is still warm improves cleaning effectiveness.

Easy Cleanup Tool: The Lodge Scrub Brush is designed to help tackle stubborn food residue and simplify cast iron cookware cleanup

Scrubs without soap to preserve seasoning and protect surfaces

EARTH FRIENDLY MATERIALS: Crafted with a bamboo handle and recycled plastic for environmentally friendly cleaning.
Dry Your Cast Iron Skillet Completely to Prevent Rust
Dry your cast iron skillet completely immediately after washing to prevent rust. Use a lint-free cloth or paper towels to wipe the skillet while it is still warm, applying firm pressure to both the cooking surface and exterior. Avoid air drying, as moisture left on the surface encourages rust formation. For more thorough drying, place the skillet on a stovetop burner set to medium-low heat for 3 to 5 minutes, rotating it occasionally to promote even moisture evaporation. Extend the heating time by one minute after the skillet appears dry to ensure all hidden moisture within deep metal pores is eliminated. Never put your skillet away damp, since trapped moisture accelerates oxidation and rust. Always store your skillet only after it is completely dry to avoid rust. Following this quick drying routine keeps your skillet in prime condition and ready for your next meal.
Oil Your Cast Iron Skillet After Every Cleaning
Oiling your cast iron skillet after every cleaning is essential for maintaining its seasoning. Applying a very thin layer of oil ensures the surface stays protected from rust and stays non-stick. Use about half a teaspoon of a high-smoke-point oil, like solid vegetable shortening, for a standard skillet. Excess oil leads to sticky residue, so caution is key. This thin layer retains heat exceptionally well compared to aluminum pans, aiding in even cooking during your next use. For best results, check the skillet’s surface temperature using a meat thermometer to ensure it reaches an internal temperature safe for seasoning.
Rub the oil into every part of the skillet—interior, exterior, handle—using a lint-free cloth or paper towel. Short, even strokes help distribute the oil evenly. Your goal is an ultra-thin coating that appears almost dry; if you see oily traces when you touch the surface, wipe again to remove excess. Continue until the skillet feels dark and smooth to the touch.
Finally, buff off any remaining oil to ensure it bonds properly. This thin layer prevents rust, enhances non-stick properties, and keeps your skillet in top shape over time.

Mild and Easy: Grapeseed Oil is at its best in stir-fries and sautés; it doesn't overwhelm other ingredients and lets fresh flavors shine. When grilling or frying, it is a must-have in the pantry.

Light Buttery Flavor That Elevates Every Meal: Algae Cooking Club Chef-Grade Algae Oil enhances every dish with subtle richness. Its neutral profile makes it ideal for searing, baking, and dressings, transforming everyday meals into gourmet experiences.
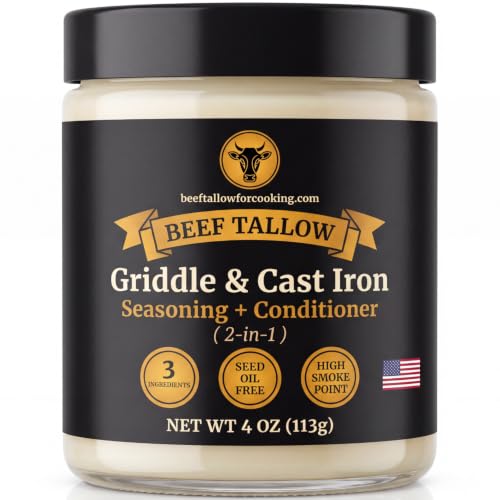
THE SEED OIL FREE FORMULA — Golden Render is the world's first seed oil free, tallow-based griddle seasoning & cast iron conditioner. While others use soy, shortening, grapeseed, sunflower or canola, we use just 3 clean ingredients: beef tallow, avocado oil & beeswax.
Remove Stubborn Residue and Restore Damaged Seasoning
To remove stubborn residue and restore damaged seasoning on your cast iron skillet, follow these effective methods. Start with salt scrubbing: mix coarse salt with a small amount of oil, then scrub the hot pan using a folded paper towel held with tongs. Rinse thoroughly to remove any loosened debris. This method is effective because salt undissolved in oil provides gentle abrasion without stripping the seasoning.
For tougher spots, use a baking soda reaction. Sprinkle baking soda over the residue, then add a few drops of vinegar to trigger fizzing. Pour in lukewarm water and let it sit for about 20 minutes. After that, scrub gently to lift remaining residue.
If the seasoning is badly damaged or rusted, scour off rust with a rust eraser or steel wool. Once clean, wash and dry the pan thoroughly. Apply a thin layer of oil, ensuring even coverage. Bake the skillet at 450 to 500 degrees Fahrenheit for one hour. This helps restore the seasoning layer. Avoid soaking the pan in water—just clean, dry, and re-season to keep it in good shape. For the best results, use several rounds of oiling to build up a durable, long-lasting layer.

【PROFESSIONAL COMBO FOR TOUGH CLEANING】: Cast iron scrubber is made of 316 stainless steel + silicone. Silicone has extreme stability, can resist high temperatures. Pan scraper is made of thickened ABS plastic, non-stick and non-cracking, heat-resistant up to 275 °F

PREMIUM MATERIAL: The cast iron skillet cleaner applies premium grade never rusting stainless steel. It is built with soldered and handmade construction, which makes it durable and stronger. Boasting unmatched durability for long-lasting use
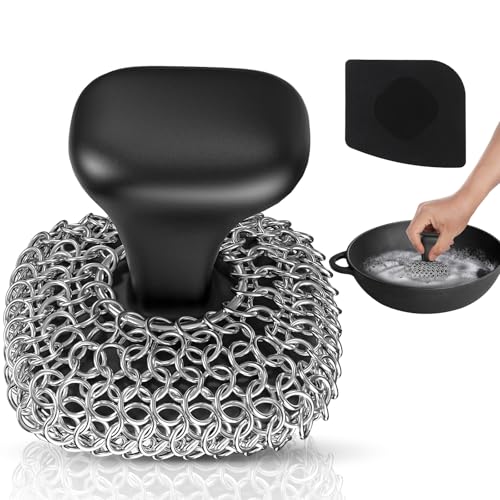
【PROFESSIONAL COMBO FOR TOUGH CLEANING】: Cast iron scrubber is made of 316 stainless steel + silicone. Silicone has extreme stability, can resist high temperatures. Pan scraper is made of thickened ABS plastic, non-stick and non-cracking, heat-resistant up to 275 °F