Using pre-seasoned cast iron can seem straightforward, but getting the best results means knowing a few simple steps. Proper heating, selecting the right oil, and cleaning techniques all help maintain the skillet’s seasoning and ensure your food cooks evenly.
By mastering these basics, you’ll unlock easier, more flavorful cast iron cooking that improves with every use. Keep reading to learn how to make the most of your pre-seasoned skillet.
How to Preheat Your Pre-Seasoned Skillet Without Burning Food
Preheat your skillet gradually on the lowest heat setting, then slowly increase the temperature. Start warming the empty skillet for 5 to 10 minutes, allowing the heat to evenly distribute across the base and sidewalls. If your burner is smaller, rotate the skillet occasionally to prevent hot spots. This method is similar to preheating for stovetop cornbread in a cast iron skillet, where the preheated pan ensures even cooking and a crispy crust. To prevent flash rust after cleaning, always apply a high-quality seasoning oil while the skillet is still wet.
Raise the heat in small steps over a period of 5 to 7 minutes, moving from low to medium. Avoid starting on high heat, as this can scorch the seasoning before you even add food. For tasks that require high heat, aim for 475 to 500°F, while gentler cooking still benefits from keeping the temperature below 400°F. For a steak that is cooked sous vide, this preheated skillet can achieve a flavorful crust in just 30 seconds to one minute per side after patting the meat dry.
Use an infrared thermometer to measure the surface temperature accurately, or hover your hand a few inches above the skillet to feel the radiating heat. Patience during this process helps preserve the skillet’s seasoning and prevents thermal shock that can cause cracking or flaking.

High Heat Resistance: Our Silicone Hot Handle Holder set are made of high-quality, durable and heat-resistant silicone. High heat resistance silicone protects hands up to 400 Degrees F/200 Degrees ℃. Which has good hot insulation and flexibility, easy to clean and be cool, dishwasher safe, protecting hands avoid high temperature burns.

Reliable Heat Resistance: Designed for skillets 9 inches and larger, the Lodge Silicone Hot Handle Holder delivers a secure grip on hot cookware with heat resistance up to 500°F
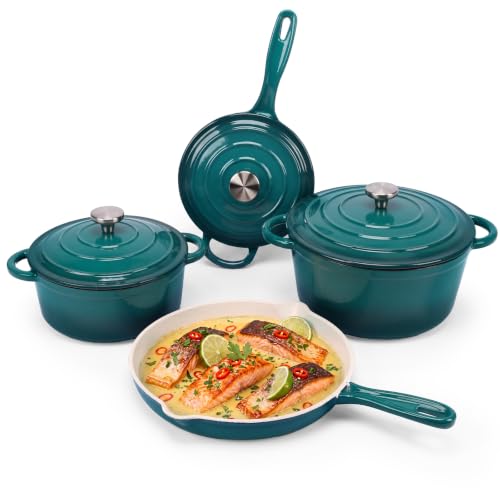
[Complete 7-Piece Set for Versatile Cooking] - This enameled cast iron cookware set includes a 4.8-quart large Dutch oven with lid, 2.8-quart small Dutch oven with lid, 2-quart sauce pan, and a 10.25-inch skillet. Perfect for a range of cooking techniques, from sautéing and grilling to slow cooking, roasting, and baking—an ideal gift choice for home chefs!
The Right Oil for Your Pre-Seasoned Skillet and How Much to Use
The optimal oil quantity for your pre-seasoned skillet is just a tiny dab. Use a lint-free rag to spread a thin layer of oil over the entire surface, then wipe off any excess until the pan appears nearly dry. Applying too much oil causes it to pool and creates an oily, sticky coating rather than a smooth, glass-like finish. A single, very thin coat is sufficient for effective seasoning. Unlike melting glass, which requires very high heat from specialized torches to reach a syrupy consistency, seasoning cast iron uses moderate oven temperatures. This process for achieving a durable finish is similar to the precise temperature control used in sous vide egg cooking. Before applying the oil, heat your skillet to 250–275°F. Then, apply the oil and bake the skillet upside down at 350°F for 45 to 60 minutes for the best results. Be aware that lard and vegetable oils are not recommended for seasoning due to a rancidity risk. Alternatively, using a high smoke point oil like canola oil helps build a durable, long-lasting layer.

HEALTH BENEFITS: AVO Organic Canola Oil for deep frying is minimally processed, and NO harmful chemicals are used in the oil extraction process. Our Canola oil is Certified ORGANIC, contains Omega-3 Omega-6 and is rich in Vitamins E and K (natural antioxidants); is a Cholesterol Free oil and does not contain Trans Fats – AVO’s Canola Oil bulk does NOT contain preservatives or additives.

Traditional and Simple: La Tourangelle Organic Canola Oil is a high quality addition to your everyday cooking. From frying to sautéing, blended salad dressings or sauces, the possibilities are as limitless as your own creativity.

America's #1 Avocado Oil for Cooking — Every batch of Chosen Foods avocado oil is independently tested to confirm 100% pure avocado oil with no fillers or seed oil blends. Our purity standard was verified by UC Davis as one of only two avocado oil brands to pass their rigorous quality test. This bottle delivers the clean, neutral taste and consistent high-heat performance that has made Chosen Foods the avocado oil of choice for home cooks, professional chefs, and clean-eating households across the United States.
What to Cook First in Your Pre-Seasoned Skillet (and What to Avoid)
Start with high-fat proteins like breakfast sausage, bacon (added to a cold pan), or chicken thighs. Their rendered fat helps coat the surface, enhancing the seasoning layer over time. Using these foods initially allows the oil and fat to absorb into the seasoning, building a better non-stick surface. This process is effective because it uses the bonded oil layer that forms when fats surpass their smoke point.
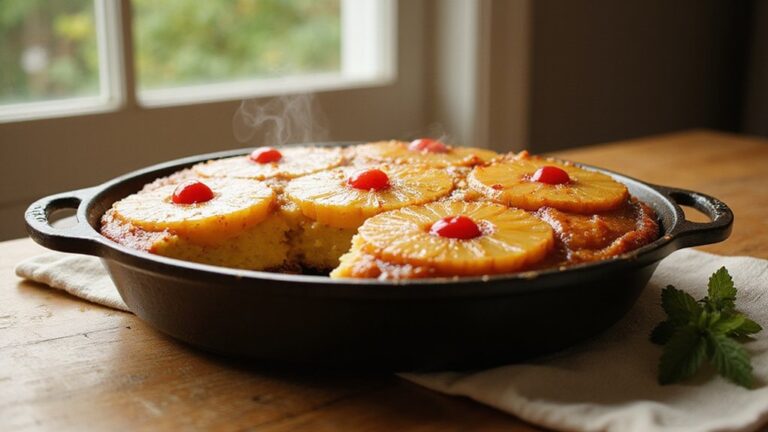
For surface preparation, try cooking cornbread or batter-based items. Preheat the skillet with oil so it reaches the sidewalls, which helps solidify the seasoning. This process ensures an even, durable coating on the pan.
Avoid acidic foods such as tomatoes or citrus during this initial seasoning phase. The acids can strip away the thin seasoning layer, leading to potential rust or unevenness. Similarly, steer clear of fish and sweetened bacon, which can introduce flavors or moisture that may interfere with seasoning development.
Maintain medium-low heat throughout the process, preheating the skillet for 4 to 5 minutes before adding food. Use extra oil during cooking, and consider shallow-frying with at least half a centimeter of fat. This method promotes even heating and helps build up seasoning effectively.

SEASONED COOKWARE FOR IMMEDIATE USE: Pre-seasons every pan with 100% natural vegetable oil, giving it a non-stick finish without synthetic chemicals, to enhance the non-stick performance and deliver authentic flavors right out of the box. The more you use your skillet, the better the seasoning becomes for effortless cooking.

Collectible Cast Iron Skillet: Celebrate America’s 250th Anniversary with this special skillet; featuring lyrics and imagery from "America the Beautiful," the skillet is designed for cooking, gifting, and collecting

Durable Cast Iron Construction: Made from cast iron for long-lasting use and even heat distribution.
How to Clean Your Pre-Seasoned Skillet Without Losing Seasoning
To clean your pre-seasoned skillet without losing its seasoning, start by rinsing it with hot water immediately after cooking. This prevents food from hardening and sticking. Use a wooden scraper or a paper towel to wipe out any chunks. For stubborn bits, sprinkle coarse kosher salt with a little water to create a gentle scrub. If food really sticks, make a paste of salt and a drop of oil, then scrub with it—this method won’t harm your skillet’s seasoning. Avoid soaking the pan in water, as prolonged exposure can strip away the seasoned layer and potentially lead to rust. For tough burnt-on areas, you can boil water with baking soda to help lift residue without damaging the surface. After cleaning, dry the skillet thoroughly with a towel. To remove any remaining moisture, place the skillet on low heat for a few minutes until dry. Then, apply a thin coat of vegetable oil, wiping off excess to prevent stickiness. For better rust protection, also apply a thin coat of oil to the backside of the pan after drying. Never use harsh soap or put a pre-seasoned skillet in the dishwasher, as this can damage the seasoning and promote rust formation. For a more tender steak, you should rest the cooked meat to allow juices to redistribute for tenderness. Gentle cleaning preserves the skillet’s non-stick surface and extends its lifespan. For an alternative approach to achieving a crisp finish, you can create a stovetop caramel and pour it onto the surface just before serving.

No additives; Only pure kosher salt

Premium kosher sea salt from the Mediterranean

On Your Table For Generations: Morton Salt has been a household staple since 1848
Store Your Pre-Seasoned Skillet So It Lasts for Decades
After cleaning and drying your pre-seasoned skillet, proper storage is essential to ensure it lasts for decades. The key to maintaining your pan’s condition is making sure it is completely dry before storing. Towel-dry the skillet thoroughly, then place it on the stovetop over low heat for 5 to 10 minutes to evaporate any remaining moisture. While the skillet is warm, apply a thin layer of grapeseed or avocado oil to the surface—this protective coating helps prevent rust and preserves the seasoning. This maintenance step, however, is distinct from full seasoning which requires baking at high heat to permanently bond the oil layer.
For optimal airflow, hang your skillet on a wall rack instead of stacking it. If stacking is necessary, place a paper towel or felt pad between pans to prevent scratching and protect the seasoning. Avoid storing your skillet in damp areas like near the sink or dishwasher. Choose a cool, dry cabinet where humidity is minimal. Following these steps helps prevent rust and keeps your skillet in excellent shape for years to come.