

If you’ve ever struggled to open a vacuum-sealed bag or jar without damaging the contents, you’re not alone.
Knowing how to break the seal properly can save you frustration and keep your food fresh.
Proper techniques involve gentle tricks like snipping corners or warming seals—getting it right makes all the difference.
Keep reading to learn the best ways to open and return vacuum-sealed items safely and efficiently.
Why Your Vacuum-Sealed Bag Won’t Open (and How to Fix It)
If your vacuum-sealed bag won’t open, start by folding the edges to create leverage. This often helps pop the seal without damage. If that doesn’t work, make a small incision in a corner to break the vacuum, allowing air to rush in immediately. For tougher seals, simply cut along the sealed edge with scissors. This method bypasses the seal without risking harm to the contents. Remember, a bag that refuses to open isn’t a test of strength; it’s a sealing issue. Use these techniques, and you’ll be able to open it every time. Any food that was stored under reduced oxygen packaging should be handled according to a HACCP plan to control bacterial risks after opening. You can also mimic the water displacement method to re-seal the bag after opening if needed. Similar to cast iron care, applying a vinegar spray solution can help remove stubborn surface residues from the bag’s exterior before re-sealing.
How to Open a Vacuum-Sealed Jar Without Losing Your Cool
To open a vacuum-sealed jar without losing your cool, start with grip-enhancing tricks. Wrap a rubber band around the lid or slip on rubber gloves to boost traction, then twist. Proper grip is essential; a kitchen rag or plastic wrap can also prevent slipping. If that doesn’t work, use tools for leverage. Wedge a blunt spoon or a table knife under the lid edge and gently lift to release the seal. You can also use the back of a butter knife for prying. Apply slight upward pressure until you hear a suction release. For metal lids, submerging the lid in hot water for 30 seconds causes thermal expansion, making it easier to twist open. Once the seal is broken, the lid should twist off easily. Remember, you’re not wrestling an alligator—just a jar. Stay calm, keep your grip solid, and let the tools do the heavy lifting. Alternatively, applying heat to the lid mimics the thermal expansion principle used when preheating a cast iron skillet for a high-temperature sear. This approach works similarly to using precise temperature control to achieve consistent results, much like cooking eggs sous vide at a steady 167°F for a runny yolk. For resealing after opening, using specialized Ziploc vacuum bags with a hand pump can preserve leftovers effectively.
How to Safely Open a Vacuum-Sealed Container (No Injuries)
To safely open vacuum-sealed containers, start by locating any release valve. Press the valve firmly to equalize pressure, listening for a hiss that indicates the release of built-up air. Avoid using sharp objects directly on the valve; instead, use blunt tools and cut seals away from your body. Stabilize the container on a flat surface, and maintain a strong grip with dry rubber gloves or a rubber jar opener to prevent slips. If you’re dealing with a sous-vide bag or similar, puncture a corner with a fork to let the air escape before peeling it open. When using hot water methods, only submerge the lid and grip it with a towel to prevent burns. Running hot water over the lid for a few moments causes the metal lid to expand, which helps break the vacuum seal. To contain splatter, cover the opening with a paper towel before opening. Never force open a container—if resistance remains, activate the release valve again or apply gentle heat to soften the material. Always gradually heat the container to avoid cracking or warping it, just as with enameled cookware. For containers with metal lids, monitoring the baking temperature around 375–400°F ensures the lid heats evenly without damaging the seal or glass. Patience and careful handling are key to avoiding injuries.
What to Do If You Punctured the Contents – Next Steps
If you’ve punctured the contents, start by immediately checking if the food remains cold to the touch. If it has entered the temperature danger zone, the food is no longer safe to consume. Inspect the package for signs of contamination, such as slime, mold, or foreign debris like glass fragments. To repair the puncture, transfer the food to a new ziplock bag and remove all excess air before sealing. Apply sealant tape firmly over the leak area, then perform a drop test by submerging the bag in water—bubbles indicate the patch has failed. For bone-in meats, cover sharp edges with freezer paper before repacking. Dispose of raw onions, mushrooms, or garlic if the seal broke, due to the risk of botulism. If the food is vacuum-packaged fish, remove it from its packaging immediately to prevent toxin development. Repack the food properly and wait at least 30 minutes before re-testing the seal to ensure no slow leaks are present. Perform a systematic leak detection using ultrasonic detection or a stethoscope to locate any pinpoint seal failures that a simple water test might miss.
Can You Reuse That Vacuum-Seal Bag? Check These Three Things
Inspect the bag thoroughly. Check that the sealing strip isn’t cracked, peeling, or damaged, and ensure there are no scratches, holes, or stiff edges that could prevent a proper seal. Keep at least 1.5 inches of material above the seal area to allow for a secure new seal. Discard any bags that appear cloudy, warped, stickiness, or show signs of deterioration, as reuse could risk food safety. Unlike rectal thermometers, which are the gold standard for accurate canine temperature measurement, vacuum bags require the same precision to ensure safety.
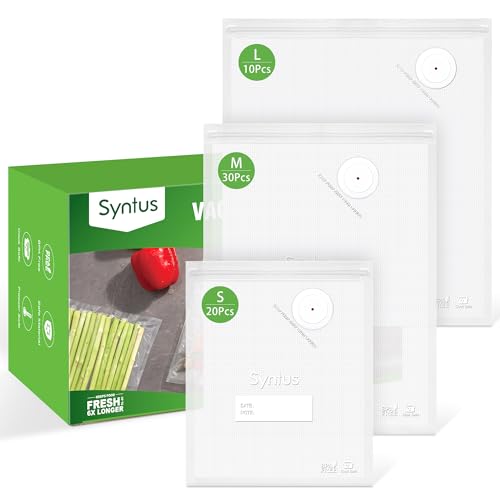
Package Contents: This set includes 60 vacuum zipper bags in three practical sizes: 20 pieces of 8" x 10", 30 pieces of 10" x 13.8", and 10 pieces of 11.8" x 13.8".Crafted from BPA-free materials, these bags are safe for food storage and suitable for use in microwaves, cabinets, refrigerators, freezers, and sous vide cooking. Designed for strength, the bags feature a smooth side (up to 3.15 mil thick) and a textured dotted side (up to 3.95 mil thick), providing sturdy protection against punctures from sharp items like bones.

MULTIPURPOSE, REUSABLE BAGS: These BPA-free, multilayer FoodSaver vacuum seal bags are durable and easy to hand-wash; also safe to use in the microwave, for sous vide cooking, and for freezer storage
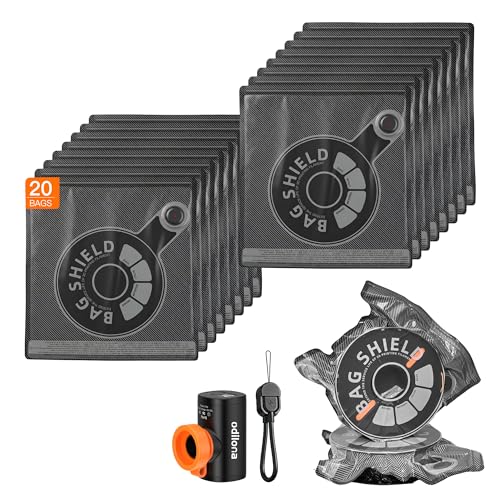
3d Printer Filament Storage Kit: Includes 20 filament vacuum bags, 20 desiccants, 1 USB vacuum pump, and 5 sealing clips to create a complete filament dry storage solution for keeping 3D printer filament clean, dry, and organized
How to Reseal Snack Bags Without Crushing the Contents
Resealing snack bags without crushing their delicate contents can be achieved with a few simple techniques. One effective method is bag folding: flatten the bag, squeeze out excess air, then roll the top down to just above your snacks. Fold back about an inch on each side, pin the corners with your thumbs, and tuck the middle inside out for a secure hold—no clips needed. Potato chips were originally invented in Saratoga Springs, NY by a chef in response to a customer complaint.
Alternatively, heat sealing offers a more permanent solution. Use a metal ruler as a guide and run a lighter quickly along its edge to melt the plastic from end to end without damaging the contents. Another option is heating the rounded side of a spoon and pressing it along the open edge; both methods create an airtight, resealed bag.
Always push the packaging up into the center fold before sealing to prevent your snacks from falling out. Practice these techniques to keep chips, rice, and pasta fresh without crushing a single piece.

【FOOD GRADE MATERIAL】 Choose SPLF brand for TRULY food-grade reusable storage bags. Made of food-grade PEVA material that is PVC, BPA, Chloride and Lead free. Healthy and safe for family and earth.

PERFECT PORTION: Set includes (4) pack PEVA Zip Bags: (2) Snack 6.5" x 3.5" 7.05oz/224 ml, (2) Sandwich 6.5" x 6.5" 26oz/775 ml

Bag Sealer with Cutter: This mini chip bag sealer combines sealing and cutting functions in one. One head for sealing, one head for cutting.
Pro Techniques for the Toughest Seals (When Everything Fails)
When softer methods fail, you’ll need to use more forceful techniques to open stubborn vacuum seals. One effective approach is applying a hair dryer set on low heat to the lid edge for one to two minutes. Move the dryer constantly to prevent overheating or damaging the material. This heat softens the plastic or rubber, making the seal easier to break. Alternatively, submerge the entire bag in warm—not boiling—water for a few minutes to soften the material, which helps loosen the seal. This water submersion technique mimics the water submersion method for removing excess air, but here it works in reverse to soften the seal.
For jars that won’t budge, chilling them in the freezer for about 20 minutes can cause the metal lid to contract, making it easier to twist open. Use dry, well-fitting gloves to grasp and turn the lid firmly, avoiding slipping.
Specialized tools can also help when nothing else works. Suction cups or vacuum seal breakers are designed to grip and help pry open sealed containers with minimal damage. Another trick is gently poking a fork into a corner of the bag to break the suction—listen for the release pop, which indicates the air has escaped.
Always prioritize safety. Cut on a flat, stable surface away from your body, using caution to avoid injury. Never apply excessive force all at once; instead, repeat these processes carefully. Patience prevents spills, injuries, and damage to your containers or seals.

Durable Metal Material: Our vacuum breaker replacement kit is made of quality stainless steel, stronger, and more durable for long term use than plastic

Durable Metal Material: Our vacuum breaker replacement kit is made of quality stainless steel, stronger, and more durable for long term use than plastic

Durable Metal Material: Our vacuum breaker replacement kit is made of quality stainless steel, stronger, and more durable for long term use than plastic


