
You’ll restore heavily soiled cast iron by submerging it in a lye bath, which chemically breaks down burnt-on residue, rust, and grease without damaging the metal. Mix one pound of lye crystals to five gallons of water—never reverse this order—and soak your cookware for 48–72 hours depending on buildup severity. After soaking, neutralize the solution with vinegar, rinse thoroughly for two minutes, dry immediately, and season with high-heat oil at 350°F for one hour. The specifics of executing each step safely and effectively await your attention.
Understanding Sodium Hydroxide and Lye Bath Basics
Before you attempt to restore cast iron with a lye bath, you’ll need to understand sodium hydroxide‘s chemical properties and how they enable effective cleaning. Sodium hydroxide (NaOH), commonly called lye, is a potent alkaline compound with a pH between 13 and 14. When you dissolve it in water, it releases hydroxide ions responsible for its corrosive strength and cleaning power.
Lye bath reactions work by breaking down organic compounds through hydrolysis. You’ll witness how the alkaline solution dissolves grease, fats, carbonized residues, and rust without mechanical abrasion. This chemical process preserves your cast iron’s underlying metal surface while removing decades of buildup. Temperature control during the lye bath accelerates these sodium hydroxide properties, optimizing cleaning efficiency while minimizing potential surface damage.
Gathering Your Materials and Safety Equipment
Now that you understand sodium hydroxide’s chemical properties and how it breaks down buildup, you’ll need to gather the right materials and safety equipment before starting your lye bath restoration.
Prioritize lye safety by investing in proper protective gear. You’ll need long rubber gloves, ideally double-layered for extended contact, along with chemical splash goggles and a face shield to prevent blindness from splashes. Wear clothing you don’t mind damaging.
Gather a large plastic container with fitted cover for solution storage and a heavy-duty barrel for submerging cast iron pieces. Collect a wood spoon for stirring, steel coat hangers for suspending items, and strong string for safe removal. Include stainless steel scouring pads and a steel wire brush for post-soak cleaning.
Line your workspace with newspaper to catch drips and guarantee proper ventilation throughout the process.

【Heavy-Duty Chemical Resistance】High-end nitrile gloves possess excellent chemical resistance, providing a tough barrier against harsh substances such as industrial solvents and cleaners, so you can handle lab work or heavy-duty tasks with confidence.
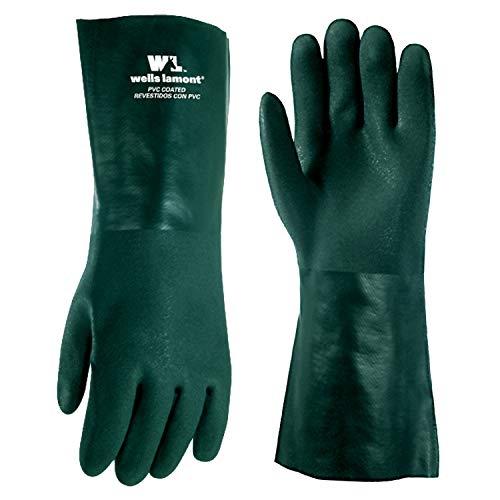
CHEMICAL RESISTANT: These PVC coated work gloves are effective against liquids, adhesives, detergents, certain fertilizers and diluted bases and acids

Heavy-Duty Chemical & Puncture Resistance: Constructed from 18-mil thick, chemical-resistant nitrile for superior protection against household acids, alkalis, solvents, grease, and oils, offering excellent resistance to abrasion, snags, and punctures.
Preparing Your Lye Solution Safely
Once you’ve gathered your materials and donned your protective gear, you’ll create your lye solution by following a critical mixing protocol that prioritizes safety. Always pour water into your container first—never reverse this order. Adding lye to water creates a dangerous thermal reaction that causes the mixture to boil and splash violently.
For proper mixing techniques, combine one pound of lye crystals with five gallons of water. This ratio doesn’t require precision; minor variations won’t create hazardous conditions. After adding lye to the water, stir thoroughly until all crystals dissolve completely into a uniform solution.
These lye precautions guarantee safe crystal dissolution. Complete dissolution prevents undissolved pockets that could cause safety issues. Your solution is ready for soaking once it becomes fully liquid and homogeneous throughout.

Reclosable HDPE Jar

99+% Pure, Meets Food Chemical Codex, Generally regarded as Safe for Use with Foods

Lye is also known as sodium hydroxide and caustic soda. Lye forms a great soap base for the production of lye soap. Our lye comes in a safe container fitted with a resealable child resistant cap.
Setting Up Your Soaking Container
Your soaking container’s selection determines the success of your lye-based restoration process. You’ll need heavy-duty plastic rated as number 2 or number 5 plastic to resist lye degradation. Container safety requires that your vessel completely submerge cast iron pieces without overflow risk. Select 5-gallon buckets for small projects or 20-gallon Rubbermade brute trash cans for bulk restoration of 100+ pieces.
Position your container near drainage access and outdoor rinsing areas to minimize contamination transfer. Maintaining proper solution concentration is crucial when caring for your cast iron by adhering to a 5-gallon water-to-1-pound lye ratio. Additionally, ensure to season your cast iron after the lye treatment to restore its protective coating. Cover your container with a fitted lid to prevent accidental spills and external contamination between restoration sessions. A covered setup preserves your solution’s strength during extended use periods, reducing replacement frequency and overall project costs.

BUILT TO LAST: Heavy duty wire bails offer extra durability

See-through body in natural polyethylene with printed measurement on the outside makes this pail easy to use

Ergonomic Rectangular Mopping Bucket: This professional cleaning bucket comes in a rectangular shape that is ideal for your smaller, around-the-house cleaning tasks and tools up to 14-inches long
Submerging and Soaking Your Cast Iron
Because complete submersion guarantees uniform removal of seasoning and grease buildup, you’ll need to position each cast iron piece so all surfaces—including handles, crevices, and interior areas—contact the lye solution. Use non-reactive weights like stainless steel objects to keep pieces submerged if they float. Avoid overcrowding your container; adequate solution circulation facilitates thorough coverage.
Your soaking duration depends on buildup thickness. Light seasoning may require several hours, while stubborn accumulation necessitates 48–72 hours. Warmer temperatures accelerate chemical reactions, reducing required bathing techniques and timeframes. Check progress periodically by removing and rinsing small areas to assess cleaning effectiveness.
Extended soaking won’t damage cast iron, though existing rust may pit. Monitor your pieces carefully throughout the process for best results.

The innovative design of these weights provides a substantial decrease in the likelihood of snagging due to its elongated and slender design

Solid Stainless steel double hooked weight 100 grams (0.22 Lbs.)

Elegant Design: These 8mm stud earrings for women feature dazzling Rivoli crystals, making them timeless jewelry for women.
Monitoring and Maintaining Your Lye Bath
As you progress through multiple cleaning cycles, you’ll want to maintain your lye solution’s effectiveness by monitoring its strength and replenishing it as needed. Evaporation monitoring is essential since water naturally dissipates from your bath over time. When you notice the water level dropping, add fresh water combined with lye crystals rather than water alone. This gradual replenishment process rebuilds your solution strength to the ideal one pound lye per five gallons ratio. Assess your bath’s potency if cast iron pieces require multiple soaking cycles—this signals weakened concentration. Temperature also affects performance, so maintain adequate warmth for efficient cleaning. Regular monitoring prevents your solution from becoming too dilute, ensuring consistent results across your cleaning projects.
Neutralizing Lye Residue With Vinegar
Once you’ve finished soaking your cast iron in the lye bath, you’ll need to neutralize any remaining lye residue before disposal. Dilute your used lye solution with additional water first—never add vinegar to undiluted lye crystals, as this creates a dangerous exothermic reaction.
Slowly add household vinegar to your diluted lye solution while stirring continuously. Monitor the temperature and pH throughout the neutralization process. The mixture will fizz and warm; this is normal. Continue adding vinegar gradually until pH strips confirm neutral pH 7. Wear protective gloves and goggles during this procedure.
Vinegar precautions include working in well-ventilated areas and adding vinegar incrementally rather than all at once. Excess vinegar is safer than insufficient vinegar. Once neutralized, safely dispose of the solution down the drain with running water.
Final Rinsing, Drying, and Seasoning Your Cookware
After neutralizing the lye solution, you’ll need to thoroughly rinse your cast iron under running water to remove all chemical residue. Use multiple rinse techniques, including running water over all surfaces and crevices for at least two minutes to guarantee complete neutralization removal.
For drying methods, immediately pat your cookware dry with a clean cloth to prevent water spots and rust formation. Use drying methods that eliminate all moisture, including towel-drying interior and exterior surfaces thoroughly. It’s crucial to ensure that the skillet is completely dried to avoid rust formation on the cooking surface.
Once completely dry, apply a thin layer of high-heat cooking oil across the entire surface. Wipe away excess oil with a clean cloth, leaving only a light coating. Heating your cast iron creates a durable non-stick layer that protects against rust and enhances cooking performance. Heat your cast iron at 350°F for one hour to establish a protective seasoning layer, then allow it to cool completely before storage.


