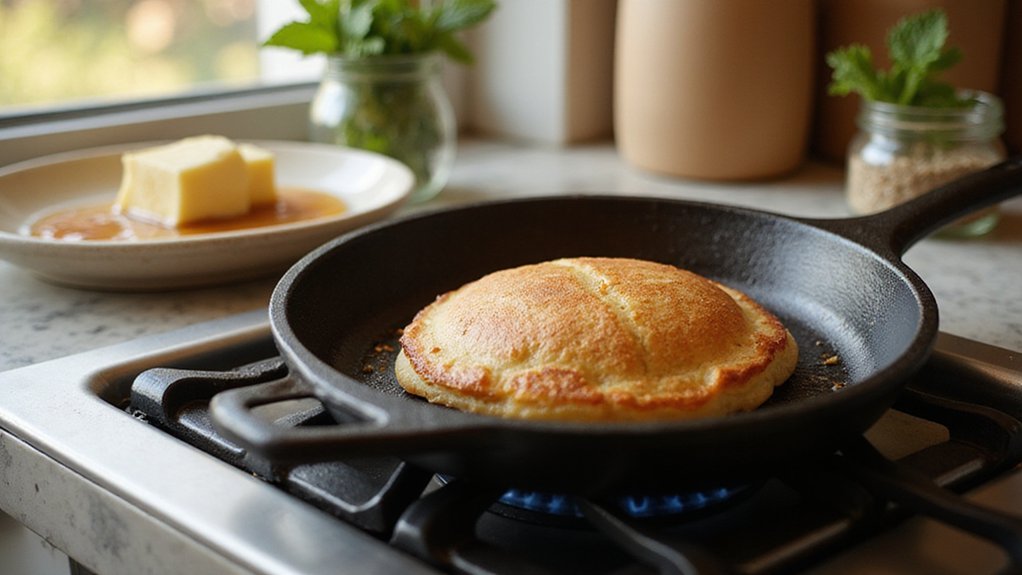
Wondering if a cast iron skillet is the best choice for making perfect pancakes? The answer is yes, and it can help you achieve golden, fluffy results every time.
With proper preheating and seasoning, a cast iron skillet offers even heat distribution and a natural non-stick surface.
Keep reading to learn how to master pancake perfection with your skillet.
Preheat Your Cast Iron Skillet for Perfect Pancakes
Preheating your cast iron skillet to the right temperature is crucial for perfect pancakes. Set your burner to medium-low and aim for a surface temperature between 350°F and 375°F. This range ensures pancakes brown evenly without burning the outsides or leaving the centers raw. A slow preheat lasting between 5 and 10 minutes allows for proper heat distribution, preventing hot spots. To test if your skillet is ready, sprinkle a few water drops on the surface; if they bead and sizzle, the skillet has reached the correct temperature. For more precise control, an infrared thermometer can be used to verify the temperature stays within the ideal range. Once preheated, reduce the heat to medium-low before pouring the batter to maintain a steady temperature of around 360°F to 370°F. This careful temperature management leads to consistently well-cooked pancakes with a golden crust every time. Patience during preheating pays off with superior results. Applying a seasoning oil while the skillet is still wet after cleaning prevents flash rust from forming, ensuring a smooth surface for cooking. For an extra savory version, you can adapt this technique by adding bacon and cheese to create a hearty camping-style breakfast. This approach to heat control is similar to slowly simmering on the stovetop for tenderizing tough cuts of meat in a covered pot.

Collectible Cast Iron Skillet: Celebrate America’s 250th Anniversary with this special skillet; featuring lyrics and imagery from "America the Beautiful," the skillet is...
Season and Grease for Non-Stick Results
To achieve truly non-stick pancakes, you need to season and grease your cast iron skillet properly before cooking. Start by washing and thoroughly drying the skillet to remove any residue. Apply a thin, even layer of oil across the entire surface, including the handle, using a paper towel. To polymerize the oil and create a durable, slick coating, bake the skillet upside down at 450°F for one hour. This initial seasoning forms the foundation for rust prevention and ensures non-stick performance. Using a high smoke point oil like vegetable or flaxseed oil helps create a more resilient seasoning layer that withstands repeated cooking. For an even more robust non-stick surface, you can repeat the baking process to build multiple layers of seasoning.
Before cooking, preheat the skillet on low for about five minutes. Then, use a paper towel to lightly coat the surface with oil or about half a tablespoon of butter. Avoid using too much fat, as excess oil or butter can make your pancakes soggy and harder to flip. Keep in mind that butter alone burns quickly and isn’t suitable for seasoning or high-heat cooking. Between batches, clean and dry the skillet, then reapply a thin layer of oil or butter and bake at 350°F for one hour. This routine maintains the seasoning, prevents rust, and guarantees smooth, easy flips every time. This process offers precise control comparable to how sous vide cooking customizes egg doneness.
How to Pour, Flip, and Time Your Pancakes
To pour, flip, and time your pancakes effectively, start by preheating your cast iron skillet on medium-low for 5 to 10 minutes until it reaches 350°F to 375°F. Reduce the heat to a 2 or 3 setting (around 360°F) to keep the surface even without hot spots. Let your batter rest for 5 to 10 minutes for better consistency and avoid over-mixing, which can make the pancakes tough. Pour exactly ⅓ cup of batter near the center of the skillet to ensure uniform size. Cook 2 to 3 pancakes at a time, waiting about 2 minutes until bubbles pop and the edges look dry. Your spatula technique is crucial: use a stainless steel spatula with a sharp edge, slide it under the pancake, and flip with a quick wrist motion. The second side should cook for 1 to 3 minutes longer. Resist the temptation to press down on the pancake as it cooks—let it rise naturally for a fluffy result. Preheating the skillet ensures even heat distribution similar to the heat retention described for a Dutch oven.

【Heavy Duty & Premium Material】 Made of thick high quality 18/8 food grade stainless steel, heat-resistant up to 600°F, which is very durable, rust-proof, corrosion resistant non-toxic, BPA free, no metal aftertaste.

STURDY STAINLESS STEEL CONSTRUCTION: This spatula is guaranteed to hold up even after years of use! Has a convenient pom handle for optimal scraping.
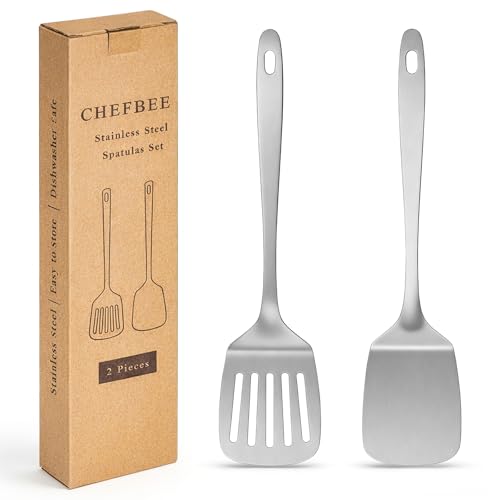
Stainless Steel Material: The spatula set is made of high-quality stainless steel, sturdy, non-toxic and rust-proof. Metal spatula don't melt or break like silicone spatula, and they don't mold like wooden spatulas. The kitchen spatula is perfect for the stainless steel magnetic pans needed for induction stoves. Whether it's baking, frying, flipping or serving food, our multi-functional stainless steel spatula will add more fun to your kitchen. Good material for flipping sandwiches or pancakes.
Keep Cast Iron Skillet Pancakes Warm Between Batches
To keep your cast iron skillet pancakes warm between batches, follow these methods. For oven warming, preheat your oven to 200°F, then place the pancakes on a parchment-lined baking sheet. Keep them there until you finish cooking all the batter. Avoid exceeding 250°F, as higher temperatures can dry out your pancakes. A tortilla warmer filled with pancakes and a paper towel at the bottom can also effectively trap heat while absorbing moisture.
Alternatively, cover the pancakes with a foil tent. Stack the cooked pancakes on a plate, then shape a large sheet of aluminum foil into a tent, sealing the edges tightly around the plate. This traps heat without trapping moisture directly, preventing sogginess while you prepare the next batch. This technique is similar to the steam environment used in artisan bread baking to maintain moisture.
You can also layer pancakes on a paper towel inside a covered dish. The paper towel absorbs excess moisture, keeping the pancakes fresh. If you’re using a dual-burner griddle, move the cooked pancakes to the unheated side to stay warm. Cook only 2 to 3 pancakes at a time on the hot side to maintain consistent heat, and move each batch promptly to your warming station. Ensure your skillet is properly seasoned to replicate the non-stick quality needed for flipping pancakes cleanly.

MULTI-PURPOSE COOKING: Perfect for pancakes, tortillas, eggs, and more—griddle anything from breakfast to dinner with ease on this flat cast iron surface.
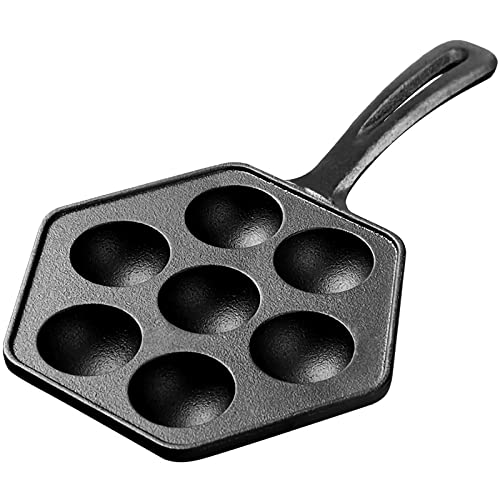
Use this cast iron griddle for making all kinds of bite sized foods, including Poffertjes pancakes, Japanese Takoyaki, Aebleskiver, Appam, and Kuli paniyaram, Danish pancake puffs, or Thai Desserts like Kanom Krok and more!

The information below is per-pack only
Why Cast Iron Wins for Consistent Pancake Texture
A cast iron skillet is unbeatable for achieving a consistent pancake texture because of its superior heat retention and distribution. When the skillet reaches about 350°F to 375°F before pouring in batter, it maintains a steady temperature, allowing the pancakes to cook evenly from edge to center. This prevents raw centers and burnt exteriors, resulting in a uniform golden-brown crust each time. The high heat capacity of cast iron also helps prevent temperature drops when you add batter, ensuring the pancakes rise evenly and stay fluffy. Proper seasoning maintenance creates a natural non-stick surface, making flipping easier without tearing. Thanks to its durability, cast iron provides reliable results batch after batch, without the uneven heating typical of flimsy pans. To get the best results, preheat the skillet well and then reduce the heat to medium-low, ensuring each pancake cooks perfectly with consistent texture. This same principle is used in Dutch ovens, where browning beef cubes develops a rich crust that locks in flavor. For long-term storage of other foods, methods like submerging salmon in chilled water before sealing also help remove air and preserve quality. To avoid damaging the pan, remember to never preheating dry without oil or liquid when using cast iron on a stovetop.