You might wonder if any blow torch is safe for cooking. The truth is, not all are suitable—many hardware store torches can leave a metallic taste or pose safety risks.
Using a dedicated kitchen blowtorch ensures better control, food-safe materials, and a safer experience.
Keep reading to learn how to choose and use the right torch for your culinary needs.
Grab These 3 Safety Items Before Lighting a Cooking Blowtorch
Before lighting your cooking blowtorch, you need to gather three key safety items: a fire extinguisher, personal protective equipment, and a clear, ventilated workspace. A Class B or K fire extinguisher should be within arm’s reach to handle small kitchen fires quickly. Regularly check its pressure gauge to ensure it’s operational, and train everyone nearby on how to use it properly.
Wear heat-resistant gloves, safety goggles with tinted lenses to protect your eyes from sparks, and a flame-retardant apron to shield your body from heat and splatters. Tie back long hair and avoid wearing synthetic fabrics that can melt or catch fire easily. These precautions help prevent burns and injuries during use.
Inspect your torch for cracks or damage before each session to avoid leaks or malfunctions. Test gas connections with soapy water to detect leaks—bubbles indicate a problem—before igniting the torch. After finishing, shut off the gas valve securely. Keep your workspace free of flammable items, such as paper towels or cloths, and use stable, non-flammable surfaces for your work. Torching over a cast iron Dutch oven can safely transfer heat for campfire-style desserts.
Ensure proper ventilation by opening windows or using an exhaust fan. Position the torch at least six inches from food to control caramelization safely and prevent accidental ignition of ingredients. Similar to cast iron restoration, applying oil while the surface is still wet can help prevent flash rust from forming on exposed metal. For precise candy making, a digital probe thermometer is recommended to ensure you accurately reach the desired internal temperature of syrups. These safety measures create a secure environment for precise and safe torching.

High Quality Oven Gloves Heat Resistant: Our oven mitts heat resistant baking supplies are crafted from premium quality aramid material. The heat resistant oven gloves are very strong, heat resistant and serve you for longtime.

【Extreme Heat Resistance】Our barbecue gloves & oven mitts, are designed to withstand temperatures up to 1472°F(Test max temperature tolerance), providing perfect protection for your hands from high temperatures whether you're grilling, baking, or cooking.
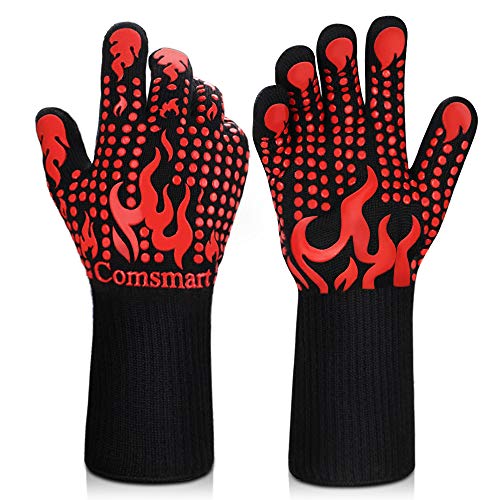
Heat Resistant: Our BBQ gloves are designed to provide protection for your hands while cooking, grilling, baking, or handling hot pots. With an instant heat resistance of up to 1472°F, these gloves are perfect for high-temperature cooking and baking.
Why a Kitchen Blowtorch Beats a Hardware Store Torch for Food
A kitchen blowtorch offers significant ergonomic advantages over a hardware store torch. It is balanced for comfortable handheld use, which minimizes hand fatigue during extended or detailed applications. Its sleek design not only looks professional but is also easy to clean, meeting hygiene standards crucial in food preparation environments. In contrast, hardware store torches tend to feel bulky or undersized, making precise control more difficult. This can affect the consistency and safety of your results. Overall, a kitchen blowtorch is better suited for culinary tasks, providing both comfort and safety for regular use. For comparison, effective vacuum seal bags feature strong, secure seals and durability to preserve food efficiently. Unlike plastic welding with a butane torch, where consistent heat control is vital to avoid melting or damaging the workpiece, cooking with a blowtorch relies on similar precision to prevent scorching food. Achieving such precision mirrors the precise temperature control needed for sous vide eggs to reach specific textures.
How to Choose the Right Fuel for Your Cooking Blowtorch
The best fuel for your cooking blowtorch depends on the environment and the tasks you plan to undertake. For indoor use, butane is ideal because it burns cleanly and produces minimal odors, making it suitable for enclosed spaces. It is also compact and efficient, providing a steady flame suitable for delicate work like caramelizing sugar or finishing dishes.
In contrast, propane is better suited for outdoor use or cold environments. It can handle lower temperatures without losing pressure and delivers higher heat output, making it ideal for larger tasks such as welding or torching meats. Propane canisters are sturdier, providing a reliable supply during outdoor cooking. For even higher heat output, Map gas is an alternative fuel that burns more efficiently.
Always perform proper flame adjustment before igniting your torch. Aim for a short, dark blue flame accompanied by a hissing sound—that indicates complete combustion and the safest, most efficient burn. A yellow-tipped flame indicates a reducing flame, which can leave undesirable flavors on your food and reduce precision. Ensure your torch is compatible with your chosen fuel to maintain safety and performance. Remember, regardless of the fuel type, achieving complete combustion is essential for optimal results.

PACKAGE CONTENT: 12 pack of 8oz butane fuel canisters
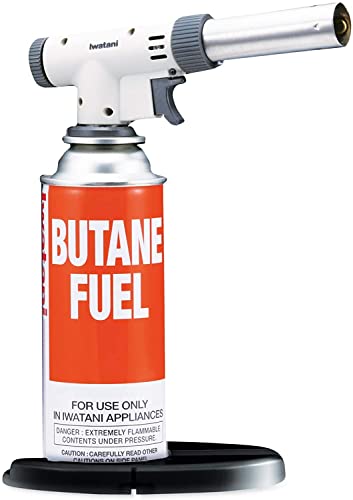
Iwatani top quality butane torch is backed by a 1-year manufacturer (butane not included)

Master the 6-in. to 8-in. Rule for Torching Food Safely
Holding your culinary torch 6 to 8 inches away from the food is the safest and most controlled way to sear. This distance helps prevent localized burning and ensures even heat distribution across the surface. When torching, aim for a short, dark blue, hissing flame—fully oxidized with no yellow tip—which indicates optimal heat and control. However, always keep in mind that thermal shock from rapid temperature changes can crack even a durable cast iron skillet. Start at 8 inches and gradually move closer, observing the color changes on the food. Keep the flame moving in constant circular motions to avoid scorching any one spot. Never hold the torch still on one area, as this can quickly cause burning. Always test the flame’s direction away from your dish first, and work on a heat-resistant surface like a metal tray or cast iron skillet to keep everything stable. If you’re unsure about your control, it’s better to pull the torch away sooner and let carryover heat finish the job. To prevent damage, ensure your cast iron is properly seasoned with a thin layer of oil to maintain its protective coating. Remember, patience and steady motion are key to achieving a beautifully seared finish without overdoing it. This technique is similar to how a Dutch oven simplifies campfire cooking with minimal prep and cleanup.
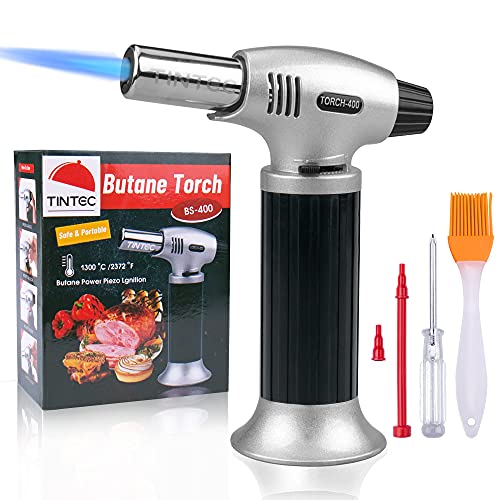
★PROFESSIONAL FOR COOKING: Adopt super lightweight Aluminum Alloy shell covered with ABS plastic handle and high-temperature resistant muzzle, ensuring long lifespan; Coming with a Silicone Basting, heat resistance up to 446⁰F / 230⁰C and can be used in the kitchen, the grill and on non-stick pans
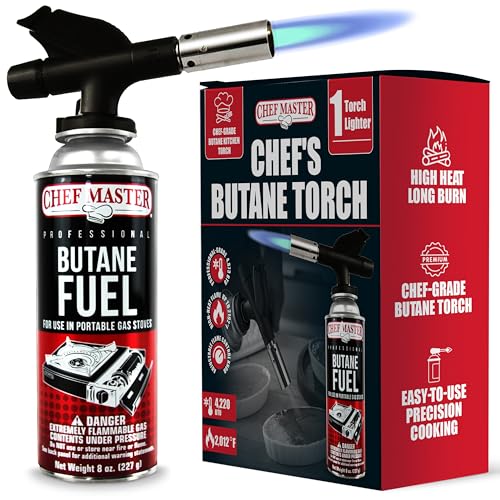
PROFESSIONAL-GRADE CULINARY TORCH – Use our blow torch for cooking to master finishing techniques like caramelizing crème brûlée, browning meringue, melting cheese, and searing meats with consistent, controlled flames. The creme brulee torch is built from high-quality, durable materials to withstand regular use in both home and professional kitchens.
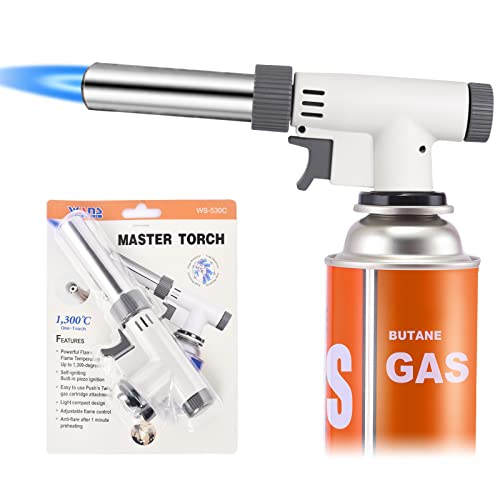
Compatible: This butane torch kitchen blow lighter is compatible with standard butane gas cartridge, which you can buy from amazon or any hardware store. Ergonomic light compact design fits easily into a hand, easy to operate and carry. Note: Primary branded aerosol butane gas only.
4 Mistakes That Ruin Food When Using a Blowtorch
Using the correct torch flame is crucial; a dark blue, hissing flame ensures complete combustion, preventing a foul, fuel-infused taste. An orange or yellow flame indicates incomplete combustion, which can ruin the flavor of your dish. Always adjust your torch until the flame is steady and blue before applying it to food.
Additionally, your technique matters. Moving the torch slowly and stationarily creates hot spots that can burn and ruin your food. Instead, sweep the torch back and forth evenly over the surface to distribute heat uniformly. For consistent results, using a cast iron skillet on a grill provides similar even heat distribution.
Flame distance is another critical factor. Holding the torch nozzle too close—less than one inch—scorches the surface, causing blackening and burning. Keep the nozzle about two inches away from the food to achieve a controlled, even finish.
Lastly, beware of torching foods that don’t suit direct heat. Applying heat too close to fatty meats or cheese can produce a burnt, bitter flavor. For cheese, increase the distance to melt without blackening. Avoid torching breadcrumbs entirely, as they tend to burn and turn bitter quickly. For a similar layered effect, consider cooking Dutch oven potatoes that combine bacon, onions, and cheese for a rich, savory dish. If you plan to travel with a blowtorch for cooking, remember that cast iron skillets are prohibited in carry-on luggage due to safety concerns, so pack them only in checked bags.
Keep Your Blowtorch Leak-Free With These Simple Checks
To keep your blowtorch leak-free, start with a soap-and-water test. Apply the solution to all connections, and watch for bubbles—which indicate a leak. Always perform this check in a well-ventilated area free of sparks; never use a flame for leak detection. Before testing, inspect hoses for cracks, wear, or damage, and tighten loose joints with a wrench. Examine valves and replace any damaged O-rings or gaskets immediately to ensure compatibility with your fuel, as a degraded O-ring is a common cause of persistent leaks in older models. If you are looking for a flexible cooking method instead, consider using a non-stick skillet set on the stovetop to gently cook eggs without flipping. When refilling, purge old gas by venting the tank, then fill it upside down and wait five to ten minutes for the fuel to settle. After each refill, listen carefully for hissing sounds, then re-test with soapy water to confirm no leaks have developed. Make sure tank and torch valves are fully closed before attaching the tank to prevent accidental leaks. Performing these simple checks regularly keeps your torch safe and ready for use. For precise results on desserts, move the torch smoothly across the surface to achieve even caramelization without burning. For a savory crust on steak, patting the meat dry before cooking is essential for browning and flavor development.
Store Your Cooking Torch Properly to Prevent Accidents
To prevent accidents, you should detach the torch head from the fuel cylinder after each use. This practice minimizes the risk of slow gas leaks caused by a cracked O-ring or a faulty valve. When storing, keep the torch head in a drawer or a metal toolbox to avoid accidental damage. Store the fuel cylinder separately in a cool, dry spot below 50°C to prevent pressure buildup or degradation. Similar safety principles apply when braising with wine to deglaze a pot, as the flammable alcohol requires careful handling near an open flame.
Always place the cylinders with the relief valve facing upward to reduce the chance of leaks and keep them away from heat sources and sunlight. Cover the valve with the protective black lid when not in use to shield it from dust and debris. Store all components high up in a locked cabinet out of children’s and pets’ reach. Proper organization and storage significantly lower the chances of accidental fires or leaks, ensuring safer use over time.