Thinking about using an infrared thermometer to check your candy’s temperature? While it can be a handy tool, it’s not foolproof—steam and bubbles can throw off your readings and cause slip-ups, especially with tricky stages like caramel or toffee.
By the end of this, you’ll see when an infrared thermometer works and when it’s best to stick with a traditional probe for perfect candy results.
Why Steam and Bubbles Make Infrared Unreliable for Candy
Bubbles scattering the infrared signal makes it unreliable for measuring candy temperature. The bubbles distort the light path, preventing your sensor from accurately reading the liquid underneath. You might see a surface temperature that looks correct, but it’s misleading. The bubbling action mixes evaporation with the infrared signal, leading to errors that can reach up to 10°C. Instead of tracking the internal heat of the candy, you’re measuring a chaotic surface phenomenon that reflects energy depletion and surface agitation. This is unlike cooking with a cast iron skillet on a grill, where the solid, stable surface allows for reliable infrared readings. For accurate readings, you must first stir the liquid vigorously to match the surface temperature with the bulk temperature below. In contrast, baking sourdough in a Dutch oven creates a sealed environment that reliably traps steam for consistent crust formation, avoiding the surface interference problems seen with boiling candy.
How Steam and Bubbles Throw Off Infrared Readings?
Steam and bubbles significantly throw off infrared thermometer readings because they create a chaotic surface that distorts temperature measurement. Steam acts as a physical barrier, absorbing and scattering infrared energy, so you end up measuring the cooler vapor cloud instead of the actual candy surface. Rapidly forming bubbles cause the surface to shift constantly, exposing cooler liquid beneath and lowering the apparent temperature. White foam reflects infrared energy differently than clear syrup, which alters emissivity calculations and leads to inaccurate readings. Even when you use proper whisking techniques, the unpredictable movement of the surface prevents a stable, accurate measurement. This fluctuation makes it impossible to determine the precise heat stage needed for correct sugar development and can produce inconsistent, misleading data, especially since the thermometer detects localized cooler spots from bursting bubbles rather than the true core temperature. For reliable candy making, a digital thermometer is inexpensive and provides much more consistent readings because it measures the liquid’s internal temperature directly. Alternatively, you can restore accuracy by adopting a vinegar spray solution to clean your equipment, ensuring no residue disrupts measurements.
The 1–2°C Precision Infrared Thermometers Can’t Meet
Infrared thermometers cannot meet the 1–2°C accuracy required for candy stages like caramel and toffee. While they provide instant readings, their accuracy tolerances typically range from ±1 to ±2°F, which often exceeds the tight 0.5–1°C window necessary at these critical points. Even a deviation of just 1.5°F can ruin the texture, leading to failures and wasted batches. In contrast, high-precision digital probes consistently achieve ±0.5°F accuracy within the 200–310°F temperature range. Similarly, FoodSaver bags are designed to withstand boiling temperatures up to 212°F and meet food safety standards, making them reliable for sous vide applications where precise temperature control is critical. Relying on less accurate infrared models risks inconsistent results, especially when final product quality depends on precise temperature control. Without verified accuracy across these high-temperature ranges, your candy’s structural integrity is compromised, threatening both quality and production efficiency. For tasks that require temperatures exceeding 300°F, a specialized candy thermometer is essential to avoid the limitations of multipurpose tools, just as a culinary blow torch is preferred over a lighter for evenly caramelizing crème brûlée without damaging the custard.

ACCURATE FAST READINGS (No More Burned Candy) --- Our candy deep fry thermometer provides instant and accurate temperature readings within seconds. Its advanced technology ensures precise measurements, allowing you to monitor the temperature of your food with confidence.

Pot Clip Design for Safer Operation: This candy thermometer digital with clip can be fixed to the pot so you can free your hands to focus on the cooking, and protect your hands from the hot

PROGRAMMABLE TEMPERATURE ALERT: Set your target temperature and a green light illuminates the moment your oil or sugar syrup hits the mark; eliminates guesswork so candy stages and fried foods come out right every time
Candy Types That Work (And Fail) With Infrared
Infrared devices are unreliable when aimed at bubbling sugar syrups or hot candies reaching 300°F or higher. The steam produced at these temperatures skews the laser readings by 10 to 25 degrees Fahrenheit, making your measurements inaccurate and ruining your batch. Hard candies at soft-ball or hard-crack stages and toffee cooked at 350°F also present the same problem because the excess steam interferes with the laser’s ability to get a precise temperature. Using infrared in these environments is ineffective because the steam distorts the laser signals, regardless of ambient conditions. To get reliable readings, target calm, non-bubbling surfaces instead—anything with minimal steam or surface agitation. For instance, sous vide cooking relies on temperature control in calm water, making it a far more dependable method for achieving consistent results. For bakers working with dough, a 5.5-quart capacity Dutch oven provides the ideal balance of heat retention and rise.
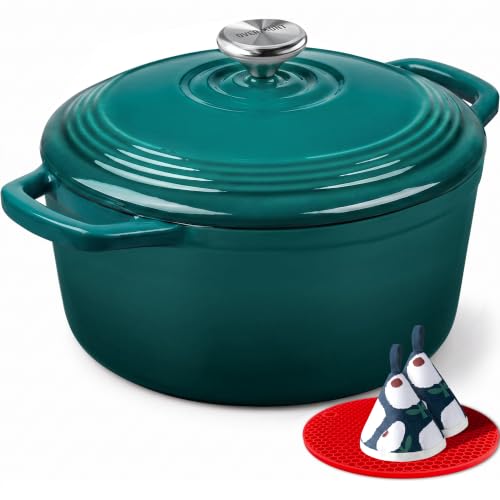
IDEAL FOR FAMILY MEALS - Perfectly sized for families of 3–5 people, this 5.5QT Dutch oven handles everything from hearty soups and stews to one-pot dinners, pasta dishes, and Sunday pot roasts. Spacious enough for a whole chicken yet practical for everyday cooking, it delivers the ideal balance between daily family meals and weekend entertaining. Also well-sized for artisan bread bakers who want one pot for both family dinners and sourdough baking.
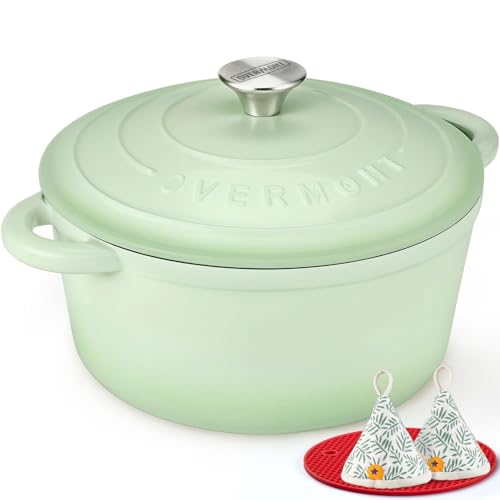
IDEAL FOR FAMILY MEALS - Perfectly sized for families of 3–5 people, this 5.5QT Dutch oven handles everything from hearty soups and stews to one-pot dinners, pasta dishes, and Sunday pot roasts. Spacious enough for a whole chicken yet practical for everyday cooking, it delivers the ideal balance between daily family meals and weekend entertaining. Also well-sized for artisan bread bakers who want one pot for both family dinners and sourdough baking.

IDEAL FOR FAMILY MEALS - Perfectly sized for families of 3–5 people, this 5.5QT Dutch oven handles everything from hearty soups and stews to one-pot dinners, pasta dishes, and Sunday pot roasts. Spacious enough for a whole chicken yet practical for everyday cooking, it delivers the ideal balance between daily family meals and weekend entertaining. Also well-sized for artisan bread bakers who want one pot for both family dinners and sourdough baking.
What Specs to Look for in a Candy-Making Infrared Thermometer
The ideal infrared thermometer for candy making should have a range of at least 100°F to 600°F. This covers essential stages like hard crack at 300–310°F and deep-frying temperatures. Instant surface readings are crucial, so look for a response time under 0.5 seconds to get quick, reliable measurements. Emissivity adjustment is more important than calibration; set it between 0.1 and 1.0 to accurately reflect the shiny, liquid sugar surface. A laser pointer helps you aim precisely at the pot’s surface, avoiding steam interference. A backlit, dual-unit display is valuable for reading temps quickly in low-light conditions. Keep in mind that infrared accuracy typically sits at approximately ±1.8°F, so you’re trading a bit of precision for speed and safety. A non-contact design prevents burns and makes scanning safer, while a heat-resistant, ergonomic grip ensures steady handling during measurements. The fat from such cooking polymerizes to create a durable, non-stick coating that resists buildup over time. For consistent results, these thermometers can also check the temperature of your sugar syrup to ensure it remains stable throughout the cooking process. Similar to placing charcoal briquettes evenly on a Dutch oven for uniform heat, consistent scanning technique is vital for accurate sugar temperature readings.

𝐕𝐞𝐫𝐬𝐚𝐭𝐢𝐥𝐞 𝐓𝐨𝐨𝐥𝐬: Infrared technology allows you to measure various objects at home and outdoors; Use it for 𝒎𝒆𝒂𝒕, 𝑫𝑰𝒀 𝒄𝒂𝒏𝒅𝒚, 𝒐𝒗𝒆𝒏𝒔, 𝒈𝒓𝒊𝒍𝒍𝒊𝒏𝒈, 𝒇𝒐𝒐𝒅, 𝒄𝒐𝒐𝒌𝒊𝒏𝒈, 𝒂𝒖𝒕𝒐𝒎𝒐𝒕𝒊𝒗𝒆 𝒖𝒔𝒆, 𝑨/𝑪, 𝒓𝒆𝒇𝒓𝒊𝒈𝒆𝒓𝒂𝒕𝒐𝒓𝒔, etc.

🎁【High Accuracy】 DESOMIYE laser thermometer gun adopts the latest high-sensitivity temperature sensor, which can measure the temperature range of -50°C~600°C (-58°F~1112°F) in only 0.5 seconds. For best results, the reader should be 14 inches away from the object.

Temperature measurement range:-50℃-500℃ (-58℉-932℉)Display resolution: 0.1 ℃ or 0.1 ℉
When You Can Trust Infrared: Calm Sugars and Equipment Checks
Infrared thermometers are reliable only when the sugar surface is calm and vapor-free. When your candy mixture has stopped bubbling and the steam has cleared, you can trust the infrared device to give accurate surface temperature readings. This calm, vaporless environment ensures the sensor captures the true temperature without interference from bubbles or steam. Precise surface readings help prevent sugar crystallization issues and keep the color consistent during cooling. For these measurements, you must account for emissivity by adjusting the thermometer mode or using techniques like spraying the surface with cooking oil to ensure accuracy.
You can also use infrared thermometers for quick equipment checks. Simply scan the exterior of your pots and stoves to identify hot spots that could scorch your batch. Before starting, verify the heating element’s temperature to ensure proper heat levels. Once you have a reasonable estimate, you can check cooling slabs to confirm they’re at a safe temperature for pouring hot sugar.
How to Calibrate an Infrared Thermometer for Candy
To calibrate your infrared thermometer for candy making, start with the ice water method. Fill a container about two-thirds full with crushed ice, cover with cold water, and stir to ensure even temperature. Set your device’s emissivity to 0.98 for best accuracy on water surfaces. Aim the thermometer at the water’s surface without touching the water; the reading should be close to 32°F. If it’s off, adjust the emissivity or note the discrepancy for future calibration. Just as with glass tube thermometers, consistent results rely on verifying that the indicator stabilizes at the correct reference point. Using ultra-pure butane in a torch lighter prevents residue buildup and ensures a clean burn, which is similarly important for maintaining precision in candy-making tools. Similarly, the heat retention of a Dutch oven makes it ideal for budget-friendly dishes like whole chicken stew and bean chili.
Next, use the boiling water method. Bring water to a rolling boil at sea level, then aim the thermometer at the water’s surface, avoiding steam. The device should read approximately 212°F. Record any difference between your reading and this standard. You can then apply this offset to your target temperatures for candy. If you want more precision, a blackbody calibrator set to a known temperature can be used, allowing you to directly adjust your thermometer‘s settings and ensure consistent accuracy. Always recheck after any adjustments to verify that the calibration remains accurate. For the most reliable results, ensure proper alignment and stabilization time before taking each measurement.

𝐕𝐞𝐫𝐬𝐚𝐭𝐢𝐥𝐞 𝐓𝐨𝐨𝐥𝐬: Infrared technology allows you to measure various objects at home and outdoors; Use it for 𝒎𝒆𝒂𝒕, 𝑫𝑰𝒀 𝒄𝒂𝒏𝒅𝒚, 𝒐𝒗𝒆𝒏𝒔, 𝒈𝒓𝒊𝒍𝒍𝒊𝒏𝒈, 𝒇𝒐𝒐𝒅, 𝒄𝒐𝒐𝒌𝒊𝒏𝒈, 𝒂𝒖𝒕𝒐𝒎𝒐𝒕𝒊𝒗𝒆 𝒖𝒔𝒆, 𝑨/𝑪, 𝒓𝒆𝒇𝒓𝒊𝒈𝒆𝒓𝒂𝒕𝒐𝒓𝒔, etc

Pot Clip Design for Safer Operation: This candy thermometer digital with a clip can be fixed to the pot so you can free your hands to focus on the cooking, and protect your hands from the hot

Preset & alarm function: Never overcook again with this programmable oil thermometer that alerts you upon reaching your preset cooking temperature with its flashing backlight
Pair Infrared With a Traditional Candy Thermometer
Pairing an infrared thermometer with a traditional candy thermometer offers a balanced approach, combining instant surface readings with internal temperature accuracy. Use the infrared to monitor the exterior of your pot and identify hotspots before they cause scorching. This quick check ensures even heating and protects your equipment. Meanwhile, rely on the traditional thermometer to track the precise internal temperature, especially during critical stages like soft-ball or hard-crack. Always verify the infrared’s accuracy by testing it in boiling water first, establishing a reliable baseline. To improve surface readings, you should add oil to improve emissivity when measuring the pot’s exterior. Cross-referencing both devices at each sugar stage helps prevent errors and ensures your candy reaches the perfect consistency. The infrared provides rapid surface insights, while the traditional thermometer guarantees internal precision—together, they make troubleshooting and timing more reliable. In clinical or home settings, using a probe cover on the traditional thermometer maintains hygiene and prevents cross-contamination between uses. For comparison, note that sous vide cooking offers precise temperature control to customize egg doneness, similarly requiring accurate thermal management to achieve specific textures.

Wide Temperature Range: Measures temperatures from -58℉ to 1112℉ (-50℃ to 600℃), making it perfect for a variety of applications, including cooking, pool maintenance, oven temperature checks, and candy making

More Valuable 2-in-1 Set:Include a temp gun and instant read thermometer; The laser thermometer with range from -58 to 1022 °F supports food prepare, auto maintenance, home repairs, while the cooking thermometer ranging from -58~572 °F gets internal temps for BBQ, grill, smoker, deep-frying and candy making

【Highly Accurate & Adjusts to Any Surface】Designed with the latest thermopile sensor technology, the infrared laser thermometer gun is accurate to +/-1.5%; Improve this pizza oven thermometer gun measurements by adjusting the emissivity from 0.1–1.0 to match the surface material being measured
Why Contactless Temperature Checks Are Safer for Hot Sugar
Contactless infrared temperature checks are much safer for hot sugar because they eliminate burn risks entirely. You don’t need to reach over boiling syrup or handle fragile glass thermometers near intense heat. Traditional probes require you to get dangerously close to the sugar, especially when it reaches the hard crack stage, which is a significant hazard. In contrast, infrared thermometers allow you to measure the surface temperature from a safe distance, protecting your hands and arms from splashes or burns.
Using infrared tools also enables you to observe temperature gradients across the pot without risking contact. Since sugar crystallization often starts at the surface, monitoring that critical zone becomes easier without disturbing the mixture or risking burns. Keep in mind, infrared measurements focus only on the surface and can be affected by steam and bubbles, which may skew readings by up to 10°C. However, during the most volatile stages, maintaining distance with infrared is the safest choice. For a different kind of precision in food preservation, consider using the water displacement method to seal bags without a vacuum machine, pushing air out via submersion.