You’ll sear your steak in a preheated stainless steel or non-stick skillet with high-heat oil for 1–2 minutes per side, then transfer it directly to a 400°F oven. For 1-inch steaks, cook 5–7 minutes until reaching 125°F internally. Let it rest on a wire rack for at least five minutes—this allows carryover cooking and juice redistribution. Finish with butter, fresh herbs, and fleur de sel. The specific temperatures, timing adjustments, and technique variations depend on your steak’s exact thickness and desired doneness level.
Alternative Cookware Options for Oven Steak Preparation
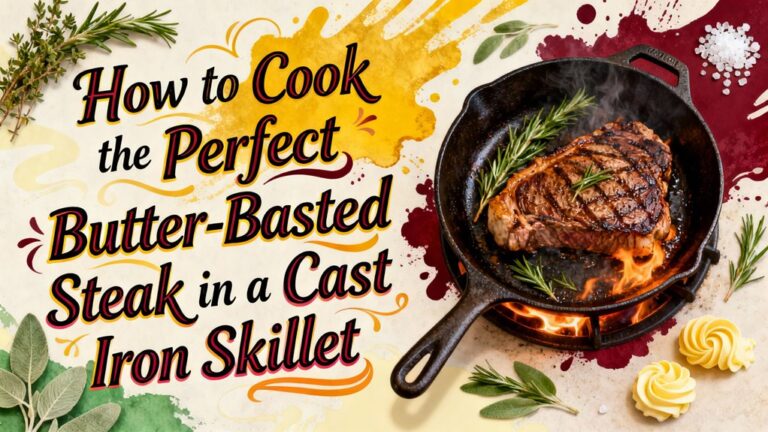
When you’re preparing steak in the oven, your cookware choice directly impacts heat distribution, browning capability, and overall results. Stainless steel benefits include superior heat retention and seamless stovetop-to-oven shifts, handling temperatures up to 450°F without degradation. Non-stick advantages allow careful medium-high searing with minimal oil, though you’ll need oven-safe cookware and cautious temperature management. Air fryer efficiency eliminates transfer complications entirely—preheat your basket at 390°F and cook individual steaks with minimal oil for juicy results. Broiling techniques work effectively on standard sheet pans or dedicated broiling pans; preheat your pan in the oven, then add a final one-minute broiler step for enhanced browning and seared flavor development. Additionally, cast iron cookware’s even heat transfer can significantly benefit the searing process, leading to a more flavorful steak. Before cooking, ensure any cast iron is clean and well-seasoned, as seasoning oil is crucial for maintaining its non-stick properties and overall performance.
Preparation and Seasoning Techniques for Optimal Results
Before you’ll need to select a quality steak that’s 1 to 1.5 inches thick—a dimension that allows proper crust formation while preserving a juicy interior. Remove your steak from refrigeration 30 minutes before cooking to reach room temperature, ensuring even heat distribution throughout the meat structure.
Pat your steak dry with paper towels to eliminate surface moisture that inhibits browning. Brush both sides evenly with 1/2 tablespoon of high-heat oil like avocado or vegetable oil for uniform cooking.
Apply kosher salt, freshly cracked black pepper, and garlic powder in equal proportions to both sides generously. Consider dry brining by salting your steak 40 minutes ahead for enhanced flavor infusion. Additionally, using a cast iron grill pan can achieve a beautifully seared crust if you’re cooking on a compatible stovetop. Fresh thyme and rosemary sprigs provide complementary herbaceous notes that elevate your finished dish. Cooking meat in a Dutch oven can also lead to tender, juicy results when using savory flavors and techniques.
Stovetop Searing Method Before Oven Finishing
Your seasoned steak‘s next stop is the stovetop, where a proper sear develops the flavorful crust that distinguishes oven-finished steak. You’ll place your steak in a preheated heavy-bottomed skillet—stainless or carbon steel—heated to ideal pan temperature over medium-high heat. Add just one tablespoon of high smoke point oil like canola or vegetable oil, spread evenly across the surface. Position your steak without touching others, then sear undisturbed for 1–2 minutes per side, listening for a loud sizzle indicating sufficient heat. Flipping only once, ideally moving to a hotter pan section is recommended to ensure an even sear. The pan’s heat retention guarantees consistent browning and crust development. Additionally, using oil with a high smoke point helps prevent burning during the searing process. Note that the key factor in achieving a great sear is boiling water to loosen stubborn food debris in case of any spills on the skillet. Thicker cuts may require up to 3 minutes per side. This vital searing step creates the golden-brown, crisp exterior you’ll finish in the oven.
Oven Temperature and Cooking Duration Guidelines
Once you’ve achieved that perfect golden-brown crust on the stovetop, transferring your steak to a preheated oven is where precise temperature control determines your final result. Your oven temperature depends on steak thickness: use 400°F for 1-inch steaks, 375°F for thicker cuts (1.5 inches or more), and 450°F for thinner varieties under 1 inch. It’s essential to use an oven-safe thermometer to ensure accurate readings as your steak cooks in the oven. In addition, knowing the internal temperature requirements for meat will help you avoid undercooking or overcooking your steak.
Cooking times vary accordingly. A 1-inch steak reaches medium-rare in 5–7 minutes at 400°F, while 1.5-inch steaks require 8–10 minutes at 375°F. For medium doneness, add 1–2 minutes to these timelines. Always use an instant-read thermometer, removing your steak at 125°F for medium-rare or 135°F for medium—it’ll rise another 5°F during resting. Regular temperature checks with a meat thermometer do not result in juice loss, so frequent probing is key to achieving your desired steak temperature.
Resting and Finishing Procedures Post-Cooking
The moment you pull your steak from the oven isn’t when your cooking’s truly finished—it’s when proper resting begins its critical work. Transfer your steak to a wire rack immediately, allowing air circulation beneath the meat and preventing moisture pooling. Rest for at least five minutes—ten minutes maximizes juice retention. During this interval, residual heat distributes evenly while internal temperature rises 5-10°F through carryover cooking. Your meat’s delectable juices reabsorb into the tissue structure, ensuring optimal tenderness as recommended for steaks. To ensure the best cooking results, it’s wise to check your oven’s true temperature before starting, especially for temperature-sensitive foods like steak. Once resting completes, apply your finishing touches strategically. Spoon garlic and thyme-infused melted butter across the surface. Grind fresh black pepper to enhance beefiness, then crown with kosher salt or flaky sea salt for textural contrast. Finally, slice against the grain and serve immediately, ensuring peak tenderness and flavor delivery.