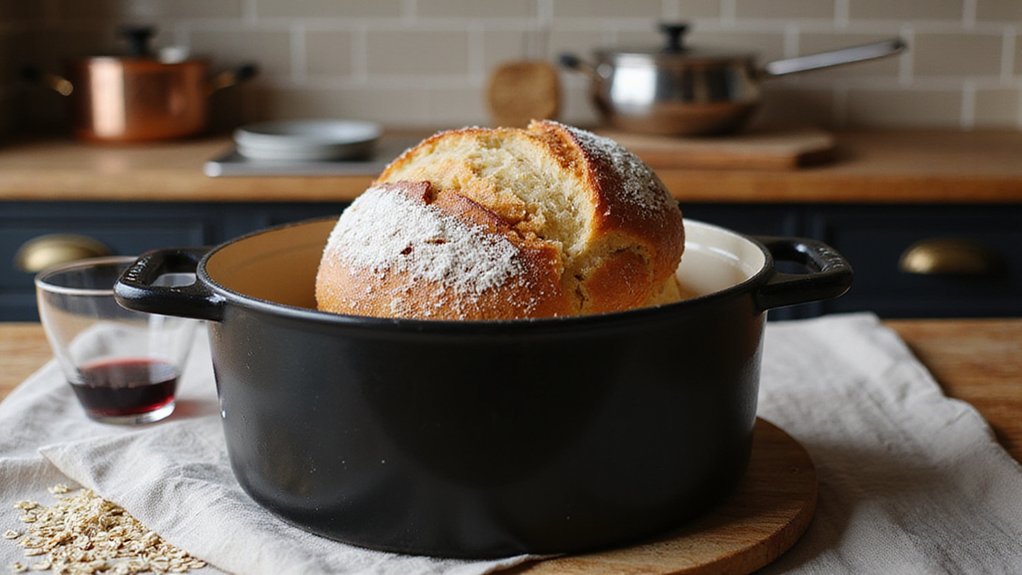
Wondering how to make bakery-quality bread at home without kneading?
With just four simple ingredients and your Dutch oven, you can craft a crusty, airy loaf that rivals artisan bread.
The secret lies in a no-knead method that takes time but requires minimal effort.
Read on to learn how to perfect this easy, foolproof process.
Why No-Knead Bread Works So Well in a Dutch Oven
Because the Dutch oven traps steam, your bread develops an artisan crust and airy crumb without needing specialized equipment. Its sealed environment locks in moisture, keeping the dough surface elastic and allowing for maximum oven spring before the crust hardens. The condensed steam gelatinizes the starches on the surface, creating that glossy, crisp crust you typically only get with professional baking tools like a brick oven or steam-injected oven. Unlike other vessels, a Dutch oven distributes heat evenly, mimicking a bakery’s brick hearth and ensuring consistent results. A cast iron Dutch oven’s exceptional heat retention also ensures the baking environment stays stable throughout the entire process. This even heat distribution mirrors how the same pot can slow-cook a hearty bean and bell pepper chili using simple pantry staples.
Getting your dough to rise properly with a no-knead method mainly relies on patience and proper fermentation. Long, slow fermentation activates the yeast naturally, developing complex flavors without kneading. Extended hydration helps gluten form gradually, resulting in better structure and elasticity. The trapped steam inside the Dutch oven, combined with stable, even heat, creates the ideal internal temperature for a firm, airy crumb. This method of precise heat control is similar to using a sous vide for cooking eggs. Ultimately, this straightforward process emphasizes simplicity and reliability over complicated techniques.

Even Heat Distribution Retention: This Umite Chef Dutch oven Made with heavy-duty enameled cast iron, ensures even heat distribution for perfect searing and slow cooking, locking in flavors. thickened walls lock in heat for slow braising, searing, and baking. Unlike thin pots that scorch food, this professional-grade Enameled cast iron potSuperior heat retention after preheating (allow 5-7 mins for even distribution). CRITICAL: Always cool naturally for 45+ mins before cleaning. Thermal shock (hot-to-cold contact) cracks enamel. USE TIP: Preheat 2-3 mins on medium-low only

Pre-seasoned 2-in-1 cast iron dutch oven: The 2-In-1 cast iron dutch oven pot with skillet lid has been burned with vegetable oil,(no synthetic coatings or chemicals). The shallow skillet that can be used as a lid

FEAST & BATCH COOKING - Designed for large families, holiday gatherings, and weekend meal prep, this 7QT Dutch oven comfortably serves 5–8 people. Its generous capacity easily handles family-size soups, large-batch stews, pot roasts, and whole chickens without overcrowding ingredients. Perfect for Thanksgiving recipes, holiday entertaining, and batch cooking with fewer rounds in the kitchen.
The Exact Ingredients and Tools for No-Knead Bread
To make no-knead bread, you’ll need the following specific ingredients and tools. Measure 3 to 3½ cups of all-purpose or bread flour; this high amount ensures enough structure while maintaining the dough’s wet, shaggy texture. Use 2 cups of warm water, which hydrates the flour fully and creates a dough with a hydration ratio of 75–80%, essential for gluten development without kneading.
Add 2 teaspoons of instant yeast for reliable fermentation, and 1½ teaspoons of salt to enhance flavor and strengthen the dough’s structure. This simple ingredient set allows for a long fermentation process that develops flavor and texture naturally.
For tools, gather a large 4-quart mixing bowl to hold the dough comfortably during fermentation. Use a wooden spoon to mix the ingredients thoroughly. A cast iron Dutch oven with a capacity of 3 to 6 quarts and a tight-fitting lid is critical to create a steamy environment that mimics professional bread ovens, resulting in a crispy crust. Prepare plastic wrap to cover the bowl during the 12 to 18 hours of fermentation, aiding in moisture retention. Parchment paper helps lift and transfer the dough safely without sticking. A well-floured work surface is necessary for shaping the dough into a round loaf. Finally, oven mitts are a must for handling the preheated Dutch oven at 450°F, preventing burns and ensuring safety. If restoring a rusty cast iron Dutch oven, a vinegar spray solution can be used to remove rust before seasoning.

EXCELLENT HEAT RETENTION: Our dutch oven crafted with durable cast iron with a glossy enamel that ensures distributing heat evenly and retains heat nicely. Ideal for slow-cooking dishes, as the cast iron pot maintain a steady temperature throughout the cooking process. Made of food-grade material without any chemicals. Non-toxic, PFOA & PTFE free. Plus, unlike other conventional cast iron dutch ovens, you can stew acidic sauces and soups without leaving behind an unpleasant metallic taste.

Even Heat Distribution Retention: This Dutch oven Made with heavy-duty enameled cast iron, ensures even heat distribution for perfect searing and slow cooking, locking in flavors. thickened walls lock in heat for slow braising, searing, and baking. Unlike thin pots that scorch food, this professional-grade Enameled cast iron pot maintains steady temperatures
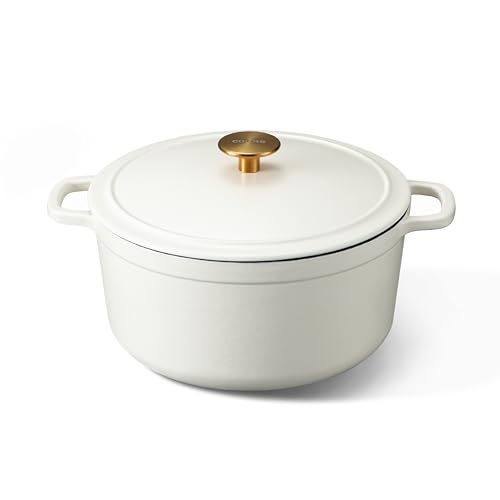
Superior Even Heat Control: One-piece thick cast iron delivers uniform heat with zero hot spots and excellent heat retention, ideal for searing, braising and crusty bread baking. Preheat on medium-low heat; cool naturally before washing to prevent enamel cracking.
How to Mix the Dough Without Kneading (It’s Easier Than You Think)
Mixing no-knead dough is straightforward and doesn’t require any special skills. First, combine the dry ingredients—flour and yeast—in a large bowl. Then, add warm water and stir with a wooden spoon handle or a dough whisk until no dry flour remains. The goal is a wet, shaggy, sticky mixture rather than a smooth dough. Use wet hands to press any remaining dry patches into the mass instead of kneading. This technique promotes autolysis, where gluten forms naturally as the flour absorbs water, so you don’t need to knead mechanically. Alternatively, folding the dough’s edge over the middle repeatedly in a circle helps evenly distribute temperature and strengthen gluten without intensive kneading. The high hydration dough benefits from a natural, healthy, and long-lasting non-stick surface created by proper seasoning techniques used on cast iron, though this pan care applies to your Dutch oven as well.
Use only about a quarter teaspoon of yeast for every three cups of flour to prevent over-fermentation during the long resting period. The dough’s high hydration level makes it easier to develop its structure without kneading. Time, not physical effort, does the work of creating elasticity. Focus on a fully hydrated, rough mass rather than a perfectly shaped ball, and your dough will be ready for the next step with minimal fuss.

【Even Heating & Outdoor Cooking】Constructed from premium cast iron, this black dutch oven pot with lid delivers superior heat retention and distribution for consistent, even heating throughout both the bottom and sidewalls. This enables energy-efficient outdoor cooking while the durable, non-toxic finish withstands rigorous camp use
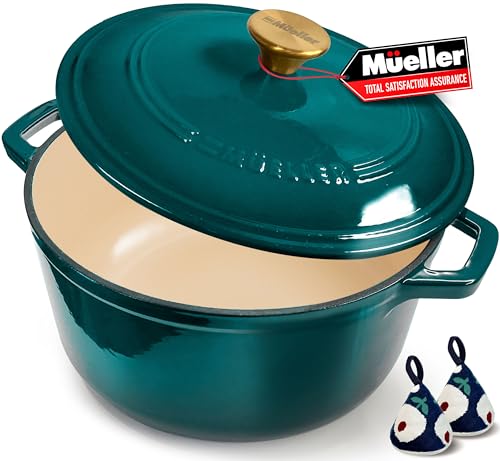
BREAD BAKER'S DUTCH OVEN, 500°F OVEN-SAFE, SOURDOUGH-READY – one of the highest ratings in its class – delivering the sustained heat that sourdough, artisan bread, and pizza dough demand. Thick cast-iron walls trap and circulate heat like a brick oven, producing bakery-quality crusts at home. The tight-sealing lid features raised self-basting nodes that continuously recirculate steam: a perfect moisture chamber, every single bake.

PFAS-FREE & NON-TOXIC COOKWARE: ATTENTION: If your manual mentions "enamel" or "low-medium heat only", it is incorrect. This is 100% pure cast iron cookware! Not Enamel-Coated: Safe for High-Heat Cooking! Metal utensils OK (avoid sharp edges) Every Umite Chef cast iron pot has been burned with 100% natural, food-grade vegetable oils—absolutely zero PFAS, PFOA, PTFE, synthetic coatings, or toxic chemicals. Our seasoning naturally builds with use, developing a superior non-stick surface over time while ensuring oven-to-table safety
How Long to Let the No-Knead Dough Rise
Let the no-knead dough rise for about 18 hours at room temperature. This slow ferment allows the yeast to activate fully, developing complex flavors and a strong gluten network. During this period, the dough should surface with small bubbles and a shiny, domed appearance, indicating it’s ready for the next step. In warmer kitchens, reduce the rising time slightly to prevent over-proofing, while cooler environments may require a longer rise. Extending the rise beyond 18 hours can deepen flavor even more, but too long risks over-fermentation. If you’re pressed for time, a shorter 2 to 3-hour rise will work but will sacrifice some depth of flavor. After the initial fermentation and once the dough doubles in size, you can refrigerate it for up to 12 hours to further develop taste with minimal effort. Similar to how savory Dutch oven recipes combine chicken, rice, and potatoes in a single pot, this method streamlines preparation while enhancing overall richness.
Fold and Shape the No-Knead Dough Without Sticking
To fold and shape no-knead dough without sticking, wet your hands lightly. This prevents the dough from adhering without adding extra flour, which can make the bread dense. Embrace the dough’s high hydration—its stickiness indicates proper moisture. Lift one side of the dough high, then fold it over the center. Rotate the bowl a quarter turn and repeat the folding process on all four sides. Perform 8 to 10 folds in total, re-wetting your hands between each set. Rest the dough for 30 minutes between rounds, and repeat the process 3 to 6 times. As you go, the dough’s resistance to stretching will increase, showing its gluten structure is strengthening. After the folding process, let the dough rest on the counter for 3-4 hours to allow it to triple in volume and develop further flavor. This resting period can also benefit from techniques used in slow-braising, which develop deep flavor over time through gentle, prolonged heat.
When ready to shape, transfer the dough to a floured work surface. Gently press it into a rough ball. Using your hands, roll the dough clockwise into a tight boule—this creates tension on the surface, forming a smooth skin that helps it hold its shape during the final proof. Proper shaping sets the stage for a crust that is crisp and an open crumb inside, especially after steaming in the oven.
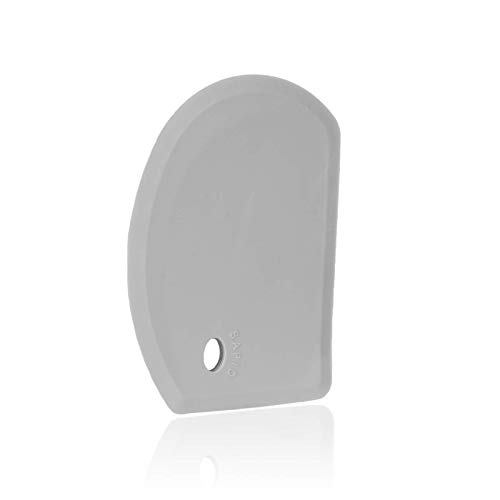
Practical Design : Sapid silicone bowl scraper is composed of stainless steel sheet and premium silicone. The outside of this dough scraper is food-grade silicone, which is equipped with great flexibility and heat resistance. You can easy to handle with the kitchen messes and stacks of dirty bowls.
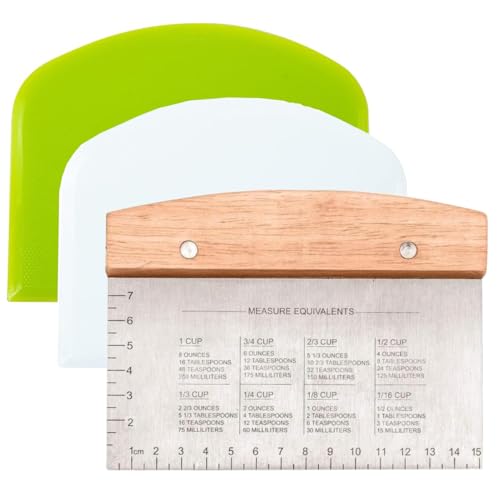
Precision Crafting: Our dough scraper set features meticulously calibrated stainless steel and plastic scrapers with precise measurement guides, enabling you to effortlessly create bakery-perfect portions every time.

Preheat Your Dutch Oven: Here’s Why It Makes the Crust
Preheating your Dutch oven is essential for achieving the perfect crust. You should preheat the pot with the lid on for at least 30 minutes at 450°F. This ensures the oven heats evenly, preventing raw bottoms or scorched tops. A fully preheated Dutch oven creates a stable, high-temperature environment that kickstarts starch-to-sugar conversion, leading to deep caramelization and a beautiful golden-brown crust. This process is similar to seasoning cast iron with Crisco, where a thin, even layer of fat is baked at high heat to build a durable, nonstick finish. Because the Dutch oven heats more slowly than the oven air, it may still be 100°F cooler than the thermostat reading when the oven first beeps. Skipping this step or using a cold pot will result in a dull, soggy, or uneven crust that lacks crunch and color. Similar to how torch lighters require premium, highly refined butane to prevent clogging and ensure optimal function, the purity and quality of your heat source impact the final result.

【ALL YOU NEED】Complete set includes 5QT sourdough dutch oven with frying pan lid,bread proofing basket, bread sling, stainless steel scraper, cleaning brush, bowl scraper, wooden-handled dough whisk, bread lame, silicone oil brush,silicone spatula. Sourdough starter kit with dutch oven is ready to use out of the box!
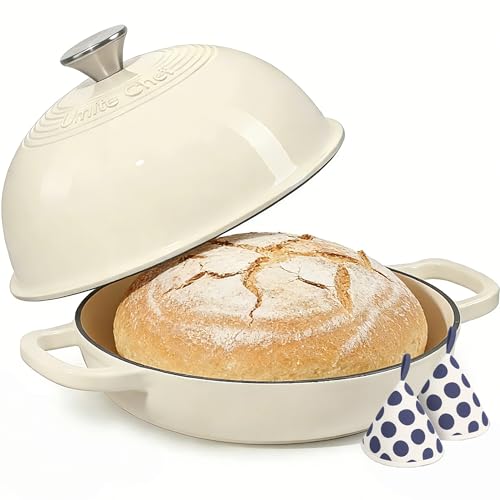
Achieve Professional Artisan Bread at Home - Expertly designed for bread baking, this 6 qt cast iron bread oven creates the ideal steam baking environment. Crafted from high-quality cast iron, it ensures superior heat retention for a crispy, golden crust and impressive oven spring—just like a bakery. The domed cloche lid traps moisture perfectly, guaranteeing delectable results every time
Bake Covered, Then Uncovered: How to Know When It’s Done
To know when your bread is done, perform a simple tap test on the bottom of the loaf. If you hear a hollow sound, the interior is fully baked. The crust should feel firm rather than soft or gummy. Proper fermentation and baking techniques ensure this hollow tone and a rich flavor. Avoid slicing the bread immediately; instead, let it rest for at least 10 minutes to finish the baking process and set the crumb.
Why Cooling No-Knead Bread Before Slicing Matters
Waiting at least 1 to 2 hours before slicing your no-knead bread is essential. This cooling period allows the crumb structure to set, moisture to evenly redistribute, and flavors to concentrate. Cutting into hot bread immediately can tear the soft interior, releasing steam that’s important for crust development. As a result, you risk ending up with a gummy center and a soggy crust. Let your loaf cool completely on a wire rack during this time. Proper cooling ensures clean cuts, prevents crumbs from curling, and helps the crust stay crisp and moisture-rich. Patience is crucial for achieving a beautifully textured loaf. Just as proper storage methods like vacuum sealing significantly extend food freshness by preventing moisture loss and oxidation, allowing your bread to cool completely ensures its internal structure and crust stay at their best.
3 Common No-Knead Bread Mistakes and How to Fix Them
Incorrect hydration levels are a common mistake that can ruin your no-knead bread. If your dough feels too dry, it likely needs more water. To measure accurately, spoon flour into your cup instead of pressing it down, as this prevents packing and excess flour from making your dough stiff. Add water one tablespoon at a time until the dough becomes sticky but manageable. Proper hydration ensures good gluten development and a tender crumb.
Temperature control is also crucial. A slow, warm proof at room temperature encourages proper fermentation and flavor development. Rushing the rise or exposing dough to cold environments can hinder gluten formation and result in a dense loaf. Over-rising, on the other hand, can cause a sour taste and weak structure. If you need to delay baking, refrigerate the dough to slow fermentation without compromising quality.
Preheating your Dutch oven thoroughly is essential for creating a steamy crust. Make sure to heat it at 450°F for at least thirty minutes before placing the dough inside. This step allows a crust to form quickly once the bread hits the hot surface, resulting in that desirable crisp texture. For precise internal temperature checks of your dough or syrup, a digital probe thermometer is more reliable than an infrared model.
Finally, storage impacts the crust and freshness. Wrap your loaf in a clean cloth instead of plastic to preserve the crust’s crispness without trapping moisture. This way, your bread remains flavorful and crispy longer without becoming soggy.