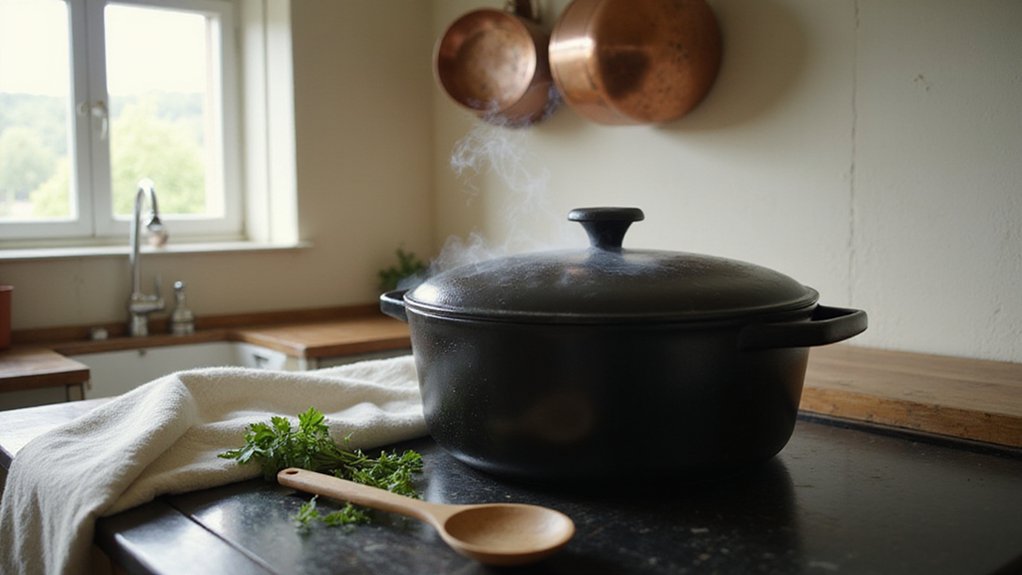
Cooking with a Lodge Dutch oven might seem straightforward, but getting the best results takes some know-how. Whether you’re seasoning it for non-stick performance or managing heat during campfire cookouts, understanding key techniques makes all the difference.
Once you master these basics, you’ll find your Dutch oven more versatile than ever before.
Why Your First Lodge Dutch Oven Deserves Some TLC
Your first Lodge Dutch oven needs some TLC before you start cooking with it. Begin by washing it with warm water and mild soap to remove any factory residues or oils left from manufacturing. Dry it thoroughly with a towel or by placing it on a warm stove to prevent rust. Next, bake it upside down at 400°F for one hour to eliminate any manufacturing odors and to prepare the surface for seasoning. For ongoing maintenance, apply a very thin layer of vegetable oil or lard to all interior and exterior surfaces using a cloth or paper towel. Wipe off the excess oil to avoid a sticky coating. Bake the Dutch oven at 350°F to 400°F for an hour, repeating this cycle until the surface develops a glossy, non-stick finish. To prevent rust during storage, ensure the pot is completely dry, and place a folded paper towel between the lid and the pot to absorb any moisture. If rust does appear, you can use a vinegar spray solution to remove it, but avoid letting it sit for longer than 30 minutes to prevent pitting damage.

YOUR NEW GO-TO SEASONING SPRAY: The Lodge Seasoning Spray is the perfect seasoning spray to maintain your cast iron cookware. It is made of 100% canola oil - no additives or propellants, to protect your cookware and enhance its finish.

YOUR NEW GO-TO ENAMELED CAST IRON CLEANER: The Lodge Enameled Cast Iron Cleaner will keep your enamel cast iron pans looking and cooking its best for generations. This gentle cleanser is entirely bleach and dye-free and specially designed to clean enameled cast iron, inside and out.

PREMIUM CAST IRON CONDITIONING & SEASONING OIL | Made with FOOD grade, solvent-less, refined coconut oil that is safe for food contact and cast iron surfaces. The result is a premium product that does not go rancid.
Pick Silicone or Wood Utensils and Hand-Wash Only
Silicone and wooden utensils are ideal choices for your Lodge Dutch oven because they protect the enameled surface from scratches and chips. Silicone utensils are flexible, allowing you to scrape every bit of sauce without damaging the porcelain. They can withstand heat up to 425°F, making them versatile for various cooking tasks. Wooden utensils are durable and sustainable, but they require careful maintenance. Both types should be hand-washed only—never soak them, as prolonged exposure to water can cause cracking or warping. After cleaning, towel-dry wooden tools immediately and stand them upright to air dry. Silicone handles may be dishwasher safe, but hand-washing with mild soap extends their lifespan. Avoid metal utensils entirely, as they can chip the enamel and cause rust on the exposed cast iron surface. For stubborn residue, boil water in the Dutch oven, then use a wooden spoon to dislodge stuck-on bits. To prevent rust on any exposed cast iron edges, always dry the skillet completely after every wash and apply a thin layer of oil. For long-term ingredient storage, a vacuum sealer offers excellent airtight protection for bulk foods. Following these simple habits helps keep your enameled coating flawless over time. If you need to store leftovers after cooking, consider using the water displacement method to seal bags without a machine for an airtight solution.
Use Low-to-Medium Heat (212°F–230°F) for Stovetop Cooking
Keeping stovetop heat between 212°F and 230°F is essential for protecting your Lodge Dutch oven’s enamel. This range corresponds to low to medium heat on most stovetops. Gradually preheat the pan for 3 to 5 minutes on medium-low to prevent thermal shock that could crack the porcelain. To test if the temperature is right, sprinkle a few drops of water onto the surface: if they dance or sizzle, the heat is at the correct level. If the water evaporates instantly or oil starts to smoke, reduce the heat—you’re cooking too hot. For more precise readings, you can use a leave-in probe thermometer designed for monitoring ambient temperatures during low-and-slow cooking. For even greater precision, this thermometer can help you replicate the sous vide cooking method’s exact temperature control for egg doneness. Maintaining these heat levels also helps achieve the ideal creamy sauce consistency in recipes like hearty chicken pot pie.
Sticking to these precise heat settings helps prevent burnt food and stuck-on messes, making cleanup easier. Always cook in a well-ventilated area, especially when searing or sautéing, since steam and smoke can still build up even at lower temperatures. Match your burner size to the pot’s base to avoid uneven heating and potential warping. When you need to move the hot pot, drag it only once it has cooled. Before returning the pot to the burner, turn down the heat to maintain a safe, steady temperature. These practices help preserve your Dutch oven and ensure consistently good results every time you cook.

STAYS IN THE MEAT WHILE IT COOKS, NO BATTERY EVER: Push the 4.5-inch stainless steel probe into the roast, close the oven door and read the 2.5-inch dial through the glass. Bimetal mechanics: nothing to charge, nothing to replace, nothing to set up.

Temperature Range: 140° to 190°F / 60° to 87°C. Probe Length: 4.75-inches Dial Diameter: 2.375-inches
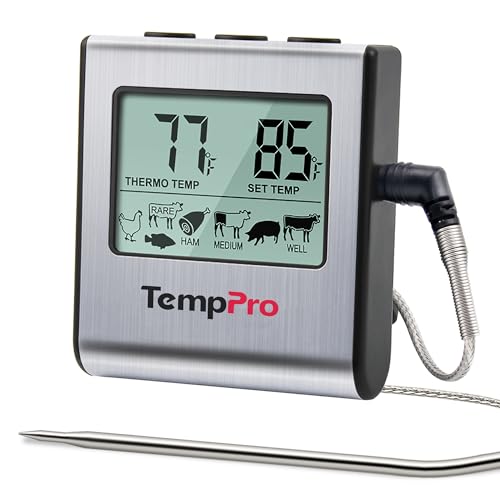
Cook mode with USDA preset temperature settings: TempPro cooking thermometer ideal for meat, oven, smoker or stove top; Programmable alert with preset temperatures for specific foods recommended by USDA; All of the preset temps can be reset to your desired tastes
Master Top-to-Bottom Heat Ratios for Campfire Dishes
Mastering top-to-bottom heat ratios is crucial for campfire cooking with your Lodge Dutch oven. Different dishes require specific coal arrangements to turn out perfectly. For baking, use a 3:1 ratio—three coals on top for every one underneath. This creates a hot and even crust on bread or casseroles. When roasting meat, go for a 1:1 ratio—coals evenly distributed on top and bottom—to cook the meat thoroughly without burning the exterior. Stewing demands a bottom-heavy heat setup, such as a 2:1 or 4:1 ratio, with more coals below to allow gentle flavor melding. For frying or boiling, place all the coals underneath the Dutch oven, leaving the lid free of coals. To determine how many coals to use, double the oven’s diameter in inches and split the total accordingly per the desired ratio. Rotate the pot and lid every 10 to 15 minutes to prevent hot spots and promote even cooking. Proper coal management enhances not only your dish quality but also simplifies outdoor seasoning and cast iron maintenance. For similar results when searing meat, remember to preheat the pan until the oil shimmers before adding the meat to develop a proper crust. Remember to adjust weather adaptations such as using a windshield in windy conditions to maintain a stable temperature. Unlike common non-contact methods that can be inaccurate, rectal thermometers remain the gold standard for reliably measuring internal temperature when checking food doneness. Using a vacuum sealing bag for marinating meat before campfire cooking can also help lock in flavor and ensure even moisture distribution.

Protects your Hands from heat as a lid or bail lifter

YOUR NEW GO-TO LID LIFTER: The Lodge Camp Dutch Oven Lid Lifter keeps outdoor cooking safe and fun. It allows you to easily lift hot lids off your dutch oven as well as transport your dutch oven from an open flame to your table.

YOUR NEW GO-TO COOKING STAND: The Lodge Campfire Cooking Stand turns any fire into an outdoor kitchen with a unique design that encourages airflow and can even hold kindling as it supports cookware. Get ready to turn outdoor meals into memorable moments.
Keep Your Campfire Coals Hot and Steady
To keep your campfire coals hot and steady, shape them in a pyramid for uniform ignition and control airflow through vent management. Starting with a pyramid ensures the coals light evenly, reducing hot spots and promoting consistent heat. As the fire burns, manage airflow by opening intake vents to increase heat or partially closing them to lower temperature without shocking the fire. Once the coals are covered in white ash, they are stable enough to maintain a steady temperature. Regularly manage ash buildup by emptying the ash pan to prevent airflow blockage, but be careful not to disturb the hot coals. To sustain the fire, add small handfuls of pre-lit charcoal every hour, avoiding the shock of cold fuel and maintaining consistent heat. Keep the lid on to trap heat and shield the coals from wind or rain, helping them burn evenly and efficiently.
Rotate the Pot Every 8 Minutes to Fix Hot Spots
Rotating the pot every 8 minutes is more aggressive than Lodge’s recommendation of every 10 to 15 minutes. This quick rotation helps prevent hot spots that can scorch your food or damage your seasoning. To do this, lift the lid, turn the oven a quarter turn clockwise, and then replace the lid facing the opposite direction. This method ensures more even heat distribution and reduces the risk of burnt edges or uneven browning. Be sure to spread the charcoal in a circular pattern underneath and in a checkerboard pattern on top to make cleaning easier and to promote consistent cooking. Pair this rapid rotation with a hot, steady fire to minimize hot spots before they develop, resulting in more uniform and reliable results. Overcrowding the pot, however, can trap steam and cause uneven cooking, so leave space around ingredients for proper searing. This technique for avoiding hot spots is conceptually similar to how a vacuum sealer forces marinade deeper into meat by creating a low-pressure environment. Just as a hot washcloth applied to the forehead can temporarily raise the temperature reading of an infrared thermometer, the rapid rotation here intentionally raises the temperature consistency of the pot.
Cook Soups, Stews, and Chili That Maximize Heat Retention
Preheating your Lodge Dutch oven for 3 to 5 minutes over medium-high heat before adding oil is essential to maximize thermal efficiency. This step ensures the cast iron reaches an even temperature, helping to trap and circulate heat more effectively during cooking. When cooking soups, stews, or chili, maintaining a consistent oven temperature of around 325°F with the lid on promotes gentle, even simmering and fork-tender results.
Seasoning your Dutch oven well is crucial for heat retention and to prevent sticking during long cooking times. Avoid exceeding 500°F when reseasoning or maintaining your pot, as higher temperatures can break down the seasoning layer. To build a good fond—those flavorful caramelized bits—sear proteins in small batches without crowding the pan, then add aromatics like onions and cook on medium-low heat for about 5 minutes. After browning, simmer chili or stew for precisely one hour to develop optimal texture and flavor.
During cooking, stir frequently to distribute heat evenly and prevent hotspots or burning. If you notice any sticking or burning, remove the pot from heat immediately to protect both your meal and the seasoning layer. Proper attention to heat management and timing ensures your soups and stews come out flavorful, tender, and evenly cooked every time.

Even Heat Distribution Retention: This Umite Chef Dutch oven Made with heavy-duty enameled cast iron, ensures even heat distribution for perfect searing and slow cooking, locking in flavors. thickened walls lock in heat for slow braising, searing, and baking. Unlike thin pots that scorch food, this professional-grade Enameled cast iron potSuperior heat retention after preheating (allow 5-7 mins for even distribution). CRITICAL: Always cool naturally for 45+ mins before cleaning. Thermal shock (hot-to-cold contact) cracks enamel. USE TIP: Preheat 2-3 mins on medium-low only

PFAS-FREE & NON-TOXIC COOKWARE: ATTENTION: If your manual mentions "enamel" or "low-medium heat only", it is incorrect. This is 100% pure cast iron cookware! Not Enamel-Coated: Safe for High-Heat Cooking! Metal utensils OK (avoid sharp edges) Every Umite Chef cast iron pot has been burned with 100% natural, food-grade vegetable oils—absolutely zero PFAS, PFOA, PTFE, synthetic coatings, or toxic chemicals. Our seasoning naturally builds with use, developing a superior non-stick surface over time while ensuring oven-to-table safety

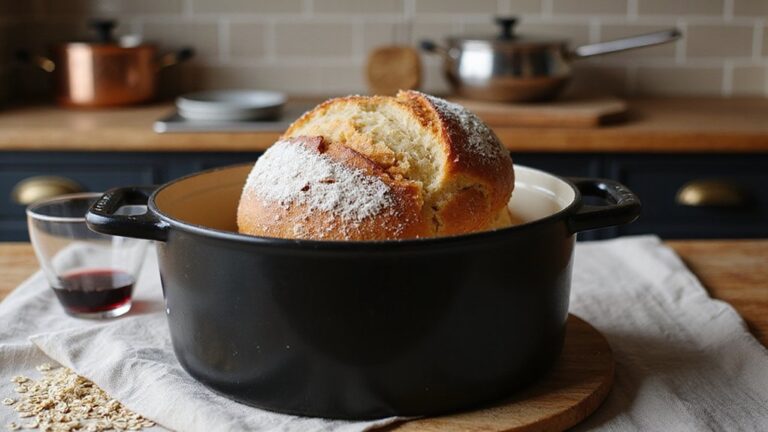
BREAD BAKER'S DUTCH OVEN, 500°F OVEN-SAFE, SOURDOUGH-READY – one of the highest ratings in its class – delivering the sustained heat that sourdough, artisan bread, and pizza dough demand. Thick cast-iron walls trap and circulate heat like a brick oven, producing bakery-quality crusts at home. The tight-sealing lid features raised self-basting nodes that continuously recirculate steam: a perfect moisture chamber, every single bake.
Sear, Simmer, Then Serve From the Same Pot
Searing your meat in batches over medium-high heat (475°F–500°F) creates a deep brown crust that enhances flavor and texture. Use equal amounts of coals under the lid and at the bottom to achieve even searing without hotspots. After searing, set the meat aside and reduce the heat to cook the vegetables gently. For simmering, shift to a ratio of four parts coals underneath to one part on the lid, ensuring a controlled, steady temperature that prevents damage to the enamel. Vacuum sealing these pre-seared ingredients can extend their shelf life by removing oxygen and preserving flavors prior to cooking. The same intense oven heat used for searing is ideal for partially baking the dough before adding toppings. When baking bread in the pot, the self-basting lid traps steam to help create a crisp crust and moist interior.
Maintain consistent heat by rotating the pot 90 degrees every 20 minutes so all sides cook evenly. Once the vegetables are tender, scrape up the fond—the flavorful caramelized bits—using a wooden spoon and deglaze with wine or broth. Layering liquid after the vegetables helps develop flavor and creates a moist environment for slow cooking. Cover the pot and cook low-and-slow for about one hour to tenderize the meat thoroughly. Near the end, stir in frozen peas for a fresh burst of color and flavor. Let the dish rest for ten minutes before serving it straight from the pot for maximum convenience.
Store Your Dutch Oven Dry to Prevent Chipping and Rust
Your storage environment is crucial. Keep your Dutch oven in a dry spot such as a garage or basement and avoid humid areas where moisture can cause rust. Only store it in a dedicated bag or tote if the location remains dry and crisp. Before storing, apply a thin layer of seasoning to the metal surface. This layer acts as a protective barrier against moisture, preventing chipping and rust over time. Similar to caring for a cast iron skillet, you can also use a salt cleaning method to remove residue without harmful detergents before drying and seasoning. Use a heavy-duty canvas storage bag that is padded and weatherproof to protect your oven during transport and storage. For outdoor cooking, remember to place approximately two-thirds of coals on top and one-third underneath for baking at standard temperatures. Using these practices consistently will keep your Dutch oven in top shape and extend its lifespan.
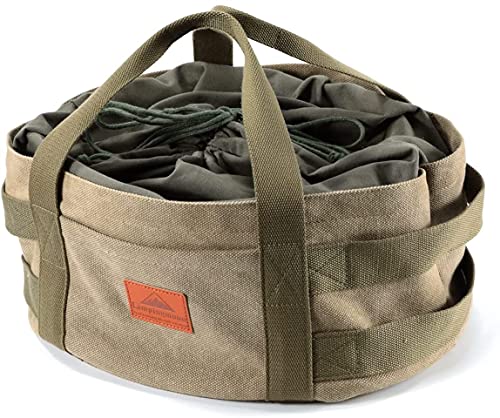
【SUITABLE SIZE FOR 12 INCH DUTCH OVEN】You can put up to 12 inch Dutch oven in this storage bag. (Note: Please check the dimensions first before purchasing.) DIMENSIONS(UNFOLDED):16.5"(L) x 13.4"(W) x 6.9"(H) / 42(L) x 34(W) x 17.5(H) cm;WEIGHT:26.3oz / 745g

Specifications: Holds up to 10 inches (330 mm) diameter x 9.4 inches (240 mm) (up to 10 inches) (Important: Please check the dimensions before purchasing)
【Please note that this Dutch oven storage bag is designed to fit 10 in Dutch ovens WITHOUT legs/feet.】Dimensions(unfolded):φ13"xφ9.45"x5.91"(H) /φ33xφ24x15(H)cm;Weight:14.11oz / 400g