Wondering if your meat is properly cooked? Using a thermometer is the most reliable way to know for sure. It provides a precise temperature reading that confirms safety and doneness, beyond just relying on color or juices.
Keep reading to learn how to accurately check meat temperature and avoid common cooking mistakes.
Why Only a Thermometer Tells You Meat Is Done
Only a food thermometer can accurately measure the internal temperature of meat to ensure it is fully cooked and safe to eat. Visual cues like color or marbling, or even the appearance of clear juices, are unreliable because they can be misleading and do not indicate whether bacteria have been destroyed. Relying solely on touch is also insufficient, as it cannot differentiate between safely cooked meat and undercooked. Time, too, is just an approximation because oven hot spots and starting temperature variation affect how long meat needs to cook. A thermometer provides an exact temperature reading—such as 160°F for ground meat or 165°F for poultry—that confirms pathogenic bacteria are eliminated. This objective measurement removes guesswork and guarantees safety while achieving the desired doneness. By carefully monitoring internal temperature, you can avoid both undercooking and overcooking, ensuring your meat is perfectly cooked and safe to enjoy every time. Similarly, restoring your cast iron cookware with multiple seasoning rounds after rust removal ensures a reliable nonstick surface for long-term use. For a similar principle of reliable, functional storage, consider using sturdy black pipe systems to hang your cast iron skillets within easy reach. Unlike infrared models, digital probe thermometers are the most accurate choice for ensuring meat reaches the proper internal temperature, as they measure the actual core temperature of the food.
Where to Insert the Probe for the Most Accurate Internal Temperature
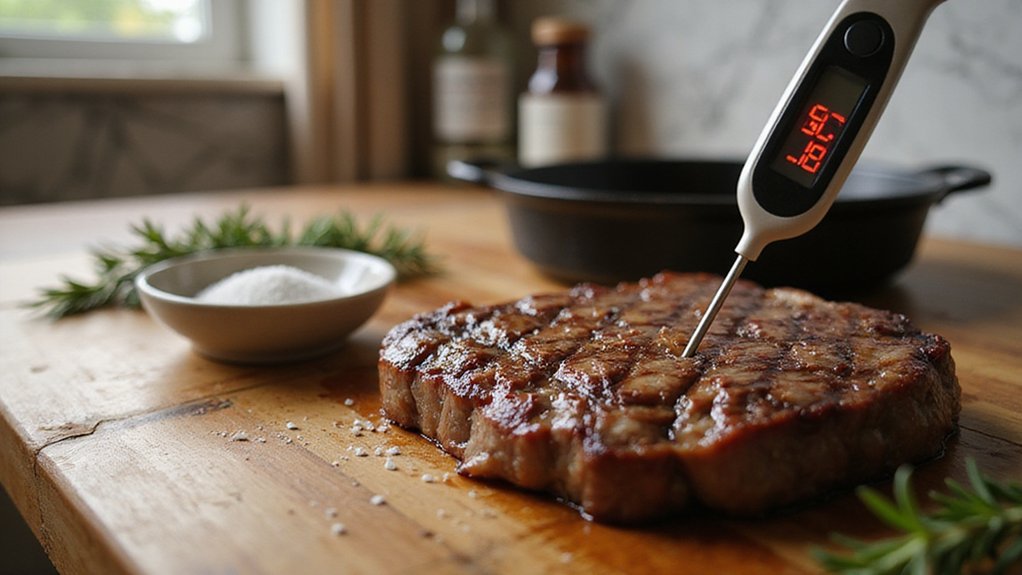
Insert the probe into the thickest part of the meat, aiming for the very center of the largest muscle where heat arrives last. For steaks or chops, insert the probe horizontally from the side, making sure the tip is at least up to the safety notch without poking through the opposite side. Adjust the angle to avoid penetrating the tapered end. For whole poultry, target the thickest part of the thigh with the probe parallel to the work surface and away from the bone. When checking large roasts, drive the probe into the center of the thickest muscle, steering clear of fat caps and bones. To ensure accuracy, check multiple spots and confirm the temperature is consistent throughout. The depth of insertion varies with the cut’s thickness—about half an inch for thin cuts and up to an inch for thicker ones—so always adjust accordingly. A well-seasoned skillet will also require proper preheating technique to ensure even cooking of the meat and any accompanying eggs. After cooking, it is important to clean the skillet using vinegar and baking soda to remove any residue and prevent rust. This method avoids relying on timers or charts by providing a direct gauge of doneness. For single-serve portions like those cooked in mini cast iron skillets, precise temperature checks ensure perfectly cooked meals without leftovers.
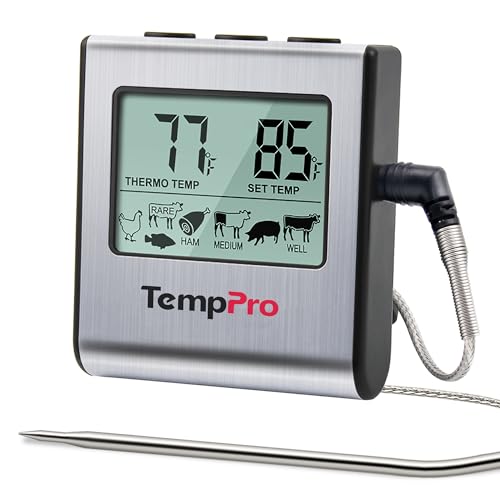
Cook mode with USDA preset temperature settings: TempPro cooking thermometer ideal for meat, oven, smoker or stove top; Programmable alert with preset temperatures for specific foods recommended by USDA; All of the preset temps can be reset to your desired tastes

BBQ HI/LOW temp range alarm: Set your desired food temp and HI/LOW temp range for your grill or smoker to know when to add more fuel smoker thermometer will flash and beep to remind you if the temperature ever goes out your set range; HI/LOW temp range alarm is specifically designed for usage with smokers, grills and BBQs

【Dual Safe Probes for Multi-Use】Vuwwey meat thermometer probe is great for meat, liquids, oil frying, baking, candy making, kitchen & outdoors. The wired probe is ideal for monitoring air fryers, ovens, grills, BBQ, smokers. It's your hands-free assistant: set the alarm, stick it on, and step away from the heat
Safe Internal Temperatures for Beef, Poultry, Pork, and Lamb
To ensure safety, cook whole cuts of beef, pork, and lamb to an internal temperature of 145°F, then let it rest for at least 3 minutes before serving. For ground versions of beef, pork, and lamb, you need to reach 160°F. Poultry of any kind—including whole birds, parts, or ground—must be cooked to an internal temperature of 165°F. Relying solely on color is unreliable, especially with ground beef, which can appear pink even when safe. Using a thermometer is the only sure way to confirm your meat has reached a safe internal temperature. This target of 165°F kills harmful bacteria like Salmonella and Campylobacter in seconds, which is why it is critical for preventing foodborne illness. For presentation, a well-cooked roast at 145°F with proper resting slices nicely. Remember, leftovers and casseroles that contain meat must be heated to 165°F to ensure safety. Similar to maintaining a seasoning oil coating on cast iron to prevent rust, properly heating leftovers locks in moisture and ensures safety. Following these temperature guidelines helps you cook confidently and prevent foodborne illnesses.

Fast & Accurate: Get precise readings in just 1 second with ±0.9°F accuracy. NSF Certified for trusted food safety, this digital food thermometer features a 4.3 inches food-grade stainless steel meat probe, perfect for grilling, frying, baking, making candy and more

Instant Read Food Thermometer | Our instant read thermometer features a temperature probe and advanced, highly accurate technology with 1-2 seconds response time; Instructions, meat temperature chart, comes pre-calibrated for your convenience, and recalibrating feature if needed.

【Ultra-Fast & Precision Accurate】This meat thermometer digital delivers accurate readings within ±1°F/±1°C in just 1–2 seconds, with a wide temperature range of -58°F to 572°F (-50°C to 300°C). No more waiting over the heat - know your food's exact temperature instantly.
How to Find the Thermal Center in Steaks, Roasts, and Whole Birds
To find the thermal center in steaks, insert your probe from the side, parallel to the grill surface. This technique avoids measuring surface temperature or heat from the pan, which can give a false reading. For irregular roasts like pork butt, the cold spots can be tricky due to uneven density. Use the probe-drag method: slowly pull the probe back from multiple points and note the lowest temperature reading to identify the true center. When checking whole birds, the thermal center is in the thigh. Insert the probe into the thickest part of the inner thigh, parallel to the leg bone but keep it away from the bone itself. Once the thigh reaches the safe internal temperature, the rest of the bird is typically cooked through. As a separate note, when cooking with a Dutch oven that has a glass lid, remember that the glass lid is typically rated only for temperatures between 350°F and 420°F, so it must be removed or replaced if your recipe exceeds that range. To maximize energy savings in your kitchen, consider setting your thermostat to 78°F during summer when you are home and cooking. Similarly, avoid storing food in containers that lack proper ventilation to prevent moisture buildup and mold, as recommended for vacuum seal bags.

【Dual Precision Probe Monitoring】Vuwwey meat thermometer comes with two 40-inch high-precision, instant read probes with an accuracy of ±2℉ between 14℉ and 572℉ while enabling simultaneous monitoring of different meats or ensuring perfectly even cooking temperatures throughout your food

Fast and Accurate Reading: Kitchen thermometer for cooking features a 1 second readout speed and high accuracy of +/-0.9 degrees Fahrenheit, ensuring you receive the most delicious results every time
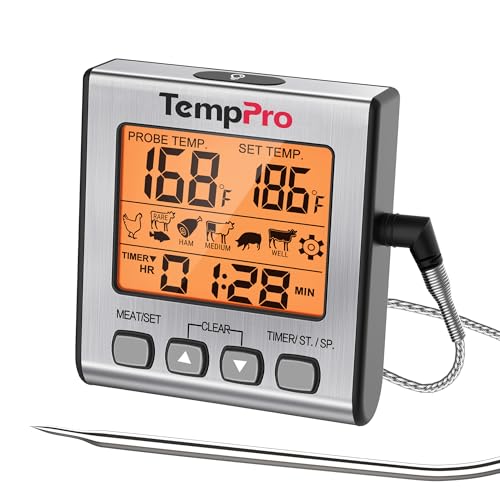
Precision Cooking, Perfect Results: Never overcook again! This digital meat thermometer features a food-safe probe with ±1.8°F accuracy and a 40" heat-resistant cable, continuously monitoring your BBQ, oven, or smoker from 14°F to 572°F for perfectly cooked meals every time
Why You Must Let Meat Rest After Cooking (and How Long)
After you remove meat from the heat, you must let it rest. Resting allows muscle fibers, which contract during cooking and squeeze out moisture, to relax and reabsorb those juices. This process helps keep the meat tender and flavorful. Resting times vary based on size: thin cuts need 5 to 7 minutes, thick cuts 10 to 20 minutes, and larger roasts or whole turkeys can require up to 40 minutes. Loosely tenting the meat with foil helps trap heat without steaming the crust, maintaining that desirable exterior. An infrared thermometer provides instant measurement capability for checking the resting surface temperature without contact, ensuring the meat remains in a safe zone during the process. Skipping this step results in a dry, less flavorful result because the juices escape quickly once you cut into the meat. To ensure food safety, you should not let cooked meat sit out for more than two hours to avoid bacteria growth. Remember, your thermometer won’t stop dry meat—you need to let it rest properly. For cookware used in the resting process, modern dish soaps are safe for cleaning cast iron. Prior to cooking, purging excess air from your torch’s fuel tank can prevent malfunction and ensure optimal ignition.
How to Calibrate Your Thermometer for Reliable Readings
To ensure your thermometer provides accurate readings, calibrate it regularly using an ice water or boiling water test. For the ice water method, fill a glass with crushed ice, add cold water, and stir well. Insert the probe at least two inches into the ice slush without touching the sides or bottom of the glass. The reading should be exactly 32°F. For the boiling water method, bring distilled water to a rolling boil and insert the probe without letting it touch the pot. The thermometer should read 212°F at sea level. This process prevents undercooking or overcooking meat by ensuring the device reads temperatures correctly. Using a properly calibrated thermometer is especially important when cooking cast iron grill pan recipes to achieve the perfect smoky flavor and texture. Regular calibration is similar to seasoning a skillet in that both processes require careful attention to temperature and oil layers for optimal performance. A well-calibrated thermometer also ensures that caramelized apples in a Dutch baby pancake reach the ideal doneness without burning.
If your readings are off, you will need to calibrate the device. For dial thermometers, twist the calibration nut near the gauge with pliers until the needle points to the correct temperature. For digital thermometers, press the calibration button while the probe is immersed in ice water, then hold until the setting is saved. Regular calibration helps maintain measurement accuracy, which is vital for safe and proper cooking.

Completely Waterproof: IPX6 waterproof rating means you can wash this cooking thermometer under running water without fear. This food thermometer for cooking ensures cleanup is ultra-fast

[Ultra-Fast and Highly Accurate] - With a precision sensor, this Digital meat thermometer reads temperature in 3 seconds and is accurate within 1 °F . Supporting Celsius and Fahrenheit display from -58°F to 572°F (-50°C to 300°C).

Ultra Fast & Accurate Reading - Biison professional digital thermometer with 3s fast response time measure food temperature From -58°F to 572°F (the accuracy of ±2°F),applicable from ice water to oil Temp
Digital vs. Dial: Which Thermometer Is Faster and More Accurate?
Digital thermometers are generally faster and more accurate than dial models. They provide readings in 2 to 8 seconds, making them ideal for quick checks, while dial thermometers can take 15 to 90 seconds. Digital units are accurate within about ±0.5 to 0.7°F, whereas analog thermometers can drift between ±3 and 5°F, with discrepancies up to 9°F across multiple uses. This consistency ensures that digital readouts are reliable every time, reducing the risk of undercooking or overcooking. Dial thermometers, though durable and battery-free, can warp at temperatures above 375°F and are less suitable for precise or health-sensitive applications. For quick, precise, and dependable results, digital thermometers are the better choice across most cooking scenarios. However, unlike butane torches which pose inhalation risks, food thermometers pose no direct respiratory hazard and are safe for kitchen use. For sous vide cooking, using a digital thermometer is particularly important to verify that the water bath stays within the safe range for food-safe plastic bags to prevent melting or chemical leaching. While the kitchen use is safe, a Dutch oven prank, which involves trapping someone under bedcovers, is a completely unrelated and non-culinary use of a cooking term.
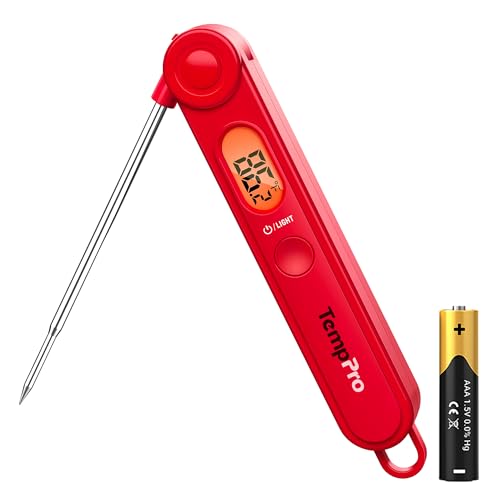
【Easy to Use】Easily release the meat probe at the push of a button, and control the backlight or power with another button. With TempPro, cooking becomes a seamless, stress-free experience

No More Guesswork During Your Chill Cooking Time - professional digital thermometer devotes every beginner to becoming a prof! A good helper both in outdoor BBQ and Home party, It is the best gift for cooking enthusiasm and the useful kitchen gadget for festival meals

【8X Faster + 4X More Precise】: Upgraded with an industrial-leading professional thermocouple sensor, Themomonster meat thermometer digital with NIST certified ±0.5℉ precision provides you the accurate temperature of your food in just 0.5 Seconds.
Three Mistakes That Give You Wrong Temperatures
To ensure accurate thermometer readings, avoid three common mistakes. First, probe placement is critical. Insert the probe into the thickest part of the meat, steering clear of bone, fat, or gristle, as these conduct heat differently and can give false high readings. For thin cuts like burgers, insert the probe sideways from the edge to reach the center without skewing the result.
Second, calibration errors can throw off your data. Test your thermometer before each grilling season using the ice water method—crushed ice mixed with cold water at a 3:1 ratio. A proper reading is 32°F. If your thermometer shows a different temperature by more than 2°F, it’s time to calibrate. Dial models often have a calibration nut for easy adjustment; digital models require noting the offset for future readings.
Finally, avoid pulling the probe out too quickly. Digital thermometers need 15 to 30 seconds to provide a stable reading, while dial thermometers require a full 60 seconds. Patience here ensures you don’t underestimate the internal temperature, which could lead to undercooked or overcooked meat.
Why Color, Juice, and Smell Can’t Confirm Meat Safety
Color, juice, and smell cannot reliably confirm meat safety. A common misconception is that the meat’s appearance indicates doneness, but it’s not a trustworthy method. For example, about one in four cooked hamburgers can turn brown before reaching the safe internal temperature of 160°F, while cooked chicken often remains pink due to chemical changes, even when it’s fully cooked. Juices that appear clear don’t mean bacteria are gone; pathogenic bacteria like Salmonella do not produce odor or visual clues. Poultry, for instance, is safe only at an internal temperature of 165°F, regardless of how the juices look. Relying on smell is also ineffective because many bacteria that cause foodborne illnesses don’t produce any detectable smell at all. Fresh ground beef and other meats can harbor dangerous germs without any visible signs or odors. Signs of mold or spoiled odors indicate decay, not safety. The only reliable way to confirm that meat is safe to eat is by using a meat thermometer, checking the internal temperature at the thickest part.
When to Start Checking Temperature to Avoid Overcooking
Start checking the meat’s internal temperature about 10 to 15 minutes before the recipe’s recommended cook time ends. For large cuts such as roasts or whole poultry, insert the thermometer into several spots and at different depths to ensure even doneness. Smaller cuts like steaks can be checked from the side to quickly reach the center.
Remember carryover cooking: remove meat when it’s 5 to 10 degrees below your target temperature. Let it rest for at least 10 minutes to allow juices to settle and to prevent overcooking. Allow the thermometer to stabilize for 5 to 10 seconds for an accurate reading. For beef and pork, the final temperature should reach 145°F, poultry at 165°F, and fish at 145°F with a short rest time. This approach helps preserve the meat’s texture and flavor.