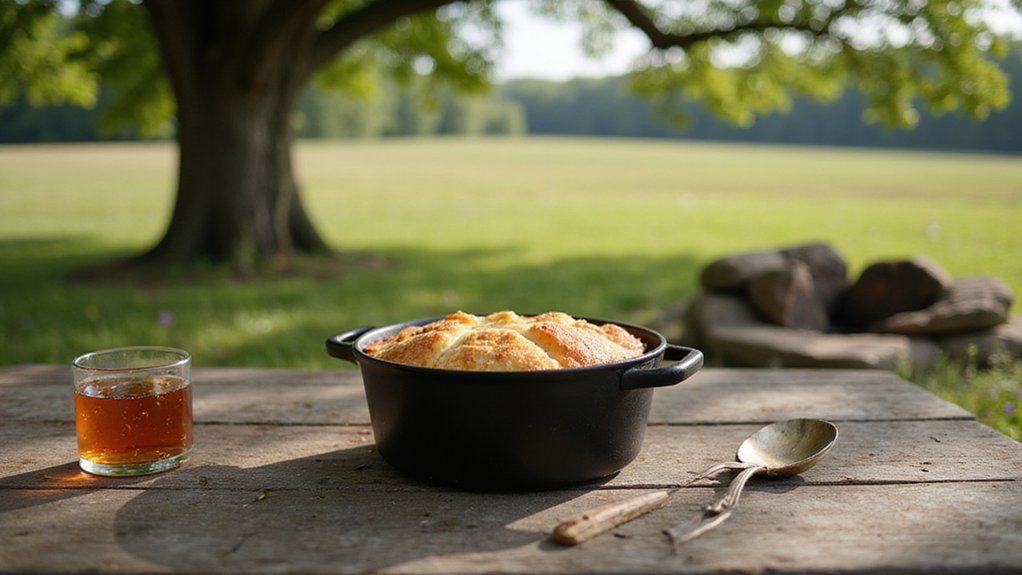
Ever wonder how to make a warm, comforting peach cobbler while camping? Using a Dutch oven and Bisquick, you can easily bake this sweet treat right over a campfire.
With simple steps for preparing the peaches and controlling the heat, you’ll have delicious cobbler ready in no time. Keep reading for all the tips to perfect your outdoor dessert.
Why Dutch Oven Peach Cobbler Is the Ultimate Campfire Dessert
A Dutch oven peach cobbler takes about 25 to 30 minutes to bake over a campfire. This timeframe ensures the dessert develops deep golden edges and a puffed topping without burning the bottom. Since the Dutch oven traps heat efficiently, the peach filling bubbles into a natural syrup without the need for additional starch, much like how beef stock or wine deglazes the pot to lift browned bits for a rich stew. You’ll know it’s ready when the crust is golden and a toothpick inserted in the center comes out clean. Regularly rotating the oven every 10 minutes helps achieve even baking, preventing hotspots. Using a 4-quart Carolina Cooker ensures proper heat distribution and size for this campfire dessert. The thick cast iron construction also allows for superior heat retention, which keeps the cobbler warm long after it is removed from the heat. Serving it warm with a scoop of ice cream creates a satisfying, crowd-pleasing campfire treat. If the cast iron shows any rust, a vinegar spray solution can safely restore it without damaging the surface.
Why Bisquick Makes Cobbler Dough So Easy
Since Bisquick already contains leavening agents and shortening, you don’t need to measure or cut in fats separately. Simply stir in milk until just combined to avoid tough dough. This creates a batter that rises evenly around your fruit without manual spreading. Whether you’re using peaches, blueberries, or apples, the same basic ratio works—a little sugar and spice are all you need to adjust. The dough bakes right along with the filling, sealing in moisture and juices. These baking techniques simplify the process because the pre-mixed ingredients minimize common errors. In under five minutes of preparation, you’ll have a golden, uniform topping, making campfire cobbler surprisingly effortless. Just as a cast iron skillet benefits from seasoning with high smoke point oil to create a durable non-stick surface, your Dutch oven’s seasoned interior helps the cobbler release easily and brown evenly over the fire. The same principles that guide flavoring a steak bag apply here, where only salt penetrates deeply while other seasonings merely coat the surface. For even more control over doneness, a water bath set to a precise temperature can be used to cook eggs, though cobbler requires dry heat to set the batter.

PANCAKE MIX AND MORE: Craft deliciously fluffy pancakes, waffles, biscuits, and beyond; An ideal ingredient in your favorite breakfast, dinner, or dessert recipes

PART OF A HEART SMART BREAKFAST OPTION: Diets low in saturated fat and cholesterol may reduce the risk of heart disease. Bisquick Heart Smart is low in fat, low in saturated fat and naturally cholesterol free

BISCUIT MIX: Make a delicious meal with this mouth-watering biscuit mix
How to Macerate Peaches With Sugar and Spice for Deeper Flavor
To enhance the flavor of your peaches, macerate them with sugar and spice before baking. Use 1/3 cup of granulated sugar for every 3 cups of sliced peaches, or swap in light brown sugar for richer, molasses-like notes. Add 1 tablespoon of fresh lemon juice to prevent oxidation and brighten the fruit’s flavor. Include 1/8 teaspoon of kosher salt per pound of fruit to help the sugar penetrate more effectively. For an extra layer of caramelized crust, you can quickly sear the macerated peaches in a cast iron skillet before baking.
If your peaches are underripe, let them sit with the sugar for 10 minutes to soften and release juices, then drizzle with a small amount of olive oil to aid in spice integration. You can customize the spice mix by tossing in a cinnamon stick and star anise pods, or by adding 1/2 teaspoon each of freshly grated nutmeg and ground ginger. Allow the mixture to rest at room temperature for 30 to 60 minutes until it becomes visibly juicy. Gently fold the peaches with a stiff spatula to coat them evenly without bruising, building up layered flavor without needing extra bowls. For precise temperature control during cooking, consider using an infrared thermometer with preset emissivity for food surfaces.
Mix the Batter in One Dish (No Extra Bowls Needed)
You can mix the batter directly in the Dutch oven to save time and cleanup. Start by melting a full stick of unsalted butter in the pot over medium heat. Once melted, pour in 1 cup of Bisquick baking mix and 1 cup of whole milk. Stir the mixture until it’s smooth and fully combined, which should take about 1-2 minutes. Avoid over-stirring; just mix until the ingredients are incorporated. This method allows the batter to sit right in the melted butter, with no need for extra bowls or utensils.
This one-vessel approach streamlines your baking process, making it ideal for camp cooking or situations where cleanup is limited. If you prefer, you can substitute the whole milk with buttermilk or a non-dairy alternative like almond or soy milk. Just keep the ratio of one part Bisquick to one part liquid consistent to maintain the batter’s texture. Once mixed, the batter will sit in the center of the melted butter, ready to be topped with your prepared peaches without additional stirring.

PANCAKE MIX AND MORE: Use Bisquick to craft deliciously fluffy pancakes, waffles, biscuits, and beyond; An ideal ingredient in your favorite breakfast, dinner, or dessert recipes

PANCAKE MIX AND MORE: Craft deliciously fluffy pancakes, waffles, biscuits, and beyond; An ideal ingredient in your favorite breakfast, dinner, or dessert recipes

Whether you’re serving them at breakfast, lunch, or dinner, biscuits are just a few steps away.
Layer Fruit and Dough Correctly (No Stirring Allowed)
After pouring the batter directly over the melted butter, do not stir. Instead, immediately spoon the prepared peaches and their collected juices evenly on top. This step is crucial for proper layering. Resist the urge to swirl or mix, as stirring would disrupt the chemical reaction that allows the dough to rise naturally above the fruit during baking. Trust gravity and heat to do their work. Spread the peaches in a single, uniform layer across the surface of the batter. This ensures steam can release evenly from the bottom, preventing pockets of uneven cooking. Remember, distinct layers are essential: the fruit settles below while the dough puffs up to create a fluffy, golden topping. You are placing ingredients carefully, not combining them. A well-seasoned Dutch oven, especially one treated with flaxseed oil, creates a durable nonstick surface that enhances release. Using a 12-inch cast iron Dutch oven ensures even heat distribution during baking, much like a preheated cast iron skillet ensures a perfectly set bottom crust. For precise temperature control when testing doneness, a candy maker would rely on ±0.5°F accuracy to achieve consistent results.
How Hot and How Long to Cook Dutch Oven Peach Cobbler
Cook your Dutch oven peach cobbler at 350°F for 50 to 60 minutes. Maintaining this temperature ensures the topping becomes golden and the filling bubbles without burning. Use briquettes or a campfire thermometer to keep a consistent heat level, as guesswork can lead to uneven cooking. Check for doneness after 30 minutes by inspecting the top; it should be crusty and golden brown. The filling should be bubbling around the edges, indicating it’s cooked through. To verify the dough is fully baked, insert a toothpick into the center; it should come out clean. Exceeding 400°F risks burning the topping, so monitoring temperature precisely is crucial. If you use water in your recipe, a digital meat thermometer with a waterproof rating can accurately gauge the water temperature for safe cooking. Remember, the right heat level enhances the flavor pairing of sweet peaches and tangy topping, making sure every bite is perfect. Rotate the lid and the oven’s interior 90 degrees every 15 minutes to promote even cooking. For consistent heat, place briquettes around and inside the Dutch oven’s bottom rim. Start your timer right away so you don’t overcook. For a 12-inch Dutch oven, use 24 briquettes to achieve the proper heat distribution. A well-cooked cobbler will have a risen, crusty top with a clean toothpick test. To avoid burning the topping, always start at a low or medium heat before gradually increasing the temperature.

【Fast & Accurate】Our meat thermometer digital delivers accurate readings within ±1°F in just 1–2 seconds, with a wide temperature range of -58°F to 572°F (-50°C to 300°C). No more waiting over the heat - know your food's exact temperature instantly.

Completely Waterproof: IPX6 waterproof rating means you can wash this cooking thermometer under running water without fear. This food thermometer for cooking ensures cleanup is ultra-fast

UPGRADED PROBE FOR FASTER, MORE STABLE READINGS - This meat thermometer features a precision-upgraded probe with higher sensitivity and enhanced thermal conductivity, delivering more accurate and stable readings in just 0.5 seconds. Unlike standard probes, the upgraded design transfers heat faster from first contact, giving you a more reliable and consistent temperature measurement every time—no more guessing, only perfect meals!
How to Arrange Coals for 350°F Even Heat
To achieve a 350°F even heat, arrange your coals according to the “Rule of Three.” For a 12-inch oven, place 9 coals underneath and 15 on top. This top-to-bottom ratio helps maintain consistent temperature during cooking or baking. Position the bottom coals in a circular ring at least half an inch inside the oven’s edge to prevent hot spots and promote even heat distribution. The top coals should be placed in a checkerboard pattern, avoiding bunching to ensure uniform heat across the surface. Regular rotation of the lid and pot—90 degrees in opposite directions every 15 minutes—is crucial for consistent temperature. This practice also makes campsite maintenance easier by preventing hot spots and uneven cooking. Always use tongs when handling hot coals and keep them away from flammable materials. Add fresh briquettes as needed to sustain the temperature, and adjust the placement closer or farther from the heat source without disturbing your cobbler. Before lighting your coals, always prepare a flat, stable workspace free of open flames and use a stable, well-ventilated workspace to ensure safety when handling fuel or fire. For any butane torch used to light coals, you should purge excess air from its fuel tank prior to refilling to prevent malfunction and ensure optimal ignition.

Material☛ Heavy duty stainless steel, size 12" bottom grate that holds the charcoal.The thickness of the bars is 6mm (0.24 inch)
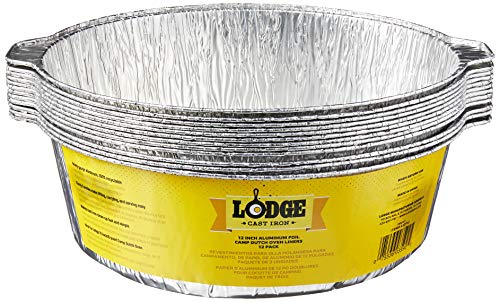
YOUR NEW GO-TO DUTCH OVEN LINERS: The Lodge Dutch Oven Liners make camp cooking cleanup easier than ever. Made of 100% recyclable aluminum, these durable liners are strong enough to lift, carry, and serve delicious outdoor meals.

YOUR NEW GO-TO DUTCH OVEN BAG: The Lodge Camp Dutch Oven Bag allows you to bring dishes to life under blue skies, under the stars, next to winding rivers, and tucked beside towering mountains.
Two Easy Ways to Know When Dutch Oven Peach Cobbler Is Done
To know when your Dutch oven peach cobbler is done, check two key signs. First, look at the crust: it should be a deep golden brown all over, indicating the topping has baked thoroughly and developed a nice crust. You should also see vigorous bubbling around the edges and in the center, which means the fruit filling has thickened to that signature cobbler consistency. Rotate the Dutch oven 90° clockwise after 15 minutes to ensure even browning and consistent heat distribution from the charcoal. An infrared thermometer can quickly confirm the surface temperature of the Dutch oven lid for even heat. However, an infrared thermometer is less reliable for measuring the internal temperature of the liquid filling, so use a digital probe for the most accurate results. For vacuum-sealed foods, a properly developed HACCP plan is essential to control biological hazards like Clostridium botulinum that thrive in reduced oxygen environments. Second, perform the toothpick test by inserting it into the cake-like topping, avoiding the fruit filling underneath. The toothpick should come out clean or with just a few dry crumbs. If it comes out with wet batter, bake for another five minutes and then recheck. Once finished, let the cobbler rest for 10 to 15 minutes, allowing the filling to set properly for cleaner servings.
The Best Toppings to Serve With Warm Cobbler
A variety of toppings can elevate your warm cobbler and add interesting textures and flavors. For a creative twist, consider a buttermilk-based whipped topping, where the subtle tang cuts through the sweetness of the filling. Pouring heavy cream directly over a warm serving creates a rich, pourable component that many find irresistible. For a crunchy finish, broil a sprinkle of turbinado sugar until it caramelizes into a crisp crust. Adding cinnamon swirls into freshly whipped cream enhances the warm spice notes and offers a flavorful visual. Toasted pecans or crumbled biscuit pieces introduce a satisfying crunch that complements the soft fruit filling. A pinch of salt mixed into your cream balances the sweetness beautifully, while a dusting of powdered sugar provides a delicate, decorative touch without affecting the texture.

One 16-ounce container of Frozen Original Whipped Topping

365 by Whole Foods Market products give you that dance-down-the-aisles feeling, virtual aisles too! Our huge range of choices with premium ingredients at prices you can get down with makes grocery shopping so much more than tossing the basics in your cart.

One 8 ounce container of Frozen Original Whipped Topping
How to Store and Reheat Leftovers Without Ruining the Crust
To store leftovers without ruining the crust, let the cobbler cool completely on a wire rack until the crust sounds hard when tapped. This helps prevent sogginess. Wrap it tightly in foil or place it in a shallow airtight container. You can keep it at room temperature for up to two days or refrigerate it for up to four days. To absorb excess moisture and steam, place a paper towel under the lid. When reheating, avoid the microwave as it destroys the crust’s crunch. Instead, preheat your oven to 350°F, loosely cover the cobbler with foil, and bake for 10 minutes. Remove the foil and bake uncovered for an additional 10 to 15 minutes to restore crispness. For extra crunch, finishing with a quick broil works well. To add a fun twist, consider topping the cobbler with marshmallows before broiling for a sweet, toasted finish. For best results, always store the cobbler in a dry, airtight container to prevent rust or moisture damage to any cast iron cookware used.