
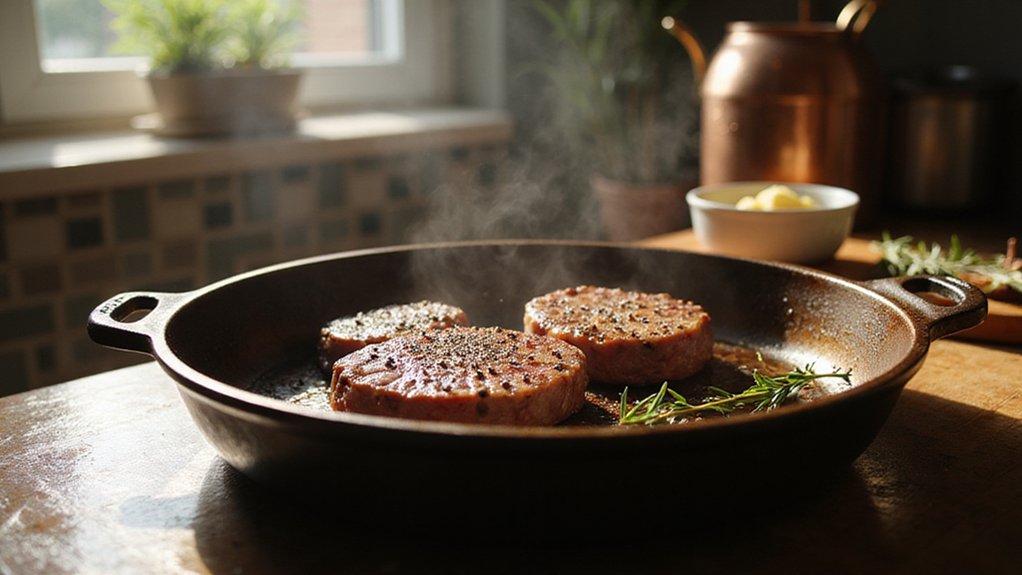
Getting that perfect sear and even cook on your cast iron grill skillet can seem tricky at first. But with a few simple steps, you can achieve restaurant-quality results right at home.
Mastering the right heat, cooking times, and care tips will make your meals both delicious and easy to prepare. The full guide below will walk you through everything you need to know.
Why You Should Preheat Your Cast Iron Grill Pan at 450°F?
Preheating your cast iron grill pan to 450°F is essential to achieve optimal cooking results. This high temperature activates the pan’s seasoning chemistry, bonding the oil layers to the iron surface and creating a smooth, non-stick coating that makes food release effortless. It also helps eliminate hot spots by allowing heat to evenly penetrate the thick walls, which prevents burning and ensures consistent cooking. This method mirrors the heat retention properties of a Dutch oven, where even heat distribution and gradual heating are key to preventing damage. The skillet’s superior heat retention is why it creates a superior sear on steak compared to other pans. When the pan reaches 450°F, it firms up proteins instantly—making searing meats like steak more effective, so they develop a perfect crust instead of sticking or burning. Additionally, fully preheating the pan promotes proper oil distribution and prevents excess oil from pooling, reducing the likelihood of sticky or hardened droplets once the pan cools. Building this heat energy before adding food ensures a consistent, browning-friendly surface that delivers great flavor every time, while reducing the risk of damaging your seasoning or ruining your meal. However, you should turn down the heat after preheating because cast iron retains heat exceptionally well and can burn food if left too high.
How to Oil Your Cast Iron Skillet Without Ruining the Seasoning
Once your cast iron skillet has fully preheated to 450°F, the next step is applying oil correctly to preserve the seasoning without causing damage. Use high-smoke-point oils like grapeseed or canola because they can withstand the heat without breaking down; avoid flaxseed oil, which is prone to flaking. Start by making sure the pan is completely dry—towel-dry it, then heat it on a burner for about two minutes to open the pores, ensuring better oil absorption. If you are dealing with a rusty skillet, note that a vinegar spray solution can be applied to loosen rust, but it should never sit for more than 30 minutes to prevent further pitting damage. This precise temperature control is similar to the sous vide method for achieving repeatable cooking results. This process is best done in a preheated oven to ensure even heat distribution and proper curing.
Apply a very thin layer of oil over the entire surface, including handles, using a cloth or paper towel. Wipe off almost all the oil so the surface looks matte and no longer glistens when tilted. Excess oil can lead to sticky buildup and flaws in the seasoning. Immediately after, place the skillet upside down in the oven at 450°F and bake for one hour, with foil underneath to catch drips. Allow it to cool completely before use. This heating process bonds the oil to the cast iron, creating a durable seasoning layer through polymerization. For new pans, repeat this process two or three times to build a durable, non-stick seasoning layer.
Form Uniform Patties for Perfect Grill Marks Every Time
To form uniform patties for perfect grill marks, start with a 1/3-cup dry measuring cup packed tightly for 4-ounce portions or a 1/2-cup measure for 6-ounce patties. Refrigerate the meat for 10 to 15 minutes before shaping to firm it up and reduce stickiness, which makes shaping easier. Use shaping tools like a lid slightly larger than your bun, lined with plastic wrap, to mold each patty evenly. Press gently to remove gaps without overworking the meat, as this helps maintain a tender texture. Aim for a patty thickness of one inch to ensure deep, attractive grill marks. For larger patties, create a shallow dimple in the center with your fingertips to prevent doming during grilling. Applying similar principles of temperature control, the U.S. Department of Energy recommends keeping your home thermostat at 78°F during summer to maximize energy savings while you are home. Chill the formed patties for at least an hour before grilling to help them hold their shape and develop better sear marks. Similar techniques are used in a Dutch oven to create evenly browned turkey and stuffing meatballs that hold together perfectly.

Heavy Duty Press Design: The Lodge Seasoned Cast Iron Burger Press features heavyweight cast iron construction designed to help create evenly pressed burgers and sandwiches

ESSENTIAL BURGER SMASHER SET : 1 * 6.69" Round Cast Iron Hamburger Press , 1 * 7.68” X 4.1” Rectangle Smasher Tool , 1 * Hamburger Press Patty Maker , 100pcs 5.9” X 5.9” Parchment Paper Squares , 1 * Packaging .

Pre-Seasoned: Our cast iron hamburger press is professionally pre-seasoned, so after use, simply clean it and wipe it dry, or place it directly in the dishwasher
How to Layer Meat and Vegetables for Even Doneness
Start with the dense vegetables first. Potatoes, carrots, or other hearty options need about 10 to 15 minutes on the grill, so giving them an early start ensures they’re cooked through. Place these on the preheated cast iron or grill first, allowing them to begin softening while you prepare the softer vegetables. To ensure the skillet is hot enough for this initial sear, preheat on low to medium heat for 5 to 10 minutes to achieve even warming and prevent sticking. You can also place a small oven-safe dish of water nearby to generate steam, which helps mimic the humid environment needed for even cooking. Once any thawed vacuum-sealed salmon is added, remember that it should be cooked and consumed within 1–2 days after thawing for safety.
Meanwhile, brush softer vegetables like bell peppers or zucchini with oil but hold them back from the initial grilling. Their shorter cooking time—around 3 to 4 minutes per side—aligns better with quick-cooking proteins like steaks or fish. To prevent burning or uneven cooking, layer softer vegetables on top of denser ones later, or add them after flipping the denser vegetables. This layered approach mirrors techniques used for deglazing the pot to lift browned bits and build rich flavor in the broth. This staggered approach helps achieve even doneness across all ingredients, maintaining both texture and flavor.

Exceptional Heat Retention: Enjoy perfectly cooked meals with cast iron skillets that provide even heat distribution, ideal for searing, frying, and baking in a 12 inch frying pan.

Steakhouse Sear At Home: The Lodge Square Cast Iron Grill Pan delivers high-heat searing and bold grill marks while channeling excess grease away

Fabric Type: Rubber
Get a Crispy Crust on the Stovetop After Oven Cooking
To get a crispy crust on your steak after oven cooking, start by transferring a smoking-hot skillet directly to a high-heat burner. Let it heat for about a minute to revive its surface intensity. Pat your steak completely dry—moisture is the enemy of crispiness. Apply a thin layer of avocado oil and carefully lay the steak down, without moving it. Sear undisturbed for 2 to 4 minutes until the crust releases naturally, creating a deep, crispy exterior that seals in the juices. For enhanced flavor, add butter, garlic, and rosemary during this final searing phase. A thorough cleaning ensures the surface is free of rust and food residues, which can interfere with the sear. This technique also mimics the undisturbed cooking method used for eggs, allowing the protein to release only when fully set. The sizzling aromatics boost the dish with rich, savory scents that fill your kitchen. Let the steak rest briefly before serving to lock in the crust and juices.

Smart Design for Control: Built-in side spouts let you drain grease with ease; this square cast iron griddle pan features raised ridges that add texture and flavor while keeping oil from food.

Enameled cast iron delivers superior heat distribution and retention

Complete Package Contents: the package is suitable for anyone who loves cooking as it not only includes 4 small cast iron skillet with wooden trays but also comes with 4 removable handles; They can meet your daily use requirements, your serving experience can now be as smooth and as convenient as cooking
Adjust Heat for Different Proteins on Your Grill Pan
Adjusting the heat correctly is crucial for cooking proteins on your grill pan. For steak and pork chops, set the temperature to 500°F to achieve a high-heat sear. Cook each side for 3 to 5 minutes; this creates a flavorful crust while keeping the inside tender. For burgers and chicken, lower the heat to 375°F–400°F. This range prevents burning and ensures a good sear without overcooking. Cook burgers for 4 to 5 minutes per side and boneless chicken for 6 to 8 minutes until the internal temperature reaches 165°F. For delicate proteins like fish or eggs, reduce the heat further to medium-low, aiming for a surface temperature of around 400°F. Use an infrared thermometer to verify the grill’s temperature before placing your protein on the pan. If you lack a thermometer, you can also use the finger test technique to gauge doneness by comparing the meat’s firmness to the fleshy part of your palm. If the oil starts smoking, lower the heat immediately to keep your searing controlled and consistent. If your skillet has heavy buildup from previous use, you can use oven cleaner with lye to strip it down before re-seasoning. To achieve the hardest and slickest surface, you can season your pan using food-grade flaxseed oil which polymerizes into a durable nonstick finish when baked at high temperatures.

NOT for HUMAN: THIS IS NOT A MEDICAL THERMOMETER,DO NOT USE TO TAKE TEMPERATURE OF BODY OR FOREHEAD. The NEWEST model of infrared thermometer measures a wider range from -58℉ to 1022℉(-50℃ to 550℃), supports switch ℉/ ℃. Tips: for better results, the IR thermometer should be 14 inches away from the object.

Instant Read Food Thermometer | Our instant read thermometer features a temperature probe and advanced, highly accurate technology with 1-2 seconds response time; Instructions, meat temperature chart, comes pre-calibrated for your convenience, and recalibrating feature if needed.
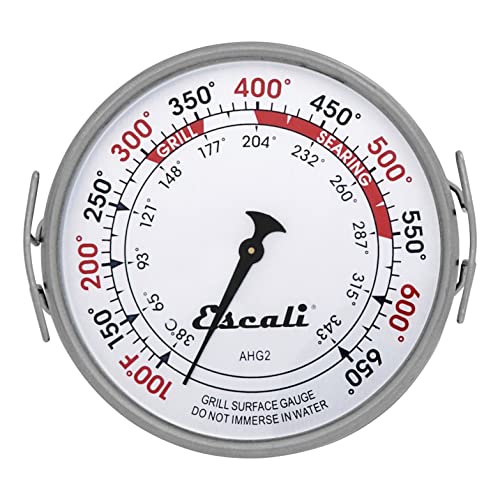
Temperature Range: 100° to 650°F / 38° to 343°C. Dial Diameter: 3.5 inches
Increase or Decrease Cooking Time for Thicker Cuts
For steaks thicker than 1.5 inches, increase the cooking time by using a reverse-sear method instead of a direct sear. Begin by cooking the steak at 275°F in the oven until the internal temperature is 10–15°F below your target doneness. For extra-thick cuts like filet mignon, this slow roast can take up to an hour. This process allows the marbling to render evenly throughout the meat. Afterward, finish by searing the steak on a grill pan over high heat for 1–2 minutes per side. Keep your kitchen ventilation on to manage smoke. Remove the steak from the pan when it’s about 5°F below your desired final temperature, as carryover cooking will continue to raise the internal temperature. Rest the meat for 5–10 minutes before slicing to help juices redistribute and ensure consistent doneness throughout. For a more tender result, you can also add butter, garlic, and fresh herbs during the final sear to infuse additional flavor. Using coarse grains like cornmeal on the grill skillet can help prevent sticking and add a pleasant texture to the crust. For precise internal temperature readings during the reverse-sear process, a digital probe thermometer is far more accurate than infrared models, which are unreliable for measuring the interior of the meat.
Never Soak Your Cast Iron: Do This Instead for Stuck-On Food
Never soak your cast iron. Water causes rust and strips away the seasoning layer. To remove stuck-on food without damaging your skillet, use a salt-and-oil scrub: sprinkle coarse kosher salt and a splash of canola oil into the warm pan. Hold a paper towel with tongs and scrub the hot surface, using the abrasive salt paste to lift burnt bits gently. For tougher residues, simmer about half an inch of water in the skillet for five minutes. The steam loosens stubborn food without prolonged water contact. After steaming, use a wooden scraper to gently remove remaining debris. Avoid metal scrubbers, as they can scratch and damage the seasoning. This seasoning-preserving method is ideal for maintaining and restoring cast iron and carbon steel pans. For an easy campfire dessert, you can use a similar no-fuss approach by layering peaches and a dry cake mix directly in a Dutch oven. This same Dutch oven technique can create a hearty one-pot meal by searing seasoned pork and cooking it with root vegetables until tender. Always dry the skillet immediately after cleaning and heat it briefly to prevent rust, keeping your cast iron in optimal condition.

For All Seasons: No pun intended! Whether it’s your next dinner party or a night in, our non iodized salt kosher option has you covered
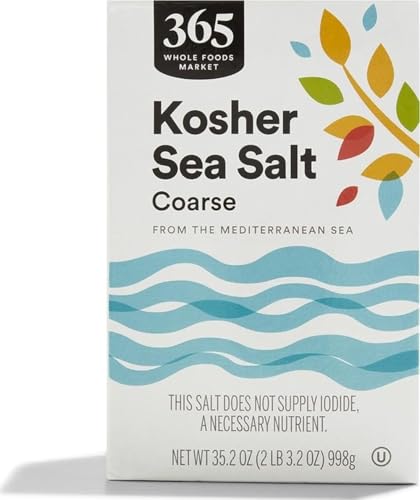
Premium kosher sea salt from the Mediterranean

No additives; Only pure kosher salt
Clean and Re-Oil: The 5-Minute Maintenance Routine
To clean and re-oil your cast iron skillet in five minutes, follow this quick routine. While the skillet is still warm, add a splash of water to create steam, which helps loosen stuck-on food. Use a brush to scrub away debris, then pour out the water and dry the skillet thoroughly with a cloth. For ridged grill pans, use a notched scraper to clean the grooves effectively. Place the skillet on the stove over heat to evaporate any remaining moisture—never store a wet pan, as this can cause rust. Once dry, wipe a thin layer of neutral oil like canola over the entire surface, including the handle. Use a lint-free cloth to remove excess oil, ensuring a shiny but not greasy finish. This step maintains consistent seasoning. Finally, heat the skillet on medium-low for five minutes to bond the oil, then wipe again to remove any pooling oil. Let the skillet cool completely before storing. This quick process keeps your skillet clean, seasoned, and rust-free.


