You’ll sear your chuck roast until deeply caramelized, then build an aromatic base with onions, garlic, carrots, and celery in rendered fat. Deglaze with red wine, incorporating beef broth and tomato paste. Braise covered in a 300-350°F oven for 2.5 to 4 hours until fork-tender. Strain the braising liquid, reduce it by half, and whisk in beurre manié for silky gravy. The techniques for plating and pairing will transform your dish into restaurant-quality elegance.
Essential Ingredients for Authentic Pot Roast
Since the success of your pot roast depends entirely on the meat you choose, you’ll want to select a chuck roast—the gold standard for this braise. The beef marbling throughout shoulder-cut chuck guarantees tenderness and rich flavor after long braising. Proper seasoning with high smoke point oils is essential for achieving optimal taste and texture. Boneless varieties simplify slicing and serving.
Beyond meat, you’ll need foundational aromatics: yellow onions, minced garlic, carrots, and celery. These build your flavor base. For liquid components, gather dry red wine, beef broth, and tomato paste—each layer adds depth and umami. Worcestershire sauce provides additional complexity.
You’ll also need all-purpose flour for creating a roux that thickens your braising liquid. Fresh thyme sprigs, bay leaves, and parsley complete your arsenal. While pot roast variations exist using brisket or round cuts, chuck roast remains the classic choice. It is also recommended to select a well-marbled cut of meat to ensure optimal tenderness. Season generously with salt and freshly ground black pepper throughout cooking.
Selecting and Preparing Your Dutch Oven
With your ingredients selected and prepped, you’ll now turn your attention to the vessel that makes pot roast possible: your Dutch oven. You’ll want to prioritize a 6-8 quart capacity to accommodate your roast and vegetables comfortably. For cooking materials, enameled cast iron delivers superior heat retention and even cooking essential for braising, while a light interior finish allows for better visibility during the cooking process. Confirm your Dutch oven’s oven-safe rating reaches at least 325°F and features a tight-fitting lid that traps moisture effectively. Sturdy, heat-resistant handles guarantee safe transfers throughout the cooking process. Before cooking, preheat your Dutch oven over medium-high heat until hot but not smoking. Heat approximately 2 tablespoons of olive oil until shimmering to prevent sticking and promote proper searing of your meat. A well-oiled surface can help ensure a proper searing process that locks in flavor and moisture.
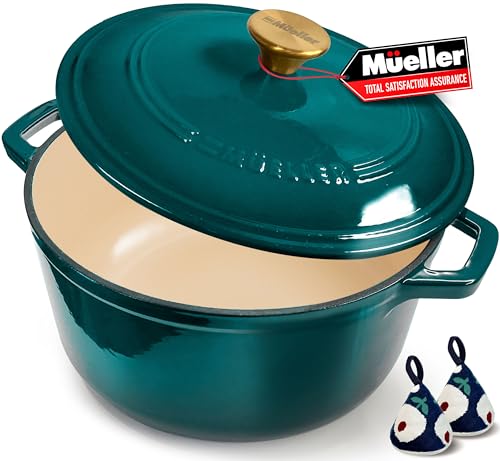
BREAD BAKER'S DUTCH OVEN, 500°F OVEN-SAFE, SOURDOUGH-READY – one of the highest ratings in its class – delivering the sustained heat that sourdough, artisan bread, and pizza dough demand. Thick cast-iron walls trap and circulate heat like a brick oven, producing bakery-quality crusts at home. The tight-sealing lid features raised self-basting nodes that continuously recirculate steam: a perfect moisture chamber, every single bake.

【Airtight Lid Locks In Freshness & Flavor】Experience the magic of this Dutch oven with lid, precision-engineered to create a tight seal. It locks in moisture and essential nutrients, delivering richer flavor and incredibly tender, juicy results in every dish—from slow-braised meats to hearty soups. Achieve a perfect, crispy crust on your artisan loaves—it's the ultimate Dutch oven for bread baking. The interior self-basting dots continuously redistribute condensation, ensuring your food stays perfectly moist, never dry or mushy

【Airtight Lid Locks In Freshness & Flavor】Experience the magic of this Dutch oven with lid, precision-engineered to create a tight seal. It locks in moisture and essential nutrients, delivering richer flavor and incredibly tender, juicy results in every dish—from slow-braised meats to hearty soups. Achieve a perfect, crispy crust on your artisan loaves—it's the ultimate Dutch oven for bread baking. The interior self-basting dots continuously redistribute condensation, ensuring your food stays perfectly moist, never dry or mushy
Searing the Beef Roast for Maximum Flavor
Having preheated your Dutch oven and shimmering your oil, you’re ready to sear—the critical step that develops rich, complex flavors through the Maillard reaction. Pat your beef roast dry with paper towels, then season generously with kosher salt and freshly ground pepper. Don’t move the meat around; let it sit undisturbed for 1–3 minutes per side at high heat. Searing techniques demand you brown all surfaces, including edges, maximizing flavor concentration. The browning benefits extend beyond aesthetics—you’ll create a caramelized crust that intensifies taste depth and adds textural contrast. The Maillard reaction is essential for achieving that rich flavor in your roast. Resist the urge to turn frequently; instead, flip once or twice for consistent browning. This technique for developing a savory crust transforms your pot roast’s final complexity and richness.

Even Heat Distribution Retention: This Umite Chef Dutch oven Made with heavy-duty enameled cast iron, ensures even heat distribution for perfect searing and slow cooking, locking in flavors. thickened walls lock in heat for slow braising, searing, and baking. Unlike thin pots that scorch food, this professional-grade Enameled cast iron potSuperior heat retention after preheating (allow 5-7 mins for even distribution). CRITICAL: Always cool naturally for 45+ mins before cleaning. Thermal shock (hot-to-cold contact) cracks enamel. USE TIP: Preheat 2-3 mins on medium-low only

Pre-seasoned 2-in-1 cast iron dutch oven: The 2-In-1 cast iron dutch oven pot with skillet lid has been burned with vegetable oil,(no synthetic coatings or chemicals). The shallow skillet that can be used as a lid

FEAST & BATCH COOKING - Designed for large families, holiday gatherings, and weekend meal prep, this 7QT Dutch oven comfortably serves 5–8 people. Its generous capacity easily handles family-size soups, large-batch stews, pot roasts, and whole chickens without overcrowding ingredients. Perfect for Thanksgiving recipes, holiday entertaining, and batch cooking with fewer rounds in the kitchen.
Building Your Flavor Base With Aromatics
Your seared roast has created a flavorful foundation; now you’ll build upon it by developing an aromatic base that’ll transform your braising liquid into something deeply complex. You’ll sauté onions, garlic, carrots, and celery in rendered fat until they’re translucent and lightly browned—this step releases volatile oils and sugars essential for flavor depth. Add tomato paste and cook briefly to caramelize, intensifying umami notes. These aromatic layers work hierarchically: onions and garlic provide savory sweetness, mirepoix establishes your foundation, and tomato paste adds richness. When you deglaze with red wine, you’re lifting browned bits that meld everything together. This flavor balance—sweetness from vegetables against wine acidity—ensures your braising liquid becomes a cohesive, deeply seasoned medium for your pot roast. Incorporating a Dutch oven allows for braising meats to be contained within a single vessel, enhancing the infusion of flavors throughout the cooking process. Adding hearty vegetables like carrots and potatoes will further enrich your dish and help absorb the savory broth.
Deglazing and Reducing the Red Wine
Once you’ve built your aromatic base and the fond’s still clinging to the pan bottom, you’re ready to deglaze with red wine. Pour just enough wine to cover the pan surface by half an inch, then use a wooden spoon to scrape and lift the browned bits into the liquid. This deglazing technique dissolves caramelized proteins and sugars, transforming them into your sauce foundation, similar to how slow-roasting a chuck roast works in other pot roast recipes.
Increase heat to high, bringing the wine to a vigorous simmer. Your wine reduction should take 5–7 minutes, concentrating flavors while evaporating alcohol. Stir continuously, preventing burning while emulsifying the sauce. Once reduced to syrupy consistency, add stock if needed for additional body. This methodical wine reduction process guarantees no raw alcohol taste remains and delivers the rich, glossy pan sauce your pot roast demands, making it an essential step for achieving a flavorful one-pot meal.


Flavor-Enhancing: Adds rich, savory depth to steaks, burgers, chicken, and grilled vegetables.
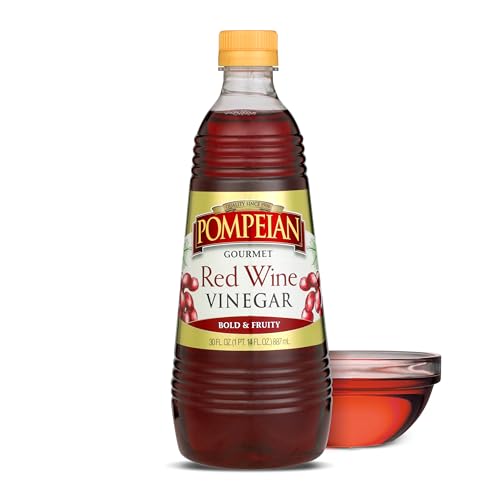
RED WINE VINEGAR: Expertly crafted by The Olive Oil People, Pompeian Red Wine Vinegar pairs perfectly with any of Pompeian’s farmer-crafted olive oils.
Braising Techniques and Cooking Times
The foundation of a successful pot roast lies in searing your chuck roast properly before it enters the braising liquid. You’ll maintain a 300-350°F oven temperature for even, stable heat throughout cooking. Standard braising techniques call for 2.5 to 4 hours, depending on your roast’s size. To enhance the flavor profile of the dish, consider adding aromatics like garlic and onions during the cooking process. Keep the pot tightly covered to preserve moisture and tenderness as collagen breaks down into gelatin. Check doneness at 2.5 hours by testing if the meat shreds easily with a fork. For best results, reveal the pot during the final 30-45 minutes to thicken the sauce through evaporation. Once fork-tender, rest your roast covered in its cooking juices for 30-45 minutes, allowing moisture redistribution that enhances final texture. If your pot roast happens to be cooked in a rusty cast iron skillet, the seasoning process will be crucial for maintaining its quality.
Creating a Rich and Silky Gravy
After you’ve rested your roast to perfection, transforming those braising juices into a rich, silky gravy separates a good pot roast from an exceptional one. Start by straining the braising liquid through a fine mesh sieve to remove solids. Next, simmer the strained liquid over medium-low heat, reducing the volume by half to concentrate flavors and build gravy thickness naturally. Whisk in a beurre manié—a paste of softened butter and flour—gradually to avoid lumps while achieving silky texture. This thickening agent develops nutty notes as it cooks into the liquid. Remember, achieving accurate temperature readings is crucial when checking the doneness of your roast. Season with kosher salt and freshly ground black pepper, adjusting precisely for flavor depth. Finish by adding fresh herbs or minced shallots to brighten the gravy’s aromatic profile. Remember, the Dutch oven’s heat retention is key in crafting a consistently rich gravy.
Plating and Garnishing Your Masterpiece
While your pot roast and gravy represent months of technique perfected, their presentation on the plate determines whether diners perceive excellence or mediocrity. Deploy plating techniques that establish hierarchy: position your sliced roast between 4 and 8 o’clock, leaning slices against mashed potatoes for vertical interest. Choose warm, contrasting plates with sufficient negative space to prevent overcrowding. To enhance the flavor of your roast, consider how slow-braising techniques can develop a rich, deep flavor profile that elevates your dish.
Your garnishing ideas should reinforce flavor authenticity. Apply fresh rosemary sprigs and thyme to echo cooking aromatics. Streak sauce artistically across the plate for visual integration. Layer roasted root vegetables and bright herbs—parsley, beets—to contrast the deep brown meat. Dust finely chopped herbs subtly along edges. This restraint maintains focus on your masterpiece while elevating the overall composition through intentional, complementary elements. Additionally, consider how slow braising enhances the tenderness of the meat, contributing to an extraordinary dining experience.
Serving Suggestions and Complementary Sides
Your artfully plated pot roast deserves companions that amplify rather than compete with its savory depth. Consider vegetable pairings that balance richness: braised root vegetables absorb the wine-infused juices, while pickled vegetables or acidic slaws cut through heaviness. Roasted Brussels sprouts add slight bitterness that contrasts beautifully with the meat’s depth.
For starch options, creamy mashed potatoes remain the classic choice, capturing gravy effectively. Using an appropriate cooking surface such as porcelain enamel-coated cast iron can help avoid potential damage while preparing these sides. Buttered egg noodles tossed with fresh herbs provide comforting tradition. Polenta or crusty bread serve as neutral bases for soaking juices.
Fresh greens with lemon vinaigrette brighten the plate without overwhelming the roast. Serve the braising liquid as jus on the side, allowing guests to customize sauce amounts. Fresh herb garnishes—parsley, thyme, or chives—add aromatic finesse. Additionally, for optimal food storage, it is essential to use specialized vacuum sealers rather than regular vacuum cleaners that cannot effectively create proper seals.

Quality Enameled Dutch Oven: The Lodge Essential Enamel Cast Iron Dutch Oven gives you all the benefits of cast iron cooking, great heat retention and durability, without fear of rust; it's also PFAS free

Even Heat Distribution Retention: This Dutch oven Made with heavy-duty enameled cast iron, ensures even heat distribution for perfect searing and slow cooking, locking in flavors. thickened walls lock in heat for slow braising, searing, and baking. Unlike thin pots that scorch food, this professional-grade Enameled cast iron pot maintains steady temperatures

Moisture-Locking Lid: The Lodge Essential Enamel Cast Iron Dutch Oven features a moisture-locking design ideal for roasting, braising, and slow cooking pot meals